


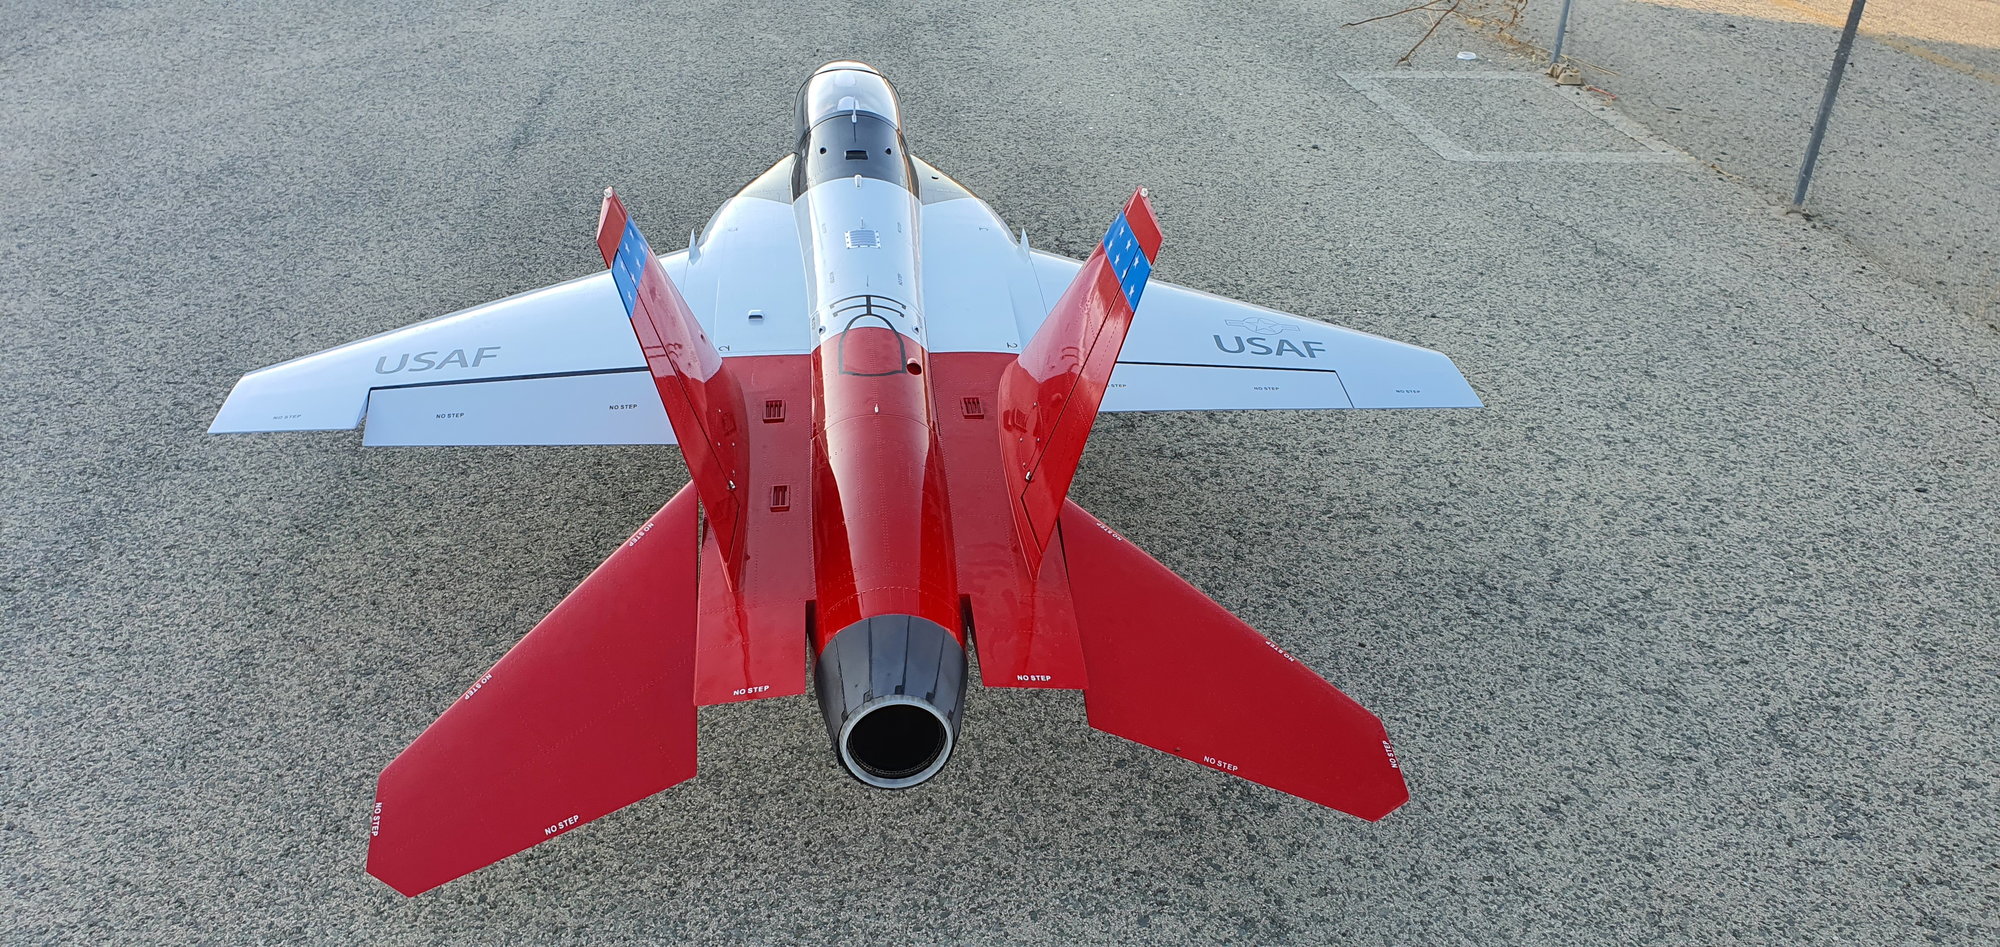
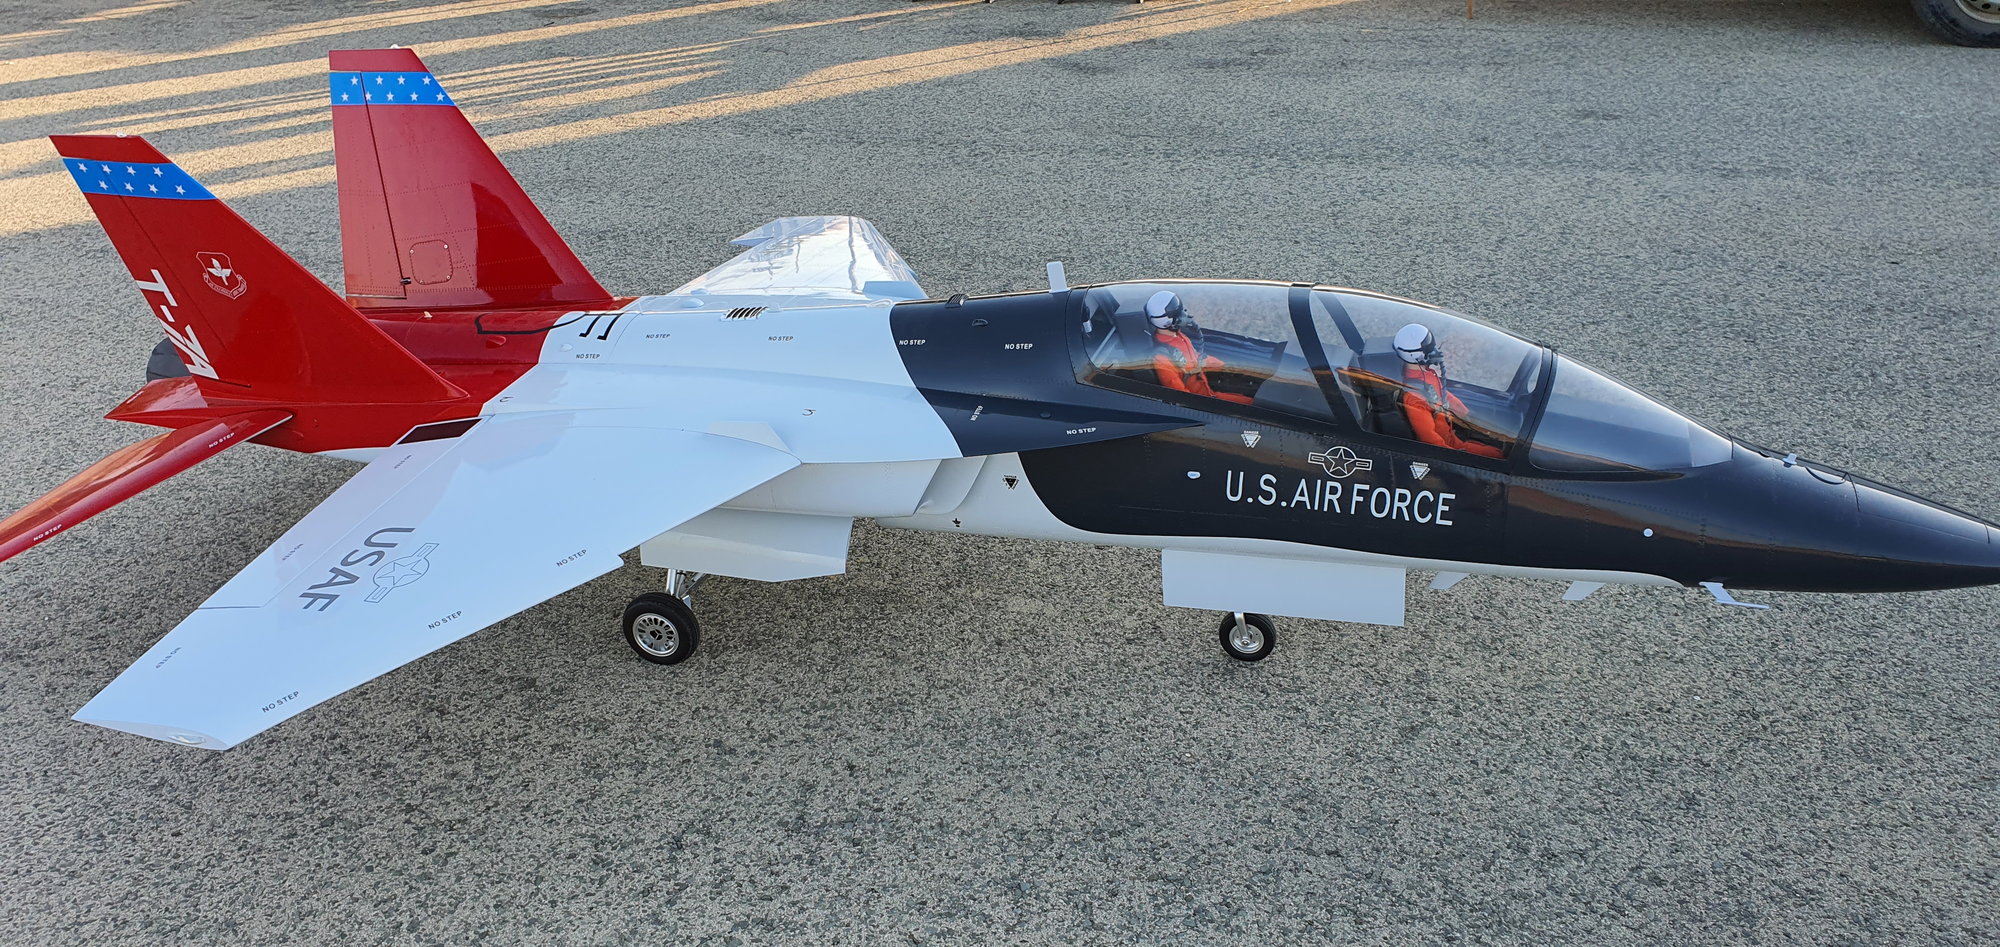
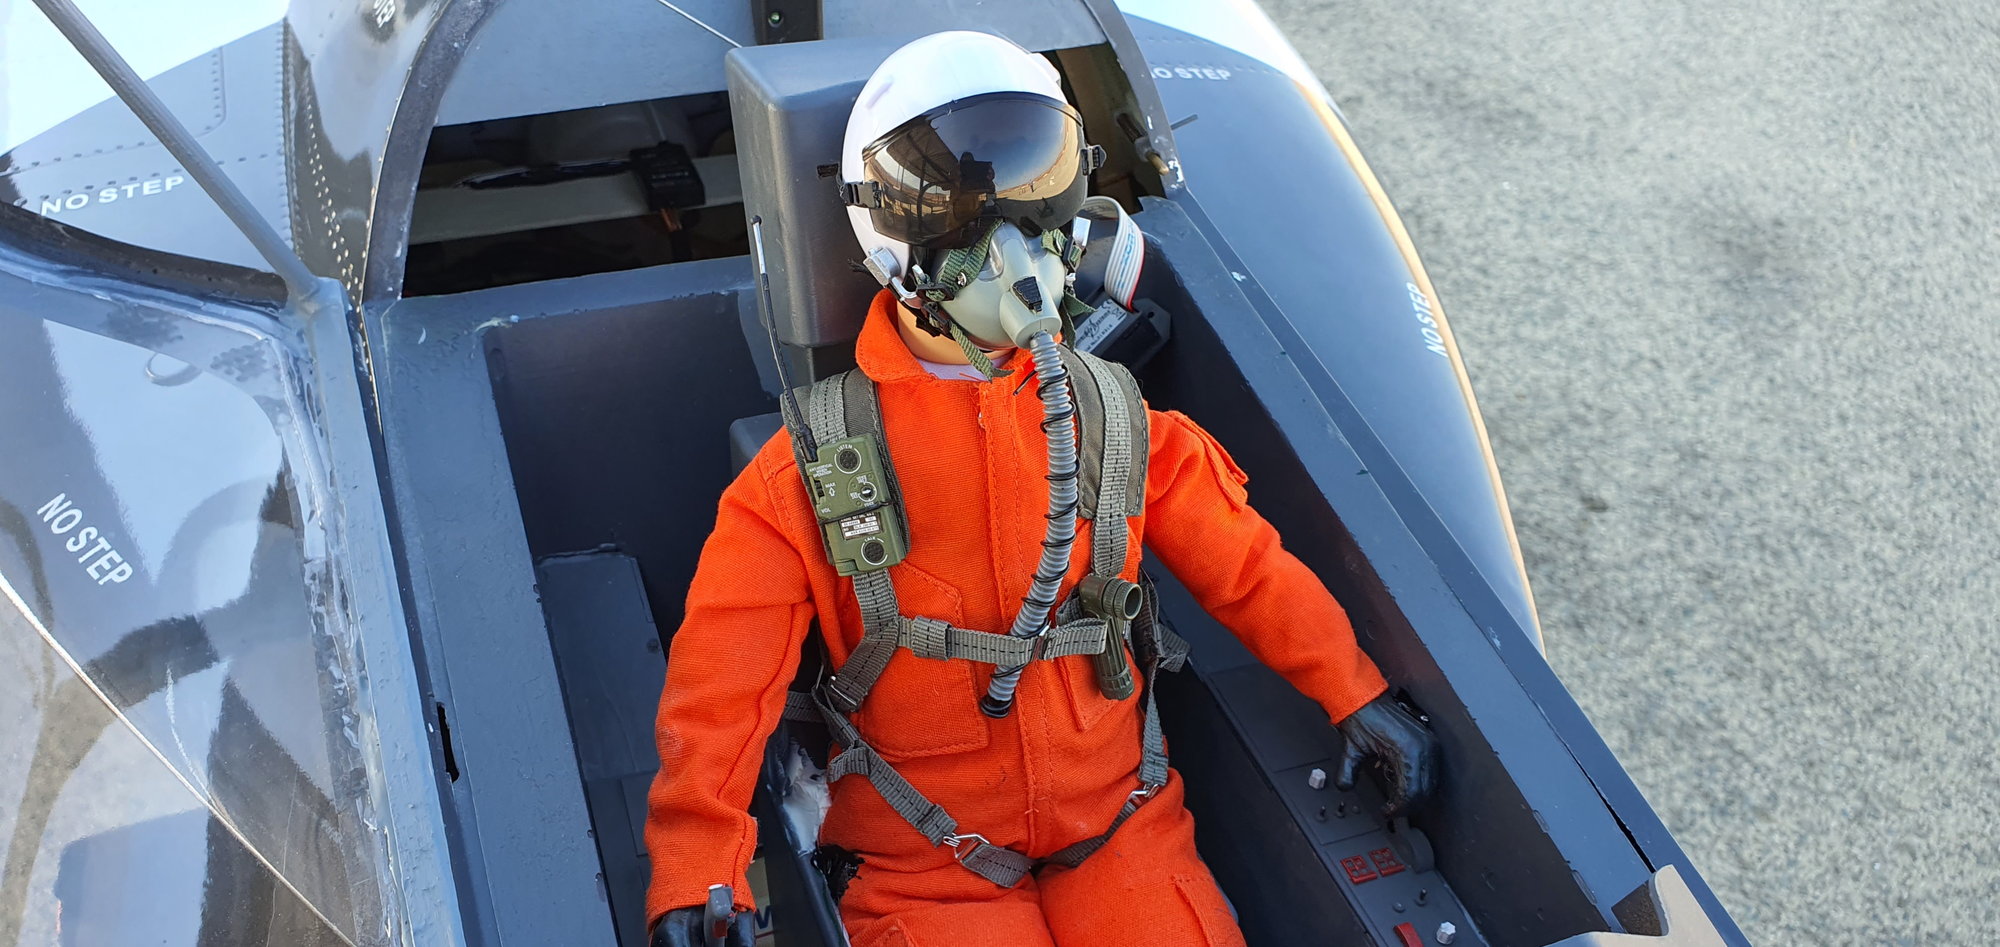
Boeing T7A - XXL size
 10-17-2021, 11:30 PM
#26
I got the regular sized one a couple weeks ago. Unfortunately some very minor damage but it's a beauty.
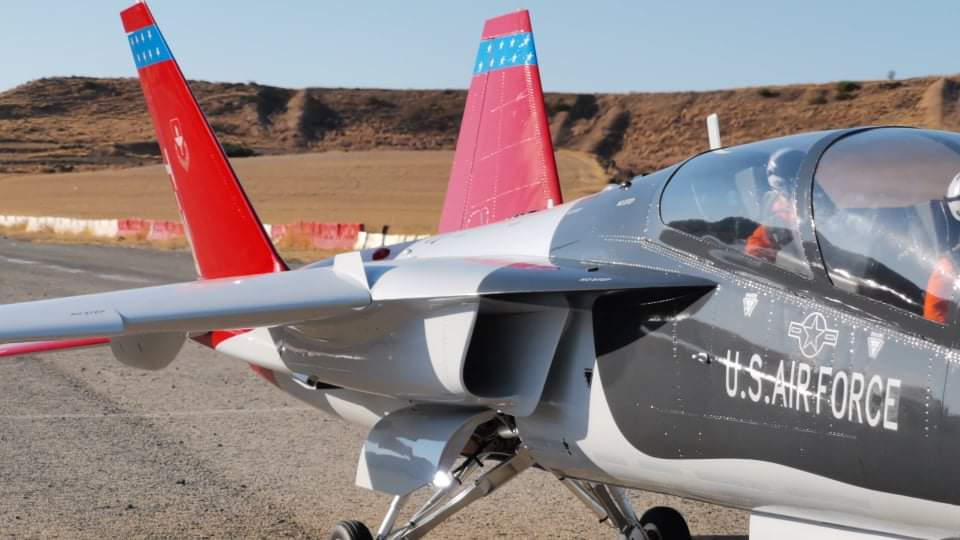
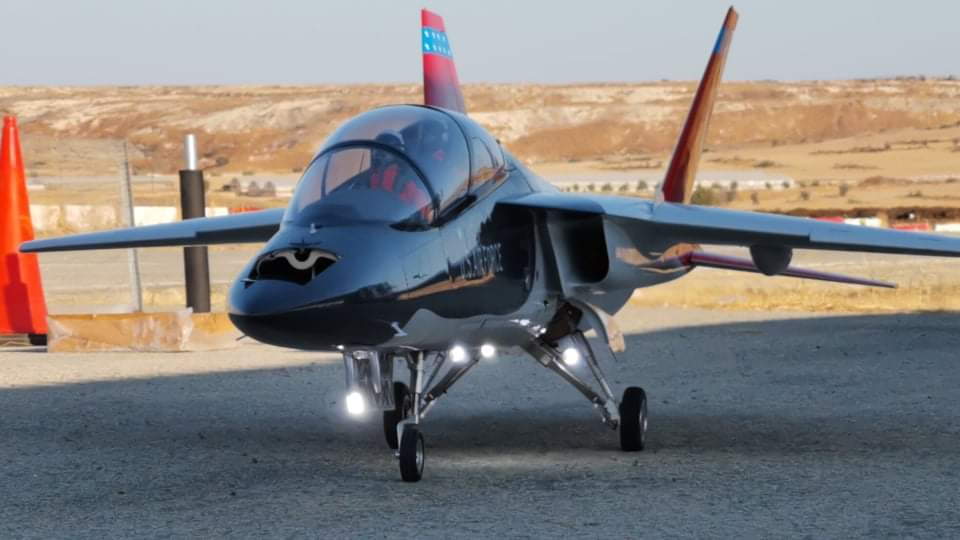
Looking at these pictures I'm glad I didn't get the xxl! That thing is HUGE! The fuel tank is tiny in the regular one, so I'm adding an aux tank with the K102G4.
Please take a video when you get it going!!
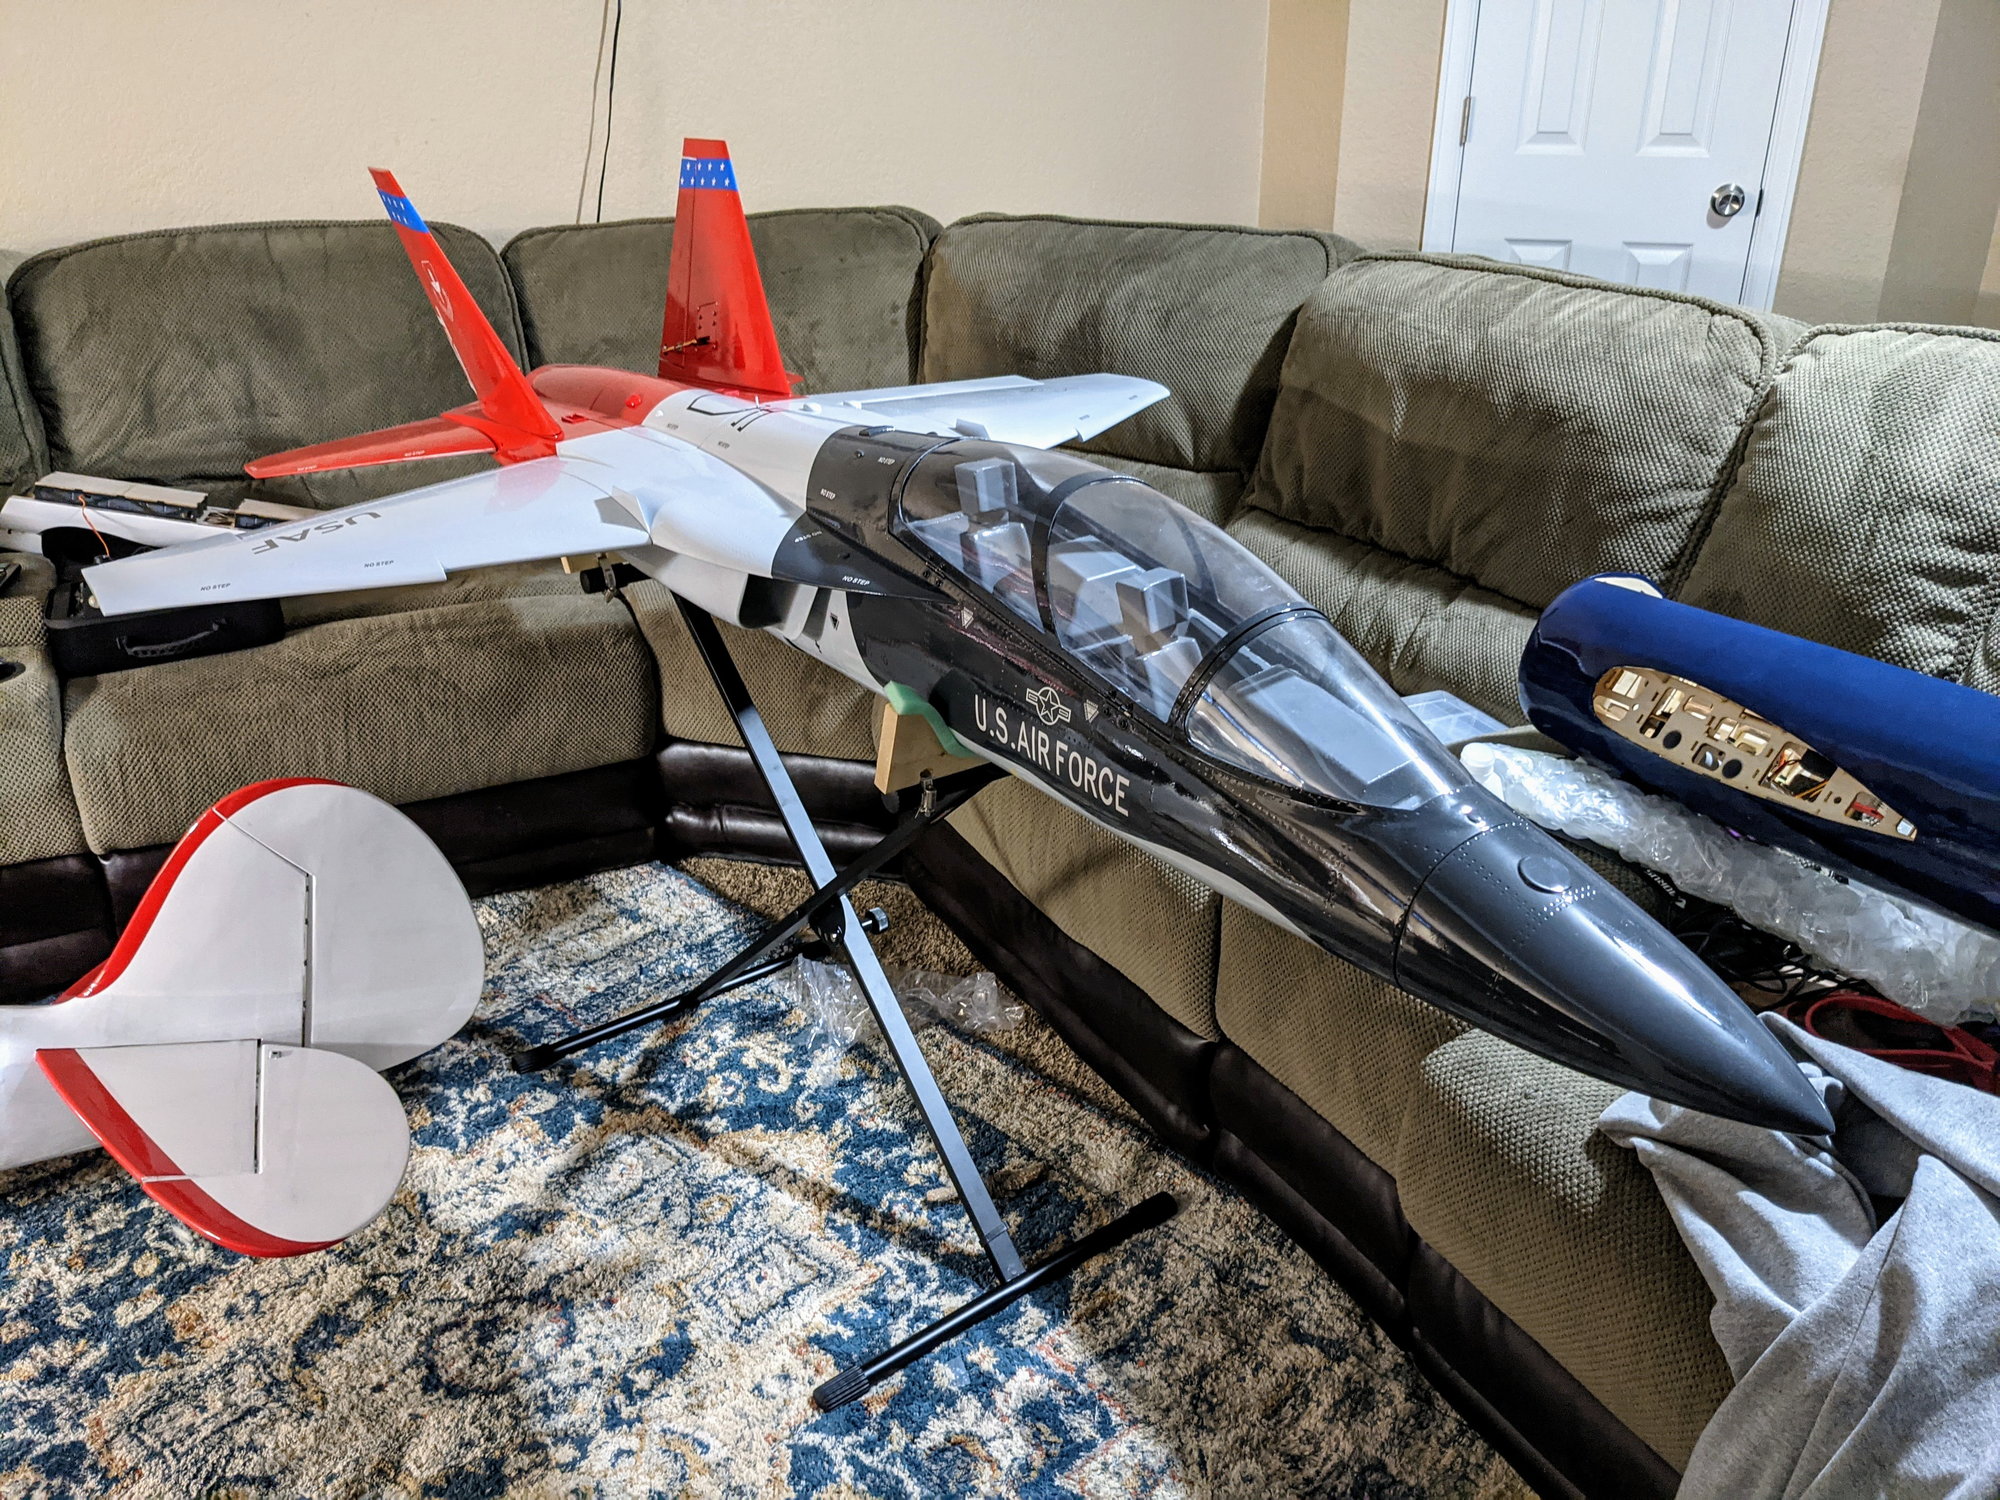
Looking at these pictures I'm glad I didn't get the xxl! That thing is HUGE! The fuel tank is tiny in the regular one, so I'm adding an aux tank with the K102G4.
Please take a video when you get it going!!
Last edited by RadialWacko; 10-17-2021 at 11:33 PM.
 10-18-2021, 05:38 AM
#27

thanks,
Tone
10-18-2021, 11:09 AM
#28
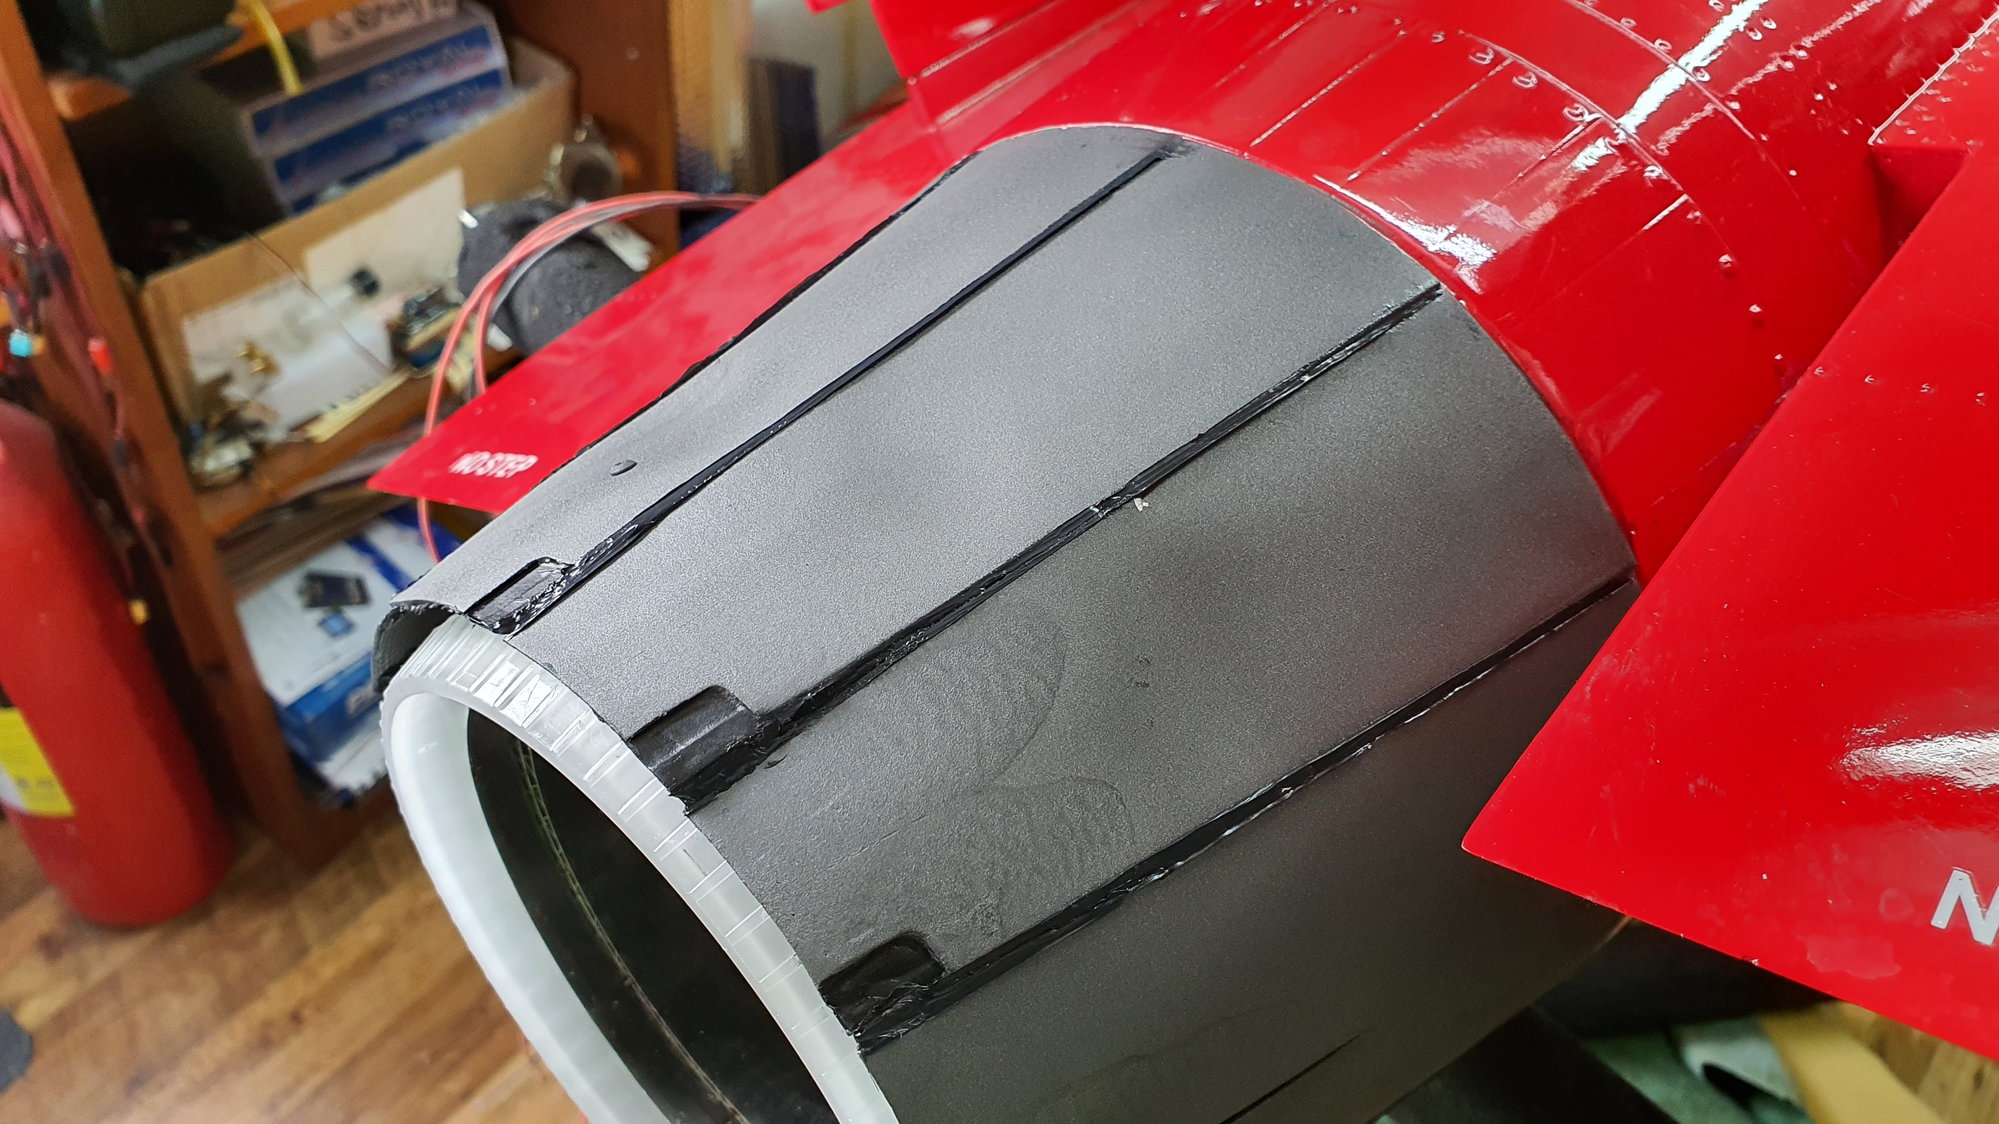
The wood supports for hinges were very easy job but they should be done already at the factory for this price. I just hate when a good design can be f***ed up with poor craftmanship.
I have been real busy in other areas of life so I will continue build next week with new elevator servo holders.
Then new fuel tank etc..
I have been real busy in other areas of life so I will continue build next week with new elevator servo holders.
Then new fuel tank etc..
11-03-2021, 11:48 PM
#29
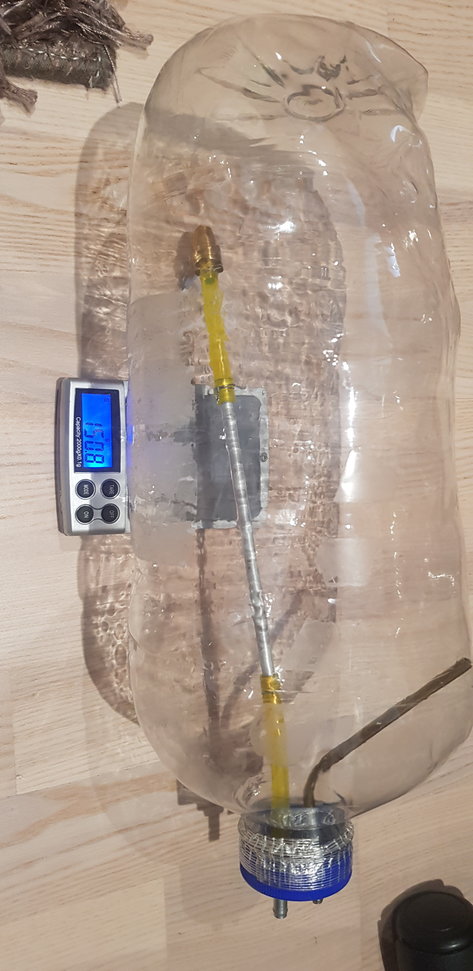
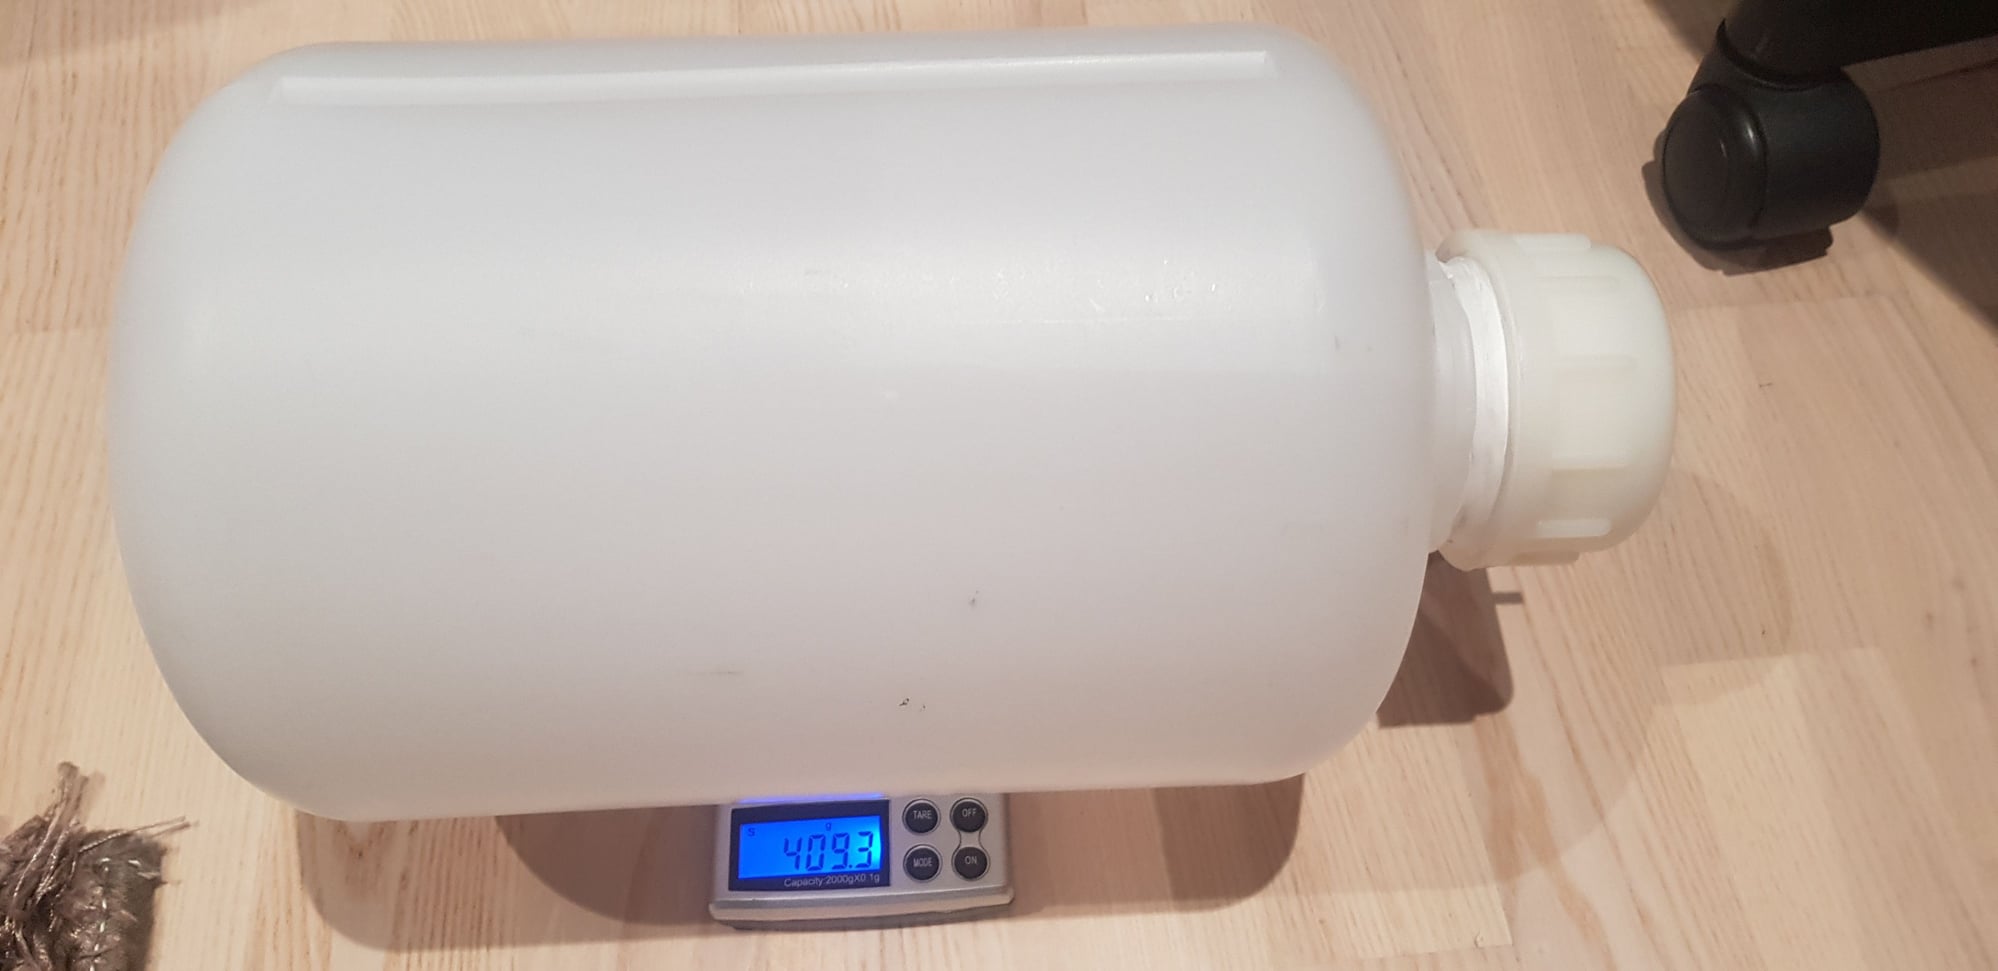
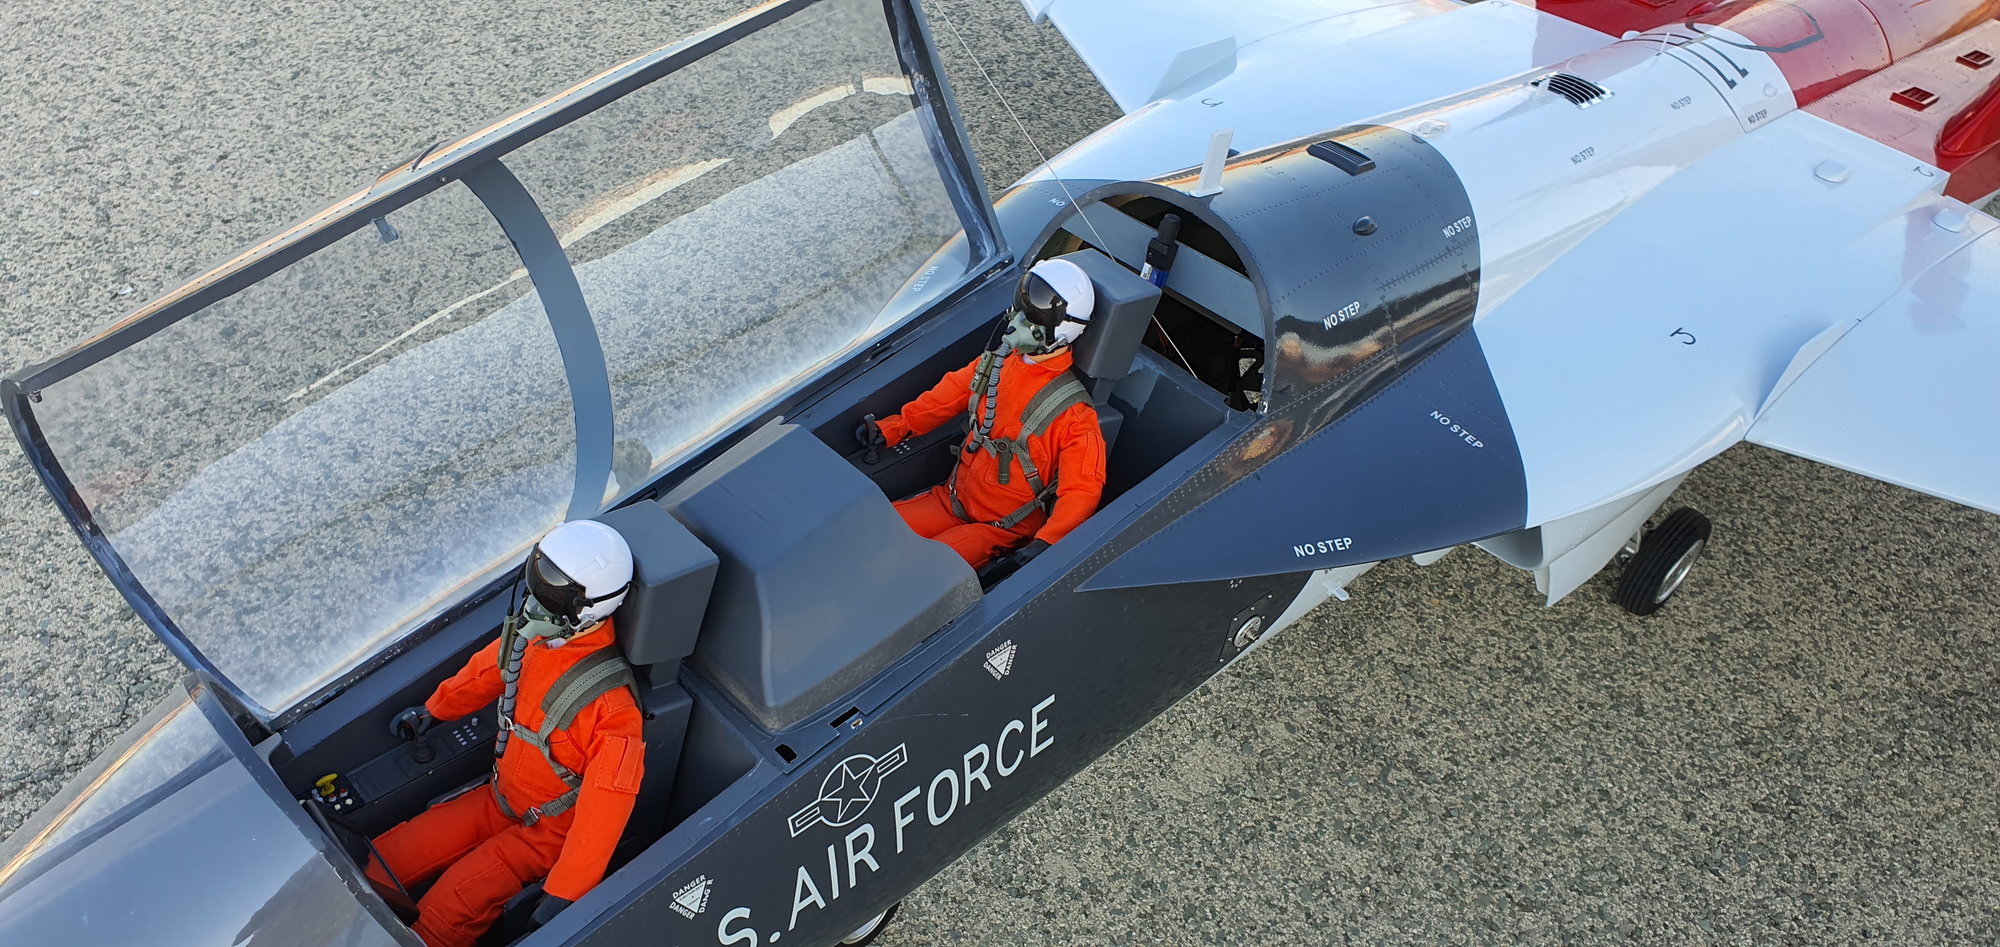
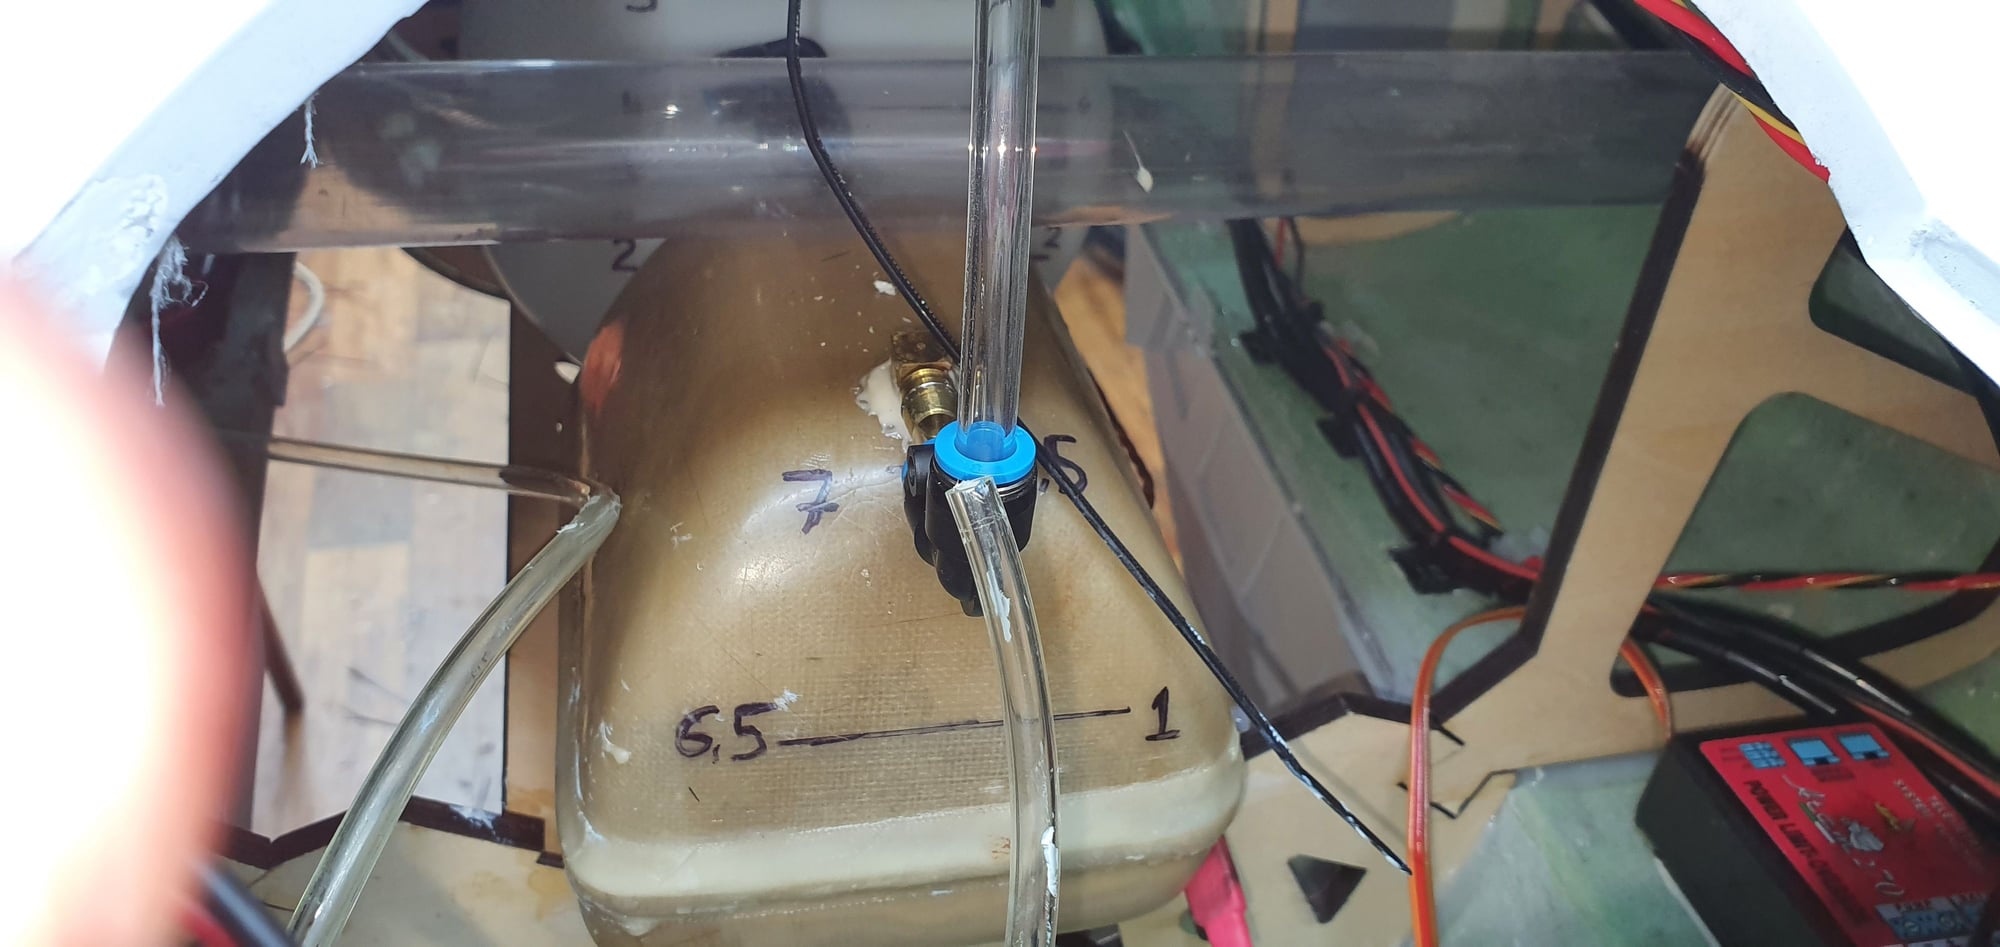
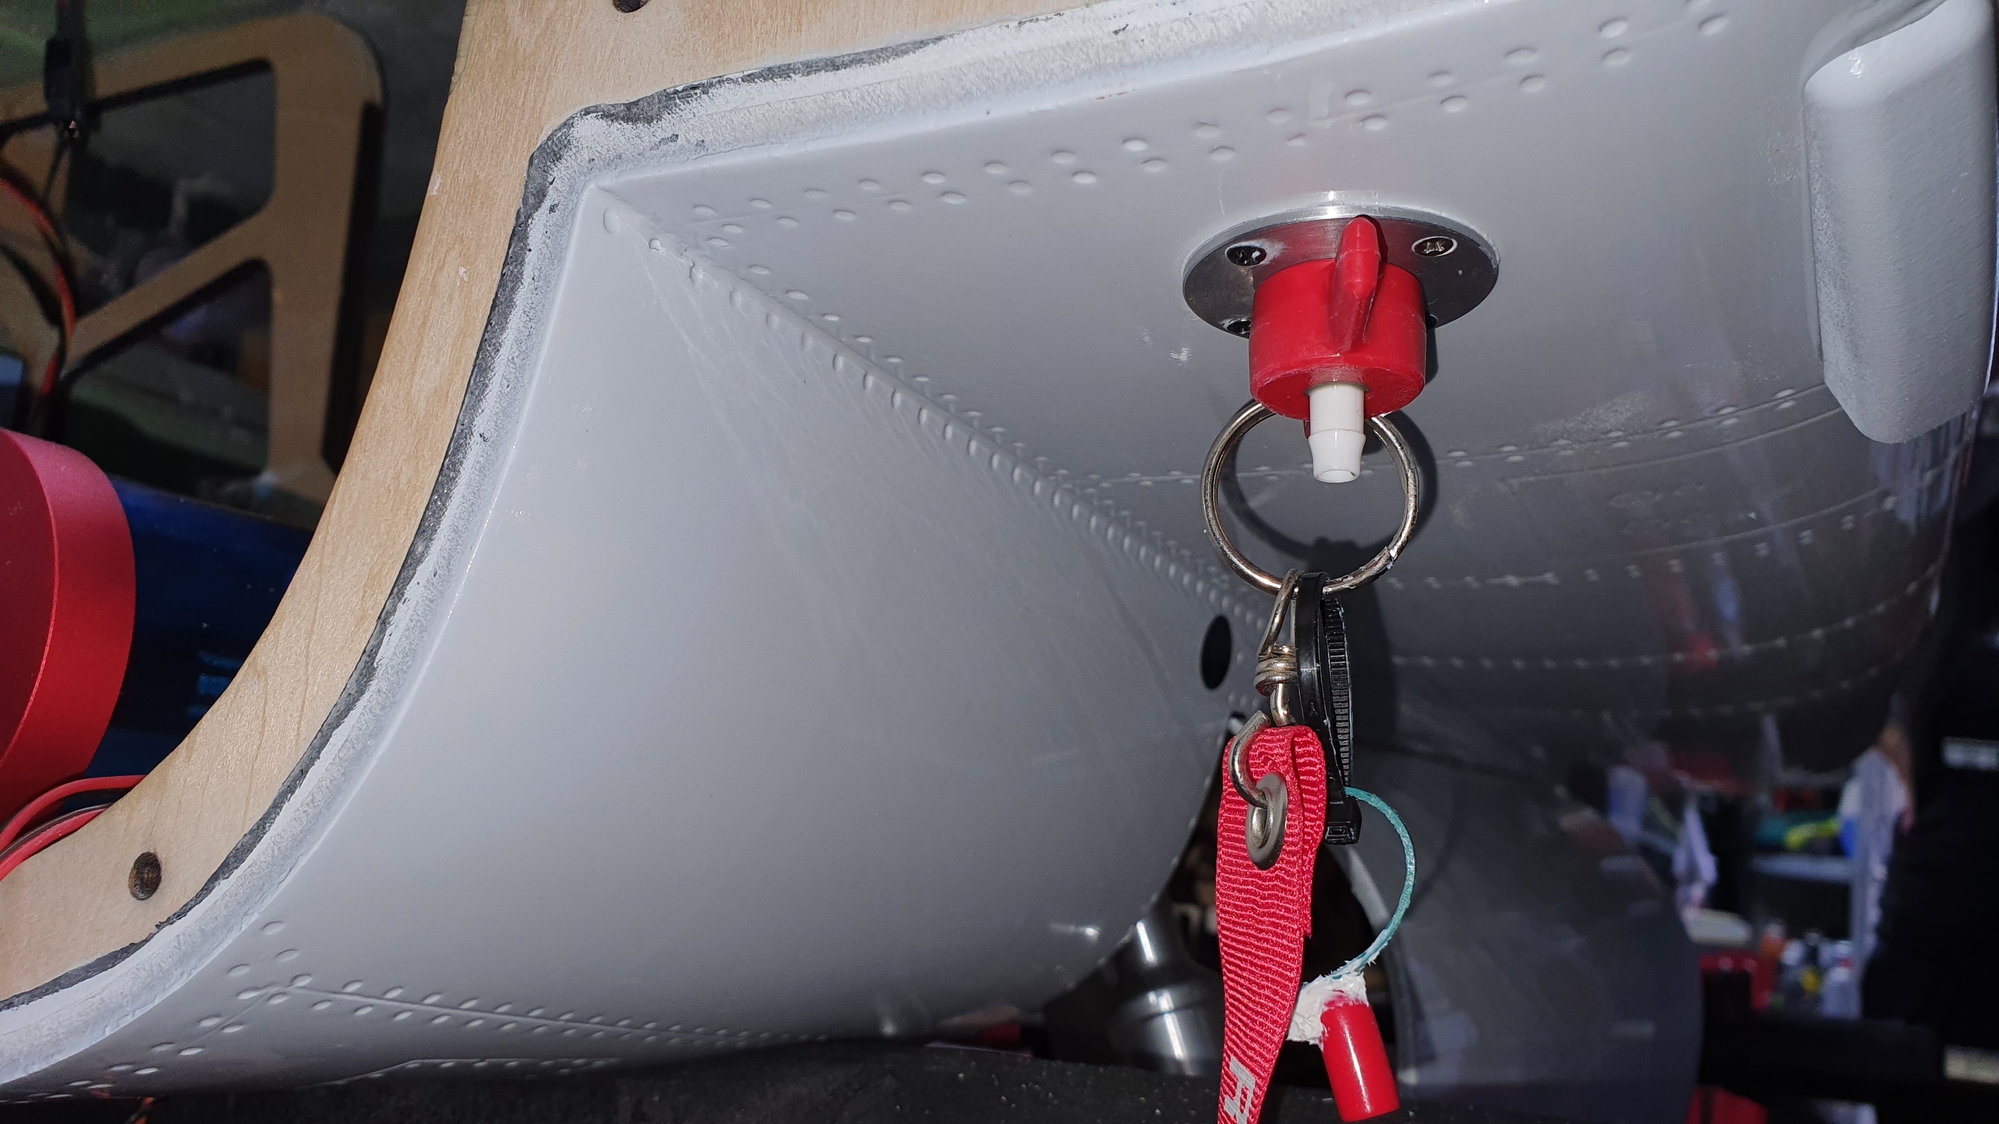
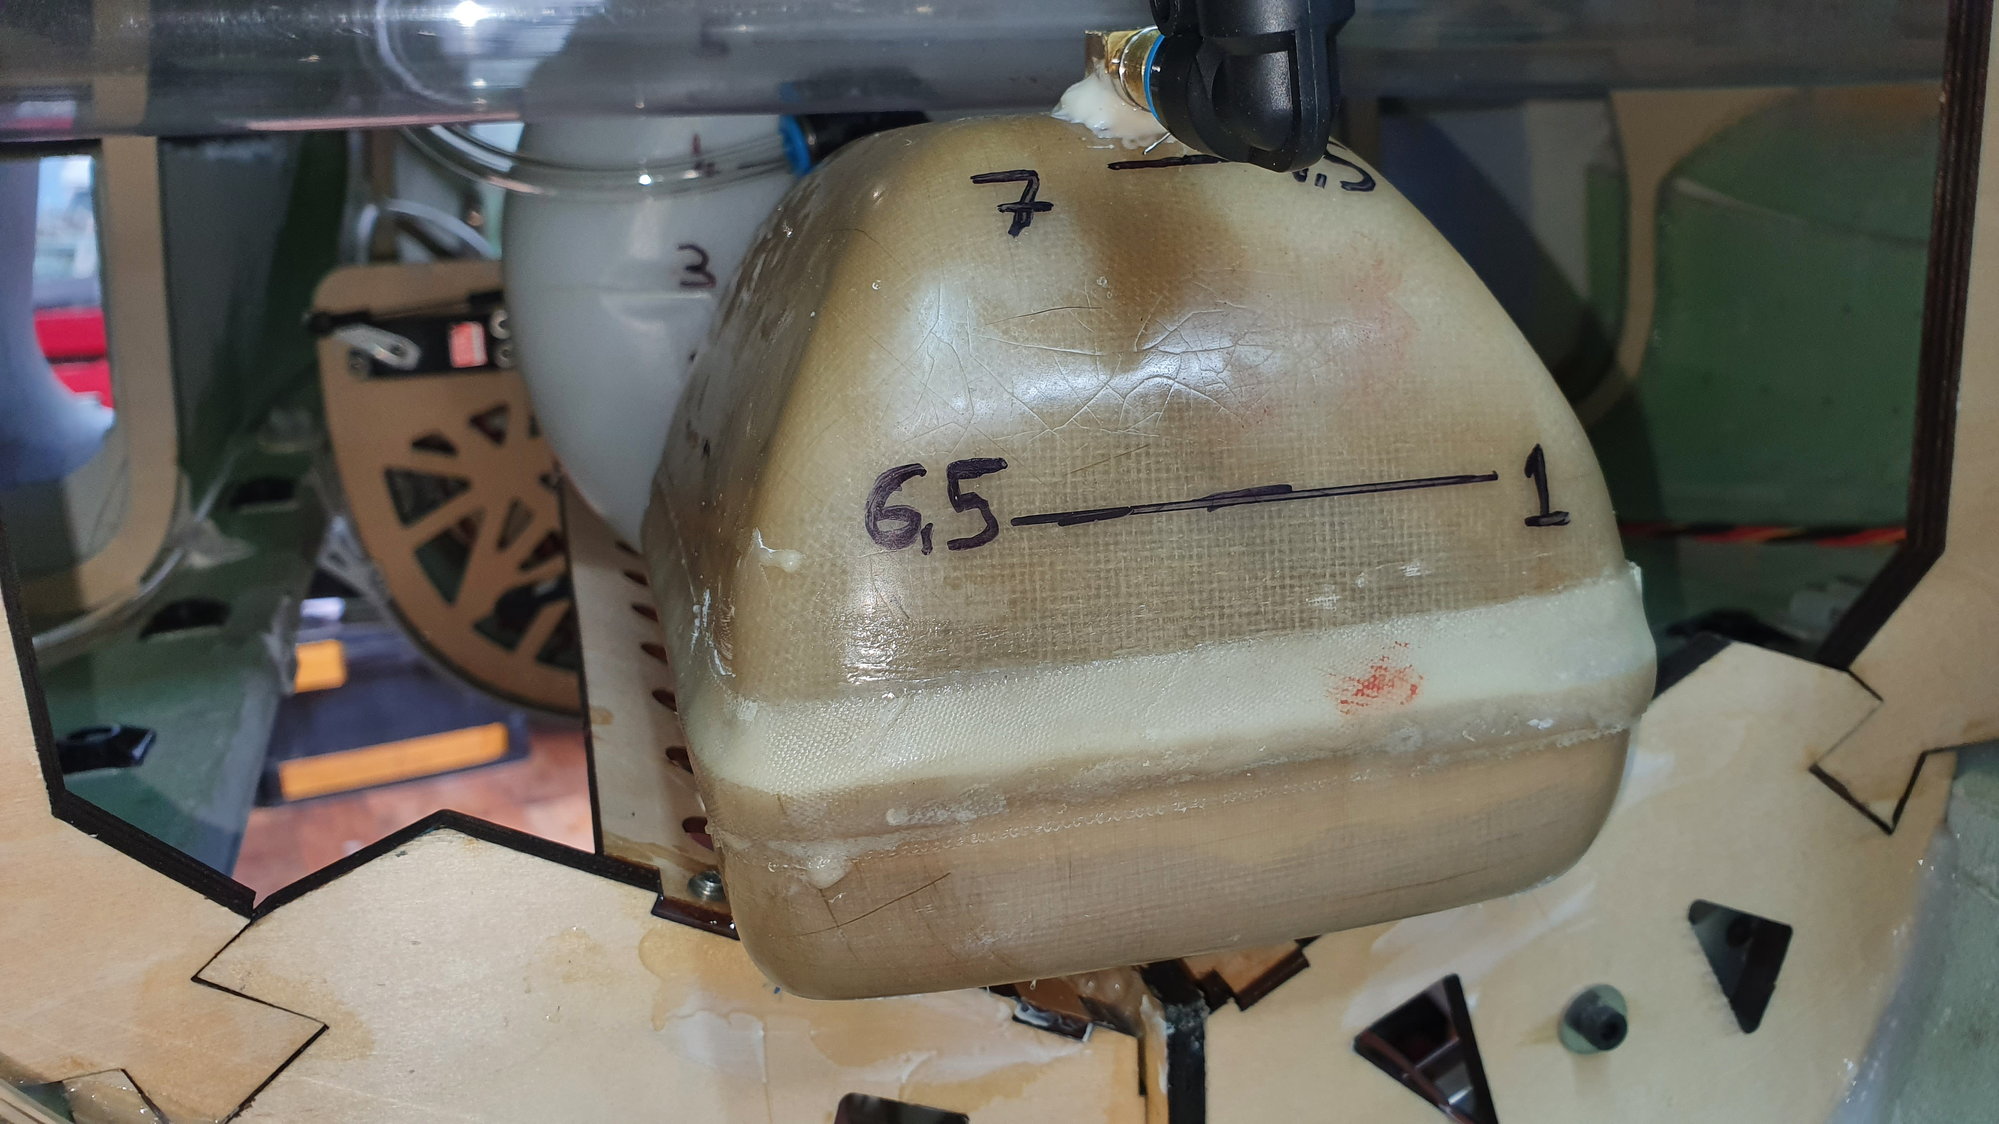
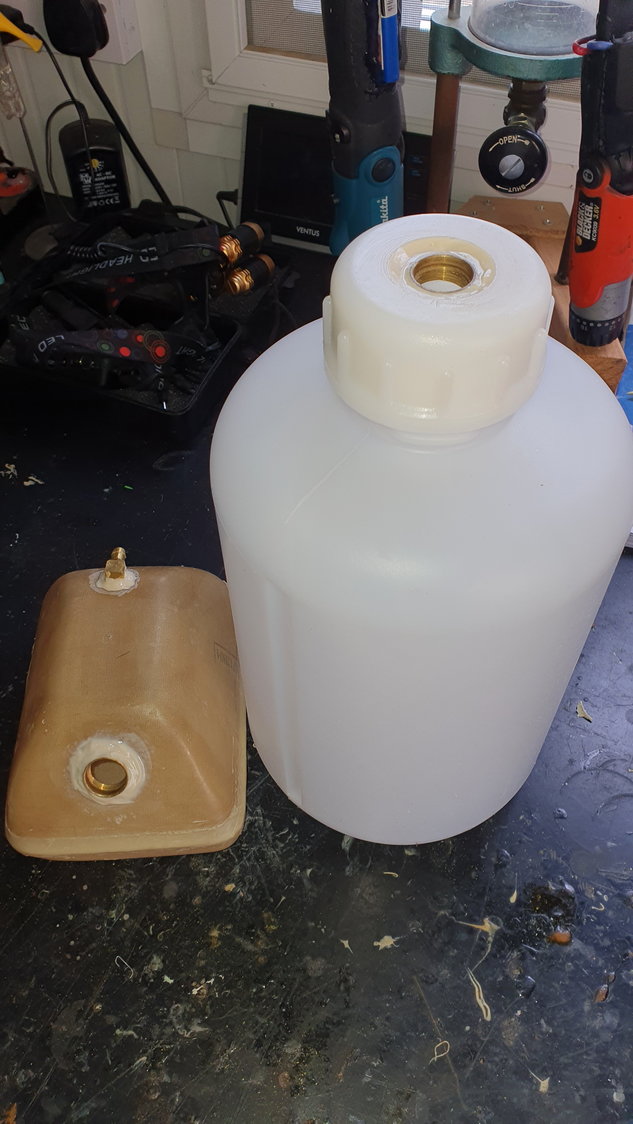
I made a new fuel tank out of a plastic bottle. Weight savings over 250g... for me its worth it. Also fuel line size was quite small in original tank so I gained a much better flowing system.
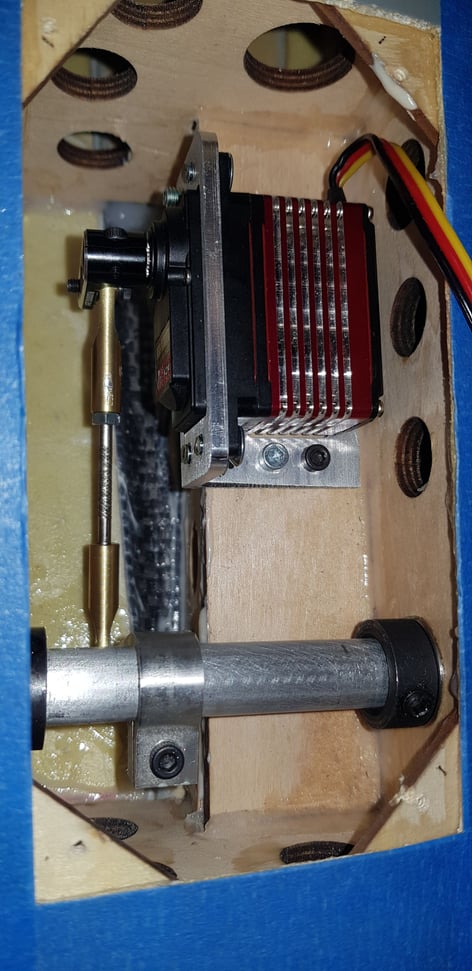
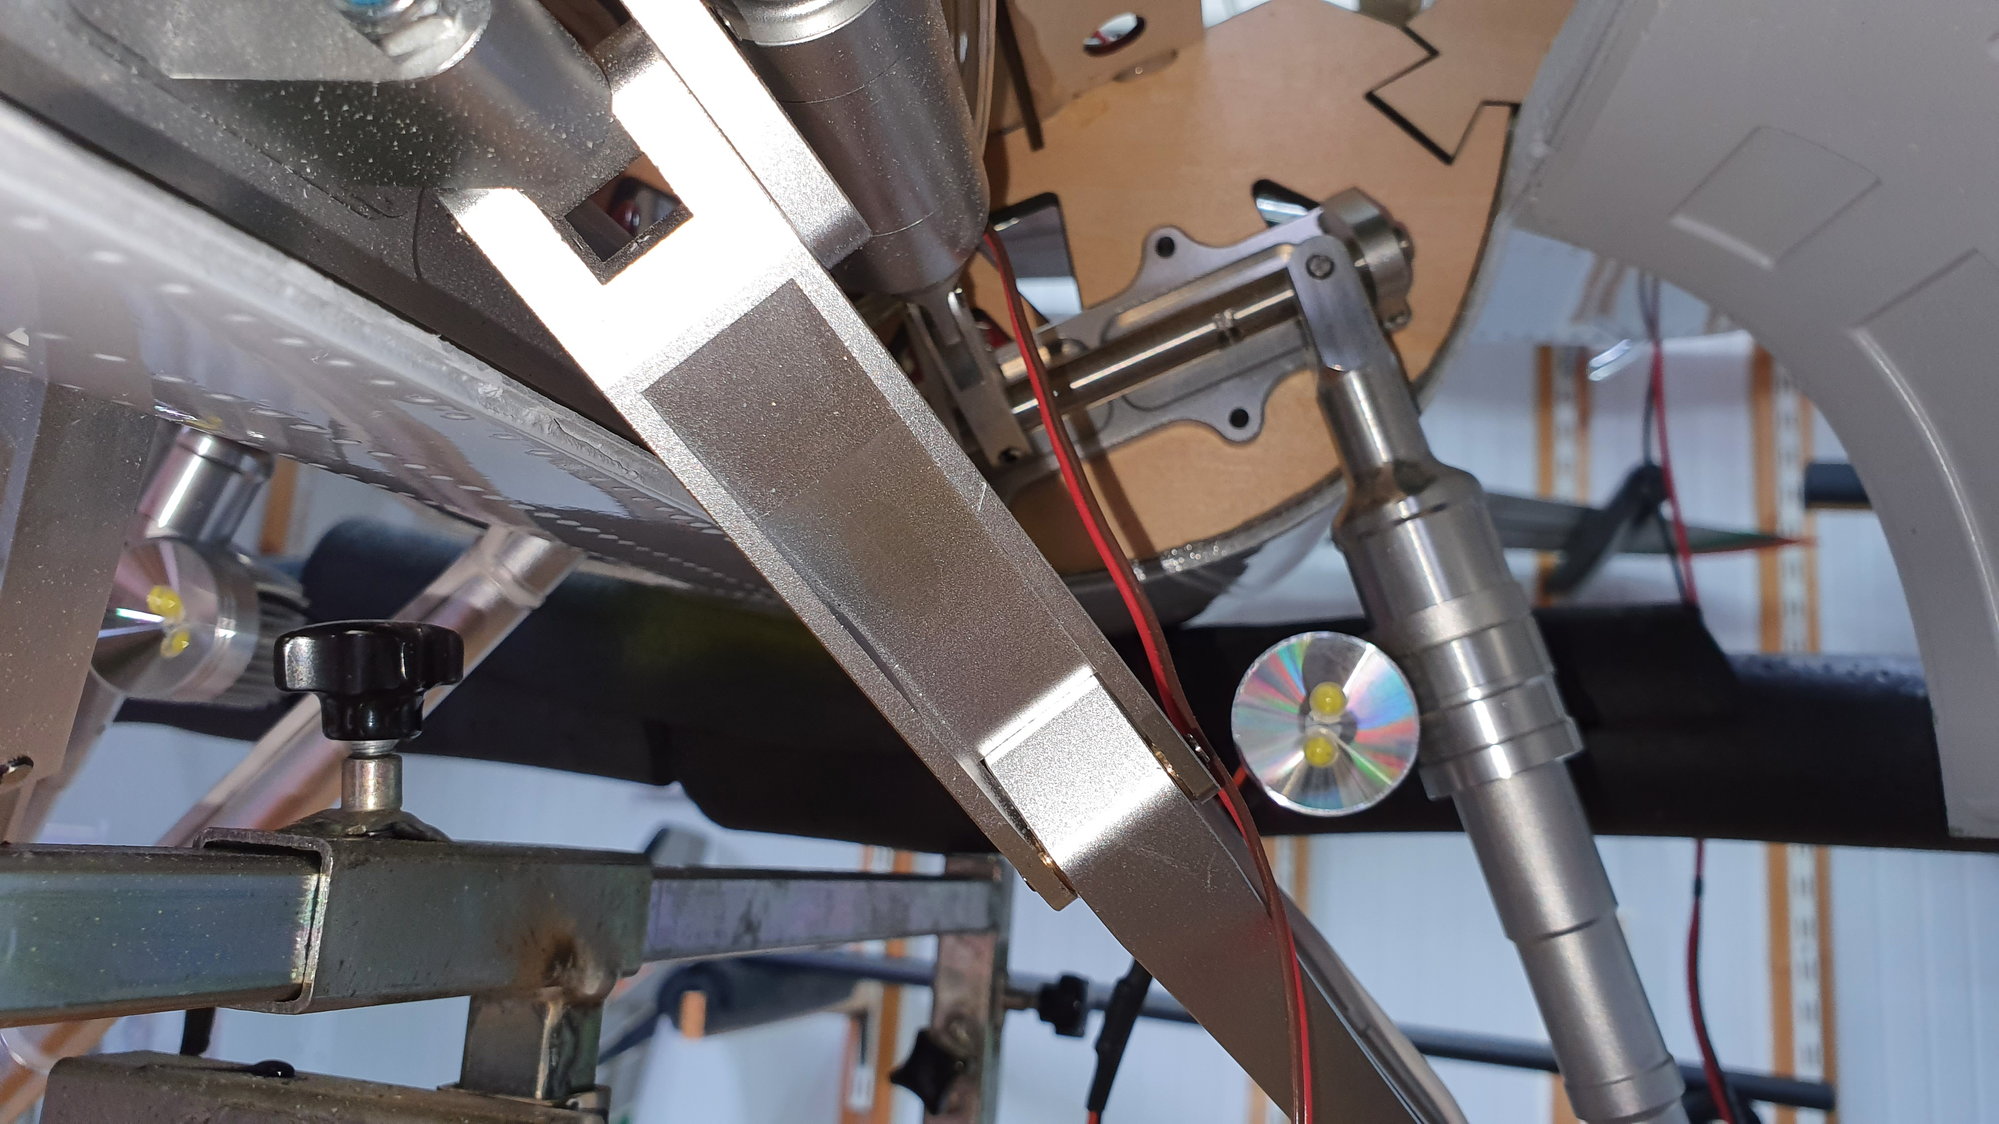
I had to redo the elevon servo assembly totally. I added support underneath servo plane so it would not flex. My friend made me new servo holders out of 40x40x3mm alloy , thank you.
I also had to test out servo arms as original setup caused torque to main bearings on the servos (not original but Hitec 9380 brushless) and that caused quite much flexing on the elevon.
The flex was cut to half with offset arms which reduced twisting torque to spline.
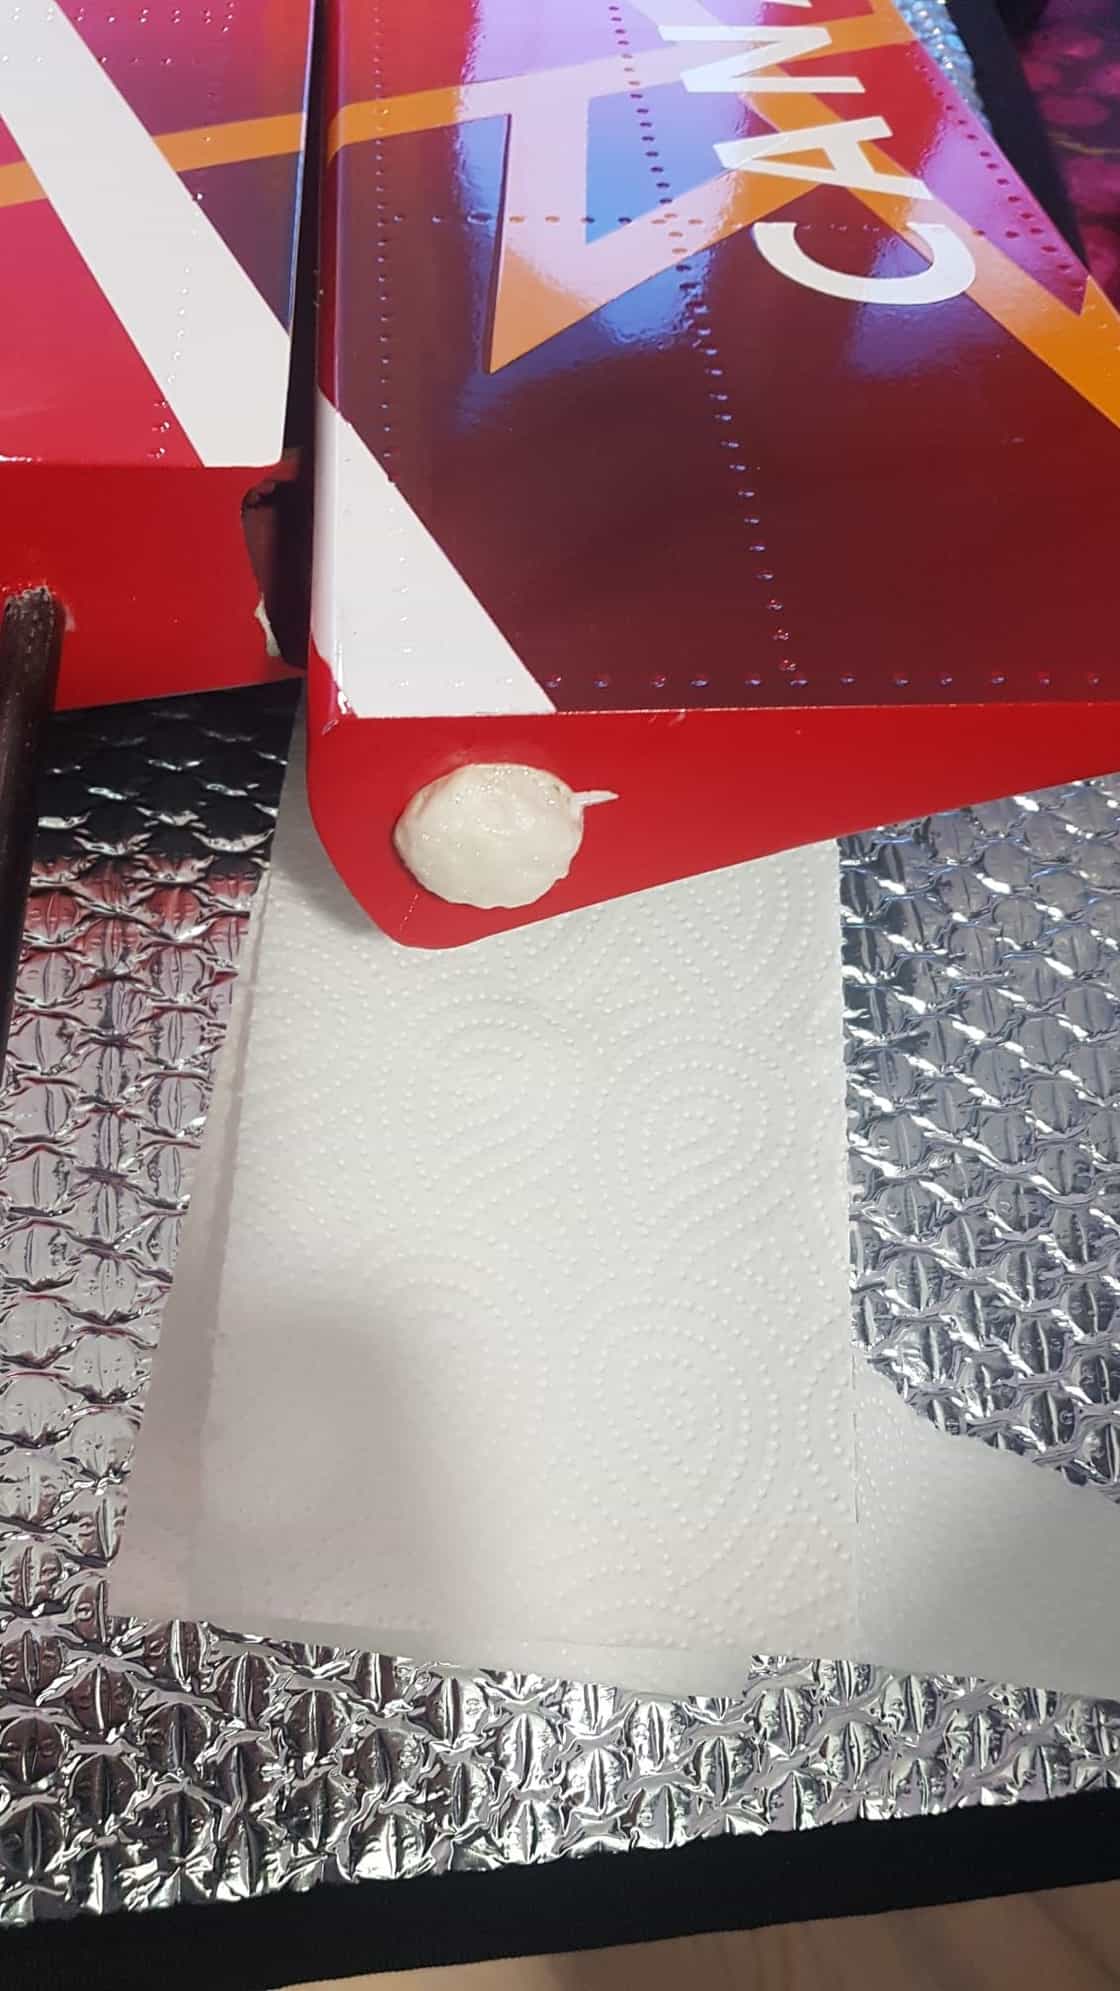
I also added drops of hysol to every collar on main shaft to keep them accidentally falling off.. (not shown in the pic..)
Next will be wiring and after that setting up gear doors and retracts correctly . Lots of things to do..
BTW I also got wingbags from REVOC. Alufoil bags are great! Also canopy cover for the large canopy is coming.
11-04-2021, 05:50 AM
#30


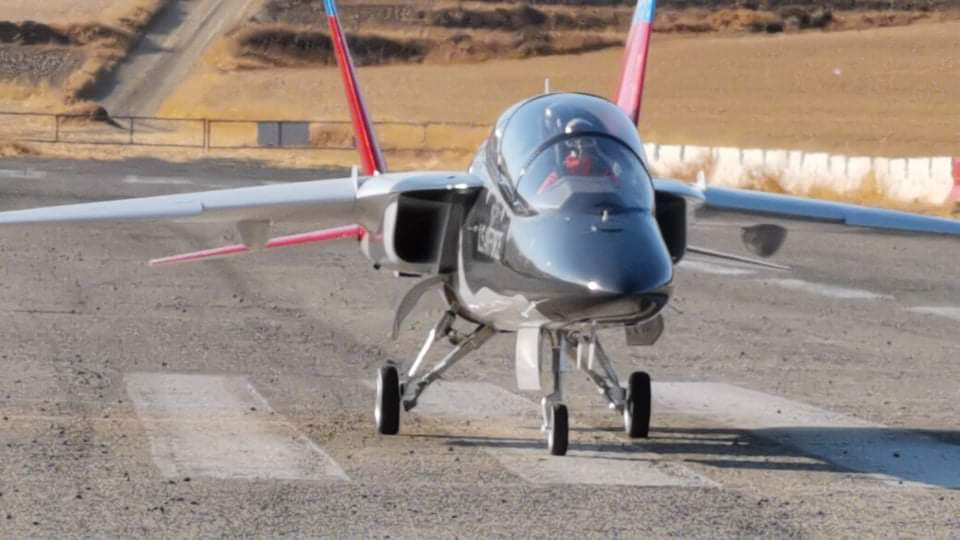
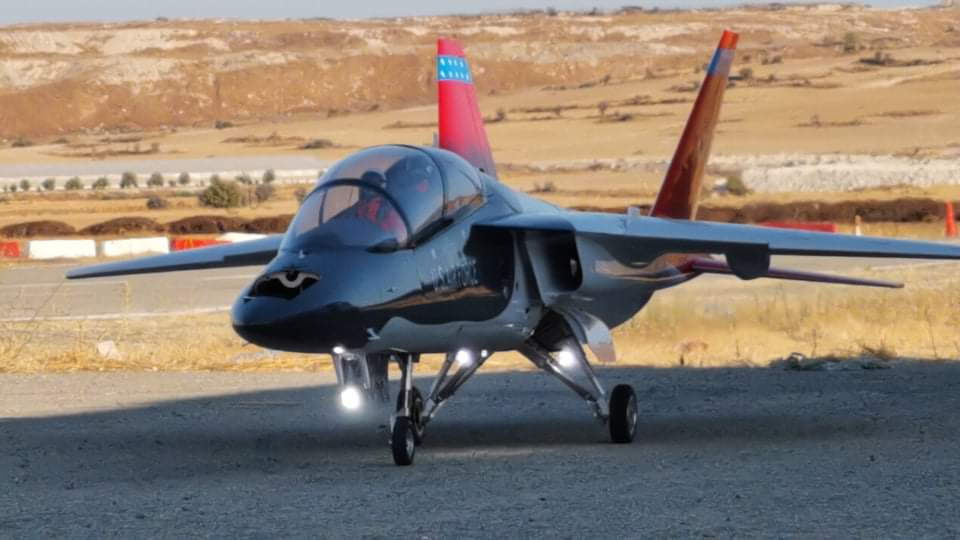
Maiden flight of Marios aka Mhadjiky
JMB-Jets Boeing T7A XXL Maiden Flight powered by Jet Italia Atom 270 - YouTube
JMB-Jets Boeing T7A XXL Maiden Flight powered by Jet Italia Atom 270 - YouTube
Beautiful model though.
David
11-04-2021, 06:00 AM
#31
Thank you for the update. I just ordered one of these so I am following this thread closely. I like the new servo mount. It looks pretty robust and should get the job done nicely. However, you lost me on the offset servo arm, that looks like a regular servo arm to me. Would it be possible to do some sort of push/pull set up? Also, that fuel bottle looks a bit sketchy. Have you used similar ones before with good results? Also, what was the verdict with your damaged wing?
Thanks,
Tone
Thanks,
Tone
11-04-2021, 07:08 AM
#32
The servo arm is a bit taller -> I get enough free space for the ball link to move above the servo when in both extreme positions. Normal arm works if you use outer holes -> servo travel gets shorter for same movement and loses resolution. This way I gained max available resolution with shortest possible arm and kept twisting torque at minimum. I first used normal arms and installed ball link on outer side and there was huge side load for servos upper bearing.
Push pull would not fit probably due main elevator shaft being so close to upper surface. Idea is good though if it could be accomplished.
Fuel bottle is 5liter water can. It works. Pet plastic survives crashes better than glassfiber tanks. The shape is bit off as I used heat gun to modify it a bit to fit rear of the tank under main spar. I have made at least 4 tanks out of plastic pet bottles and they are really easy to modify and they are light. Only issues I have had are with bulkhead barbed fittings leaking if the epoxy loosens but its easily fixable.
11-08-2021, 07:29 AM
#33
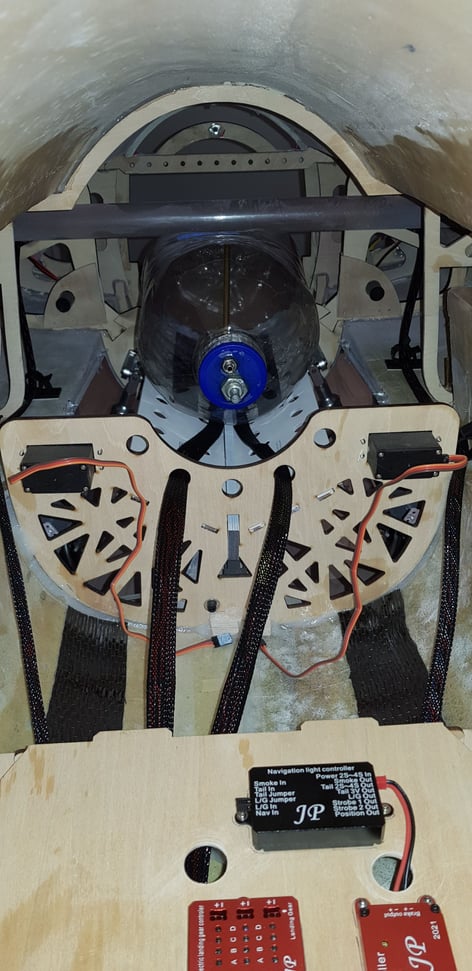
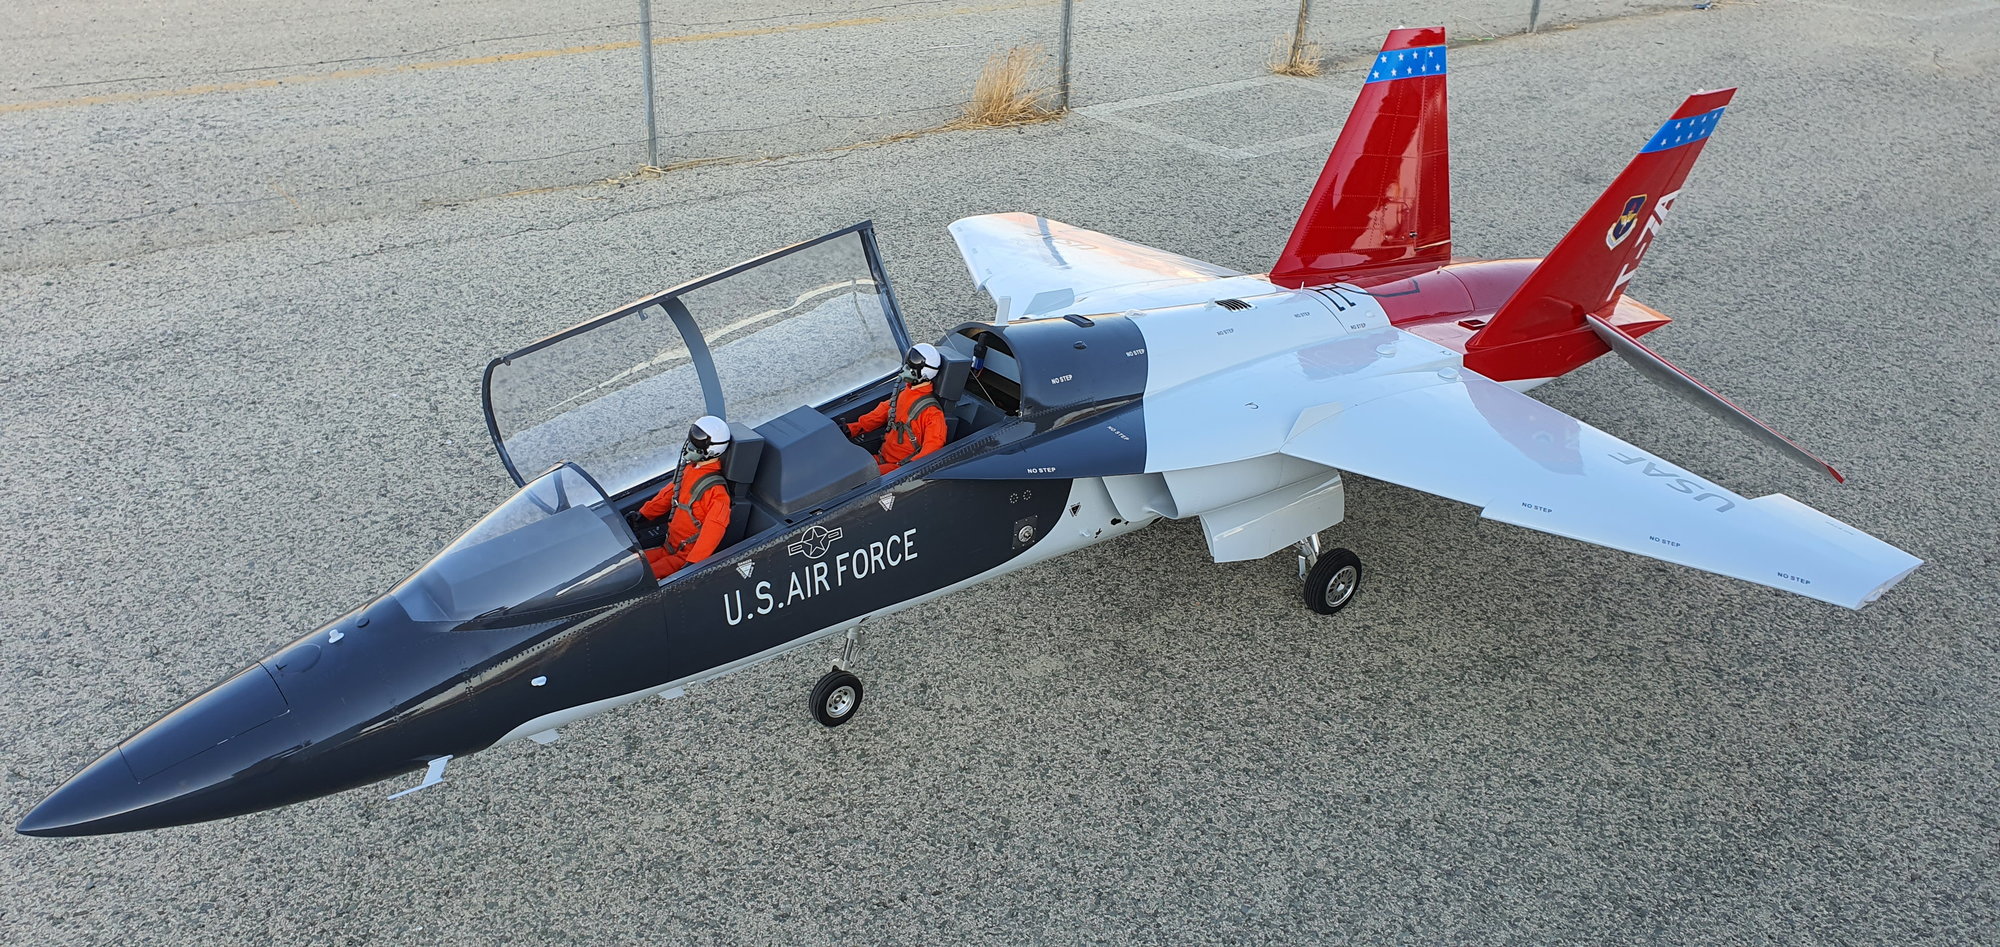
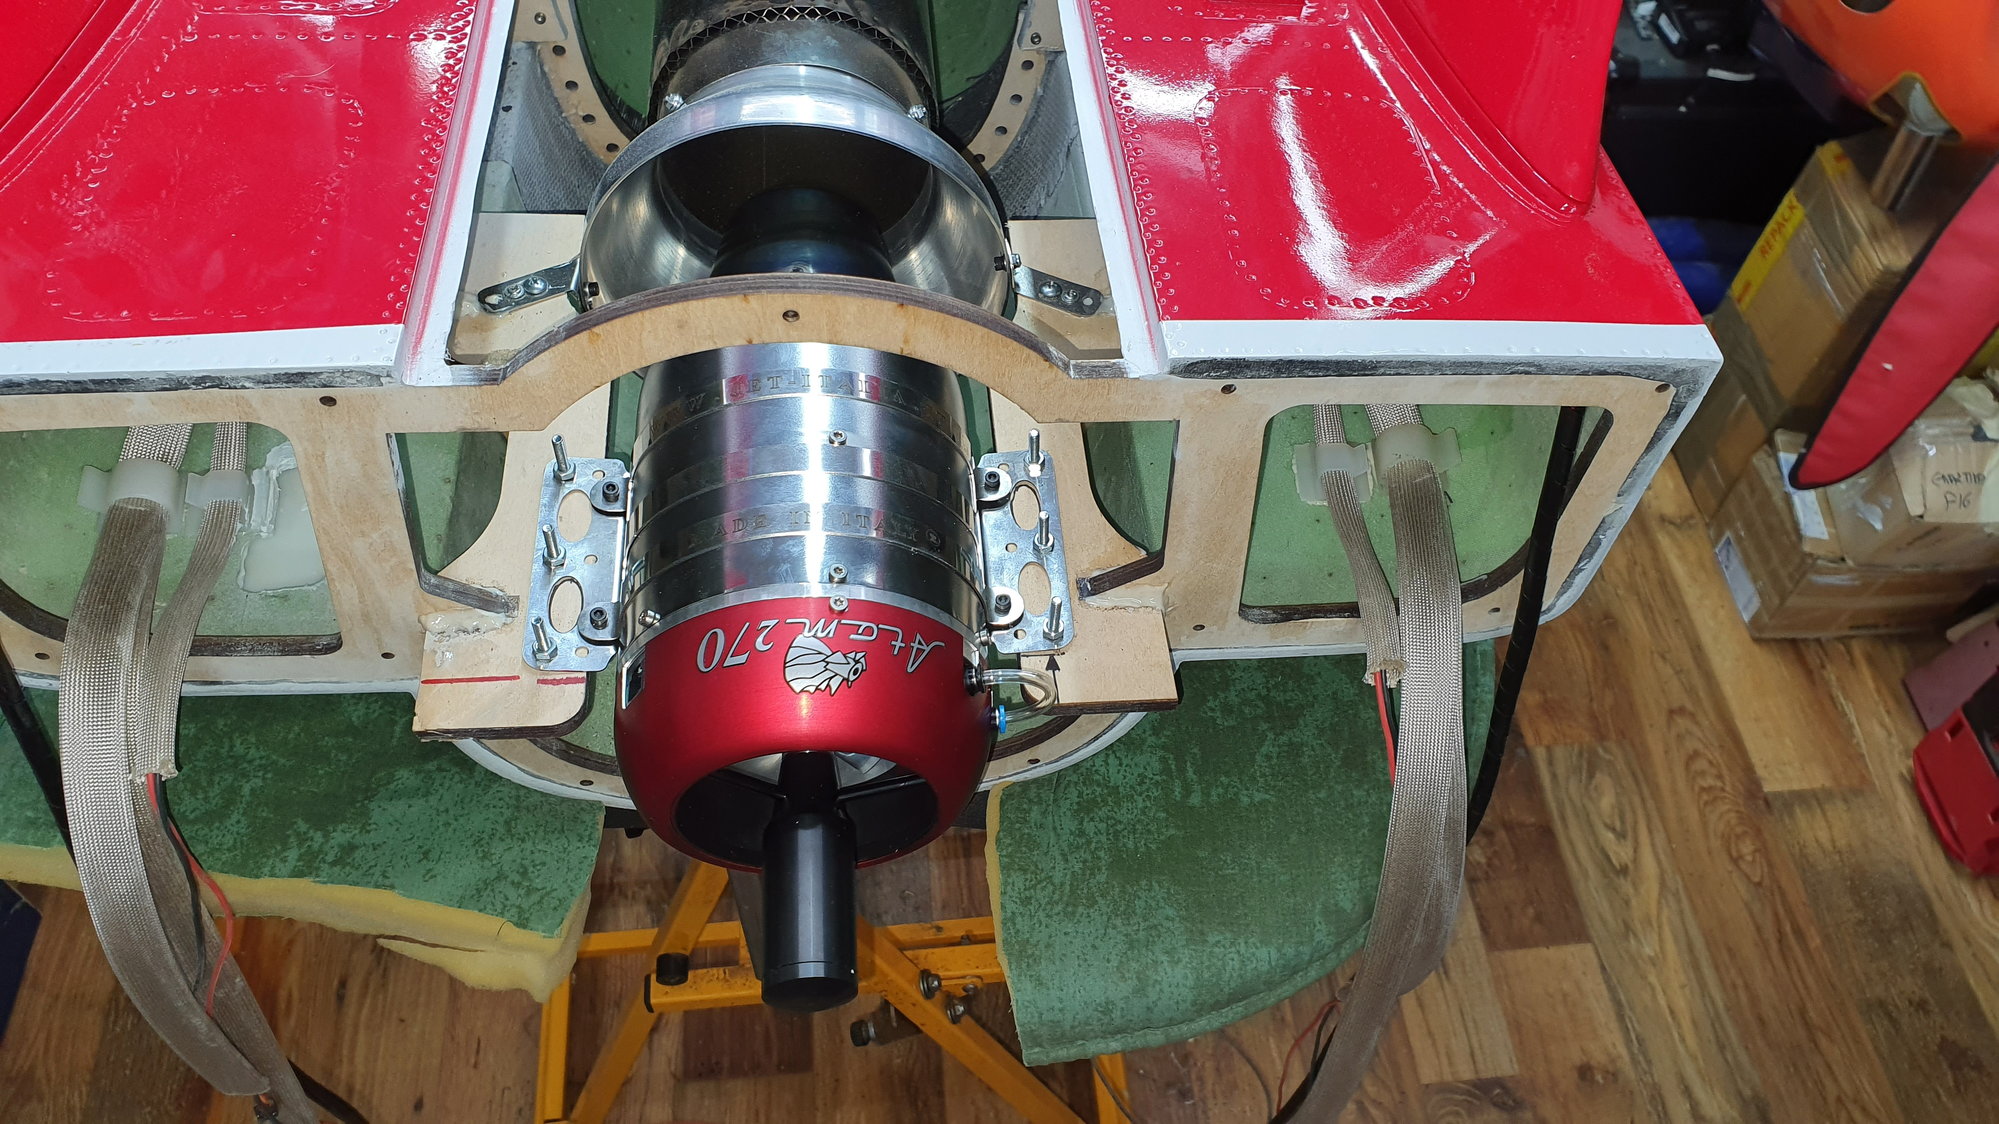
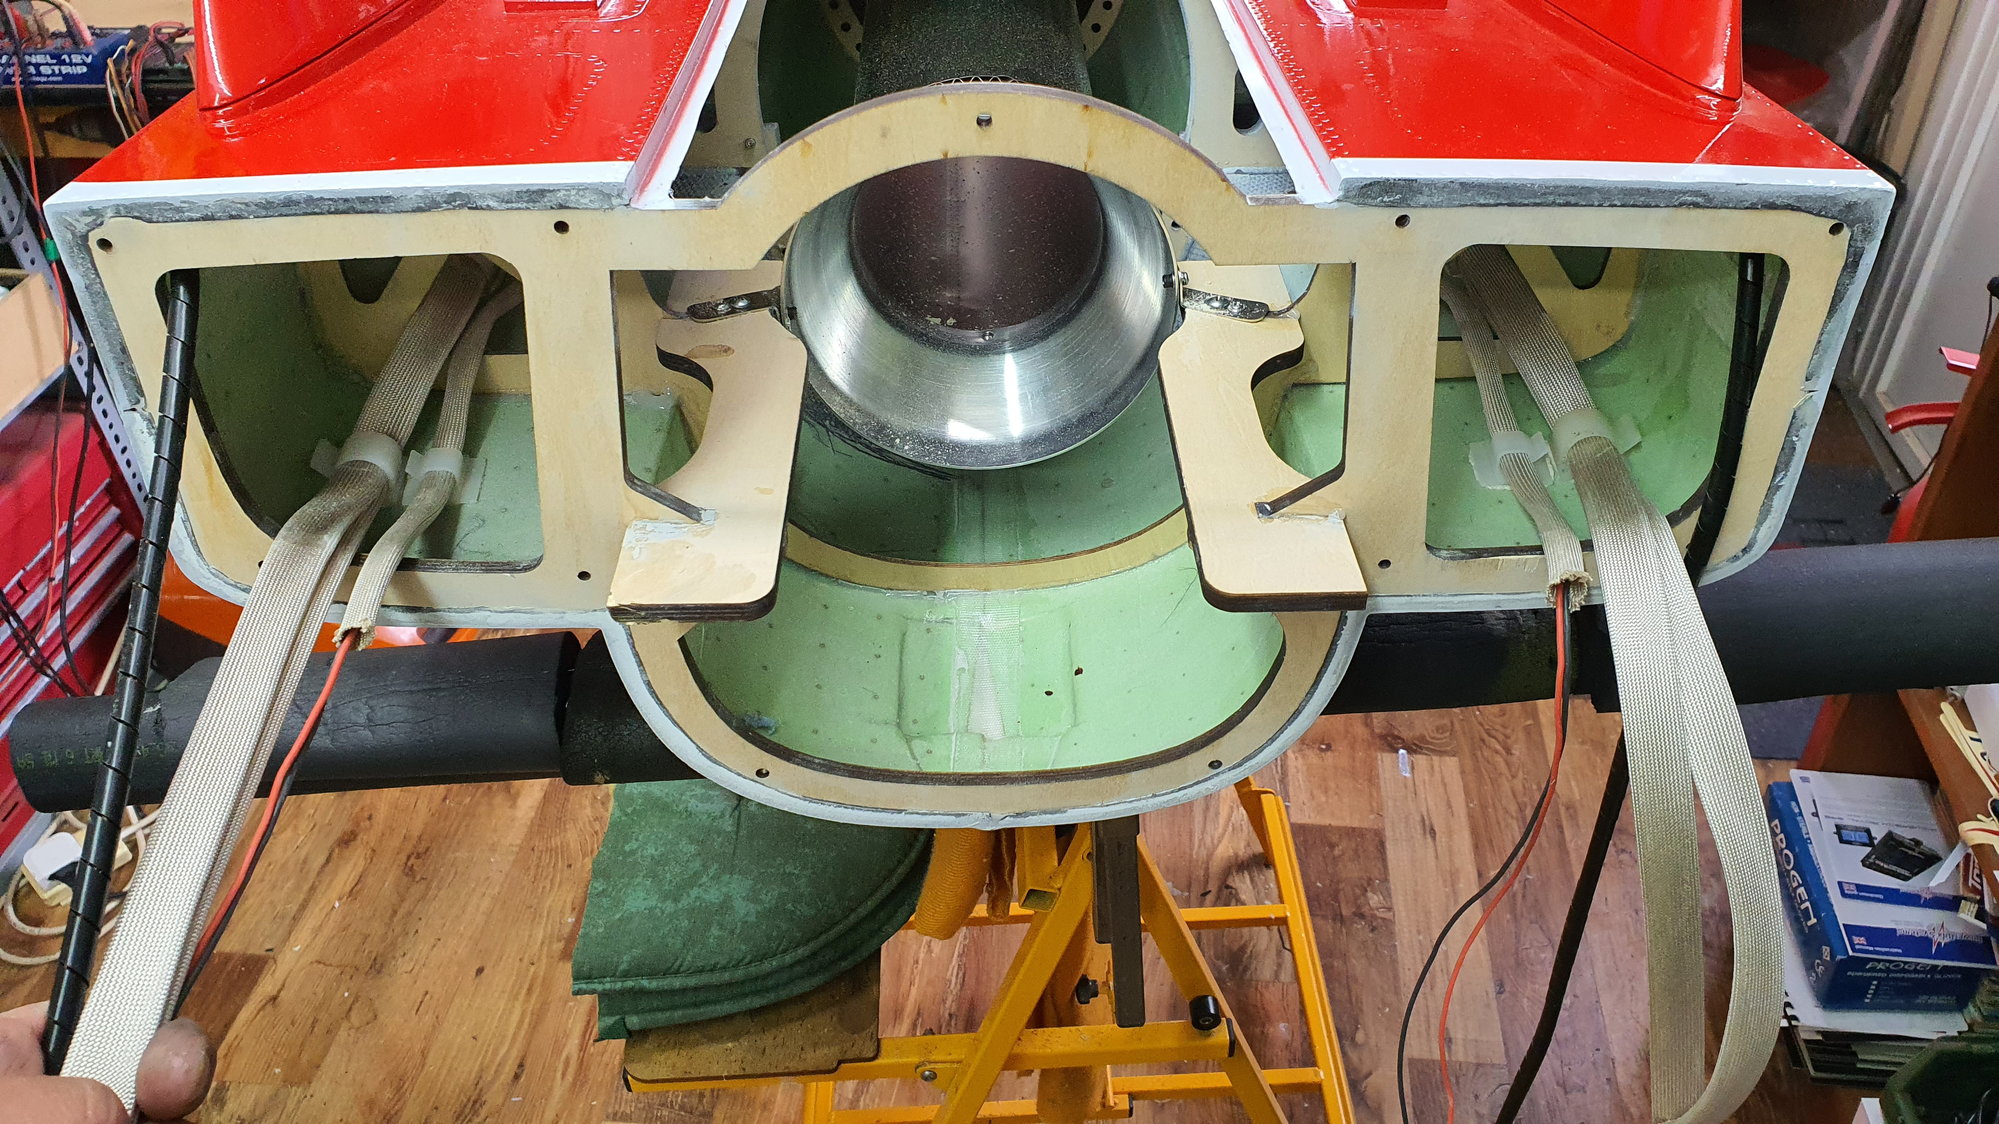
Tail section almost done. Only turbine installation missing.
Next will be wiring looms and then starting to set up sequencer for doors.
I am undecided what to do about programming tailerons
, shall I use ar smoothflite mixing ( no experience) or just jeti taileron which I am familiar with. Any ideas?
11-08-2021, 08:36 AM
#34
Tail section almost done. Only turbine installation missing.
Next will be wiring looms and then starting to set up sequencer for doors.
I am undecided what to do about programming tailerons
, shall I use ar smoothflite mixing ( no experience) or just jeti taileron which I am familiar with. Any ideas?
With the little T-7A, at least, you *only* want taileron control when the flaperons are at full deflection - at which point they no longer have much roll control authority and you need the tailerons mixed in for adequate roll control. With the flaperons at takeoff setting (i.e., 10-15 degrees down) or flaperons up, the ailerons are more than sufficient for roll control.
Bob
The following users liked this post:
marioshadjik (11-11-2021)
11-08-2021, 08:57 PM
#36

Tail section almost done. Only turbine installation missing.
Next will be wiring looms and then starting to set up sequencer for doors.
I am undecided what to do about programming tailerons
, shall I use ar smoothflite mixing ( no experience) or just jeti taileron which I am familiar with. Any ideas?
It�s also easy to remember how to program the TX for every plane vs trying to learn and remember* different devices in different planes.
That�s how I do it anyway.
11-12-2021, 11:45 AM
#37

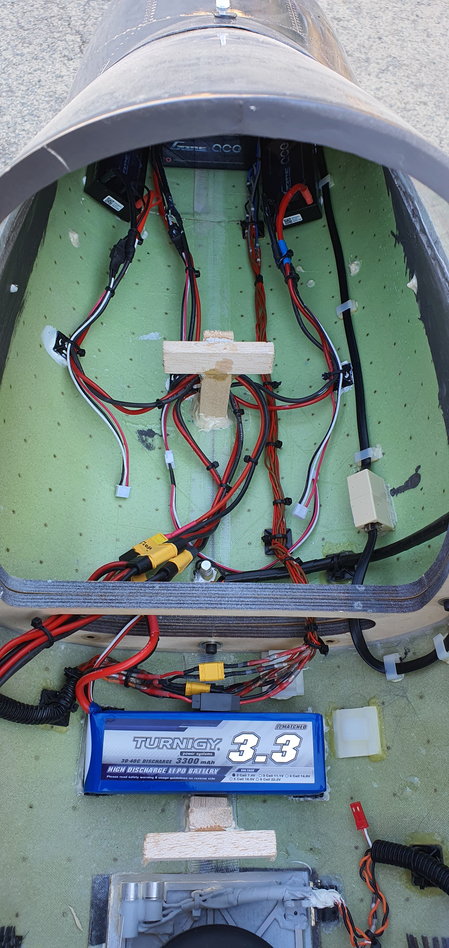
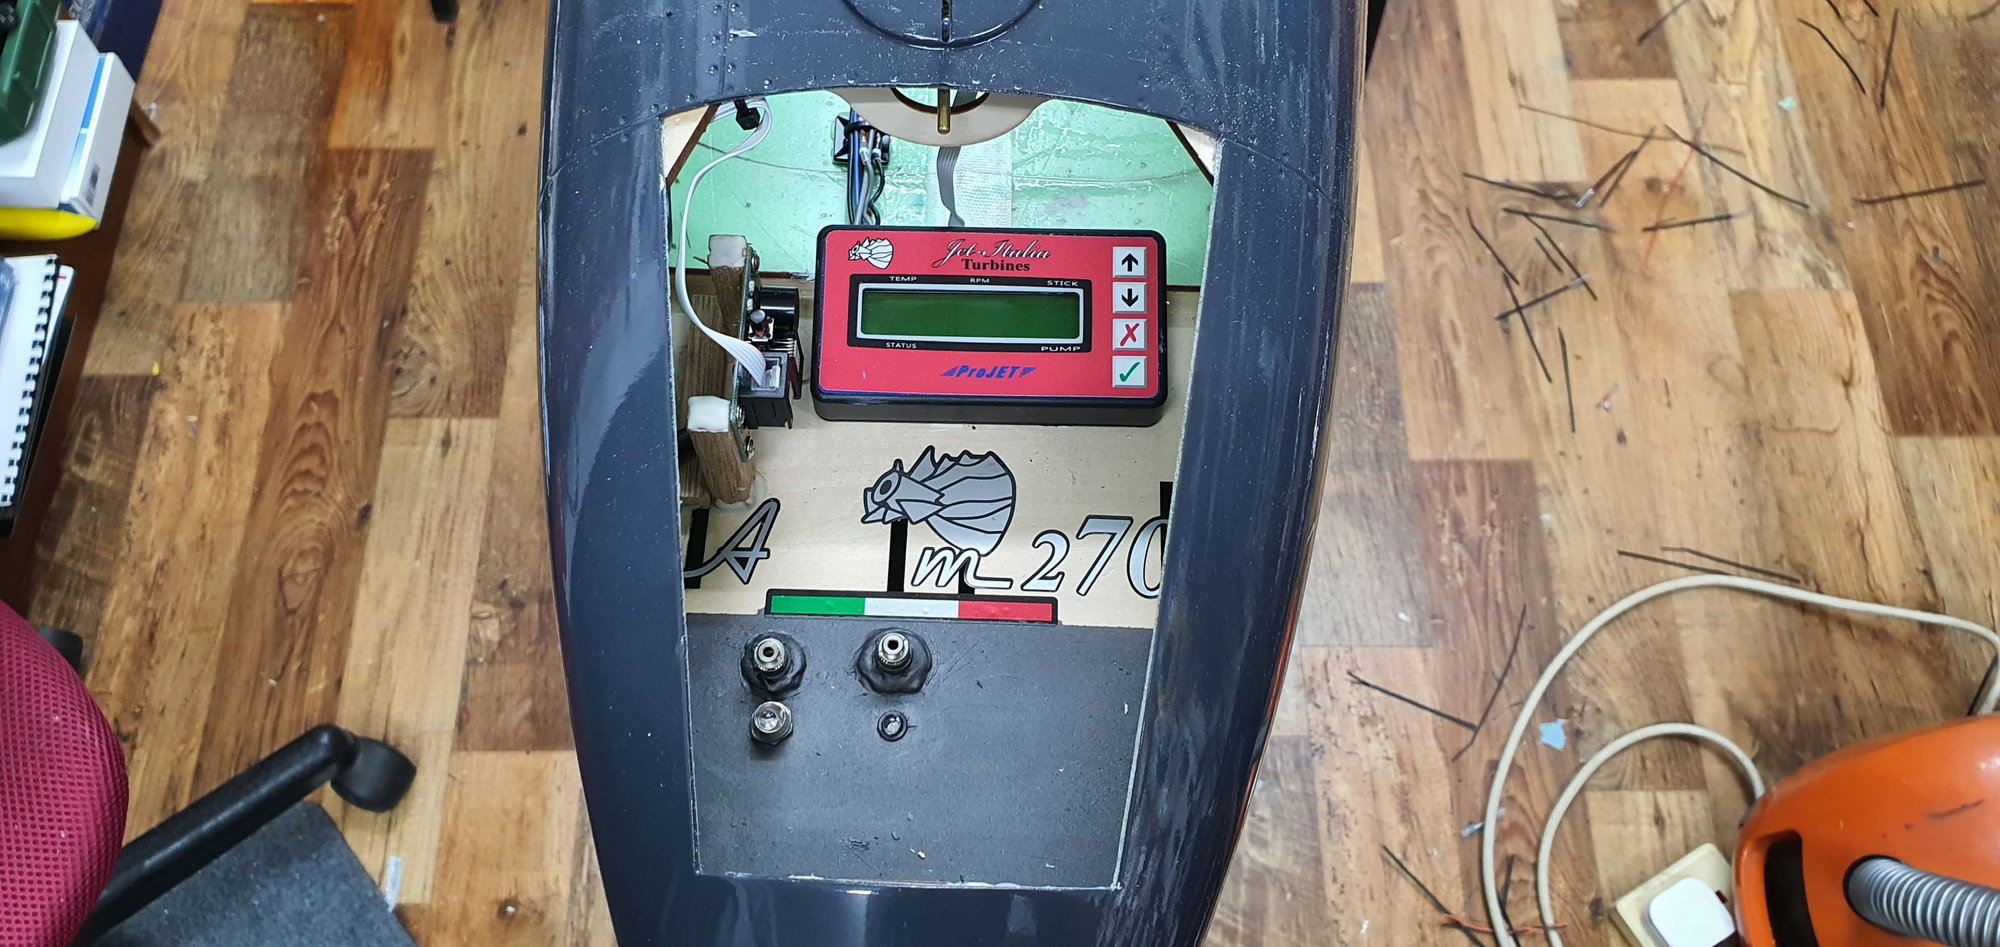
So, the wire spaghetti has arrived. These JP units are nice looking but not so user friendly. I would take Xicoy over these any day.
Fuel tank sits there nice. I will attach it to base and retract keel.
Lots of things to do until I get to testing this out..
 11-12-2021, 05:58 PM
#38
thasks,
Tone
11-13-2021, 08:55 PM
#40
11-14-2021, 04:55 PM
#43

Yeah, my biggest beef with electric gear, they are sooo... slooow... Three to four sec. gear would be so nice.
11-28-2021, 07:20 AM
#45
I'll take a pic tomorrow.
i got the damaged wing issue sorted. I got an insurance settlement and agreed to fix it by myself.
I first opened up the wing root and flap ribs with 25mm circular saw to see all glue joints and get all rattling stuff out.
The main issue was bent flap, surface damage on flap and hinges bent. Also servo had slop and was changed. Nee pushrods.
I first used sauna at 110�C for heat treating the wing. The flap trailing edge was kept under compression for 2 hours in sauna and then slowly cooled. It straightened out.
Then balsa block was installed inside to pop up the surface back to form. And at last I used expanding foam to fill the flap to bond both surfaces together. It looks solid now.
The hinges were strenghtened and reglued with support.
It took few days to fix . Visually you can still see the damage unless I paint over it but structurally its sound.
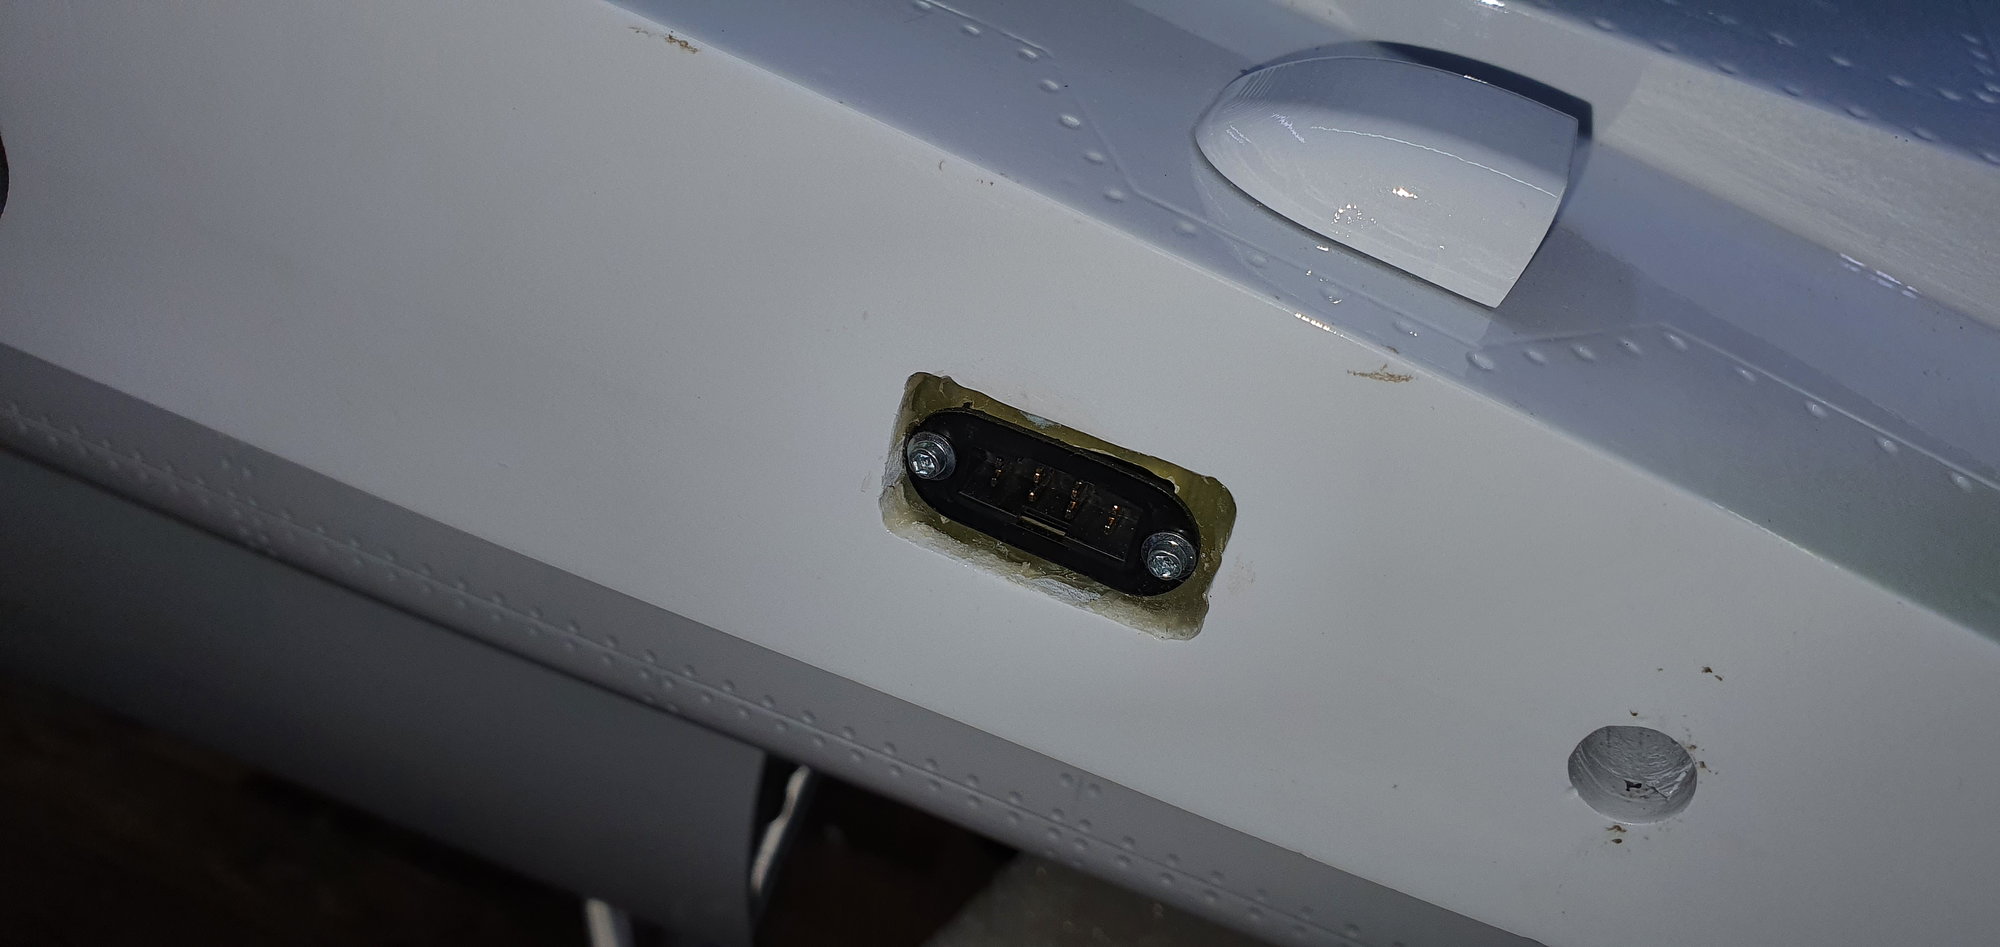
The wings are now done along new 8 pin connectors. I checked the original connectors and found out that the wires havent been stripped before crimping so I did not want to take any changes. All wires are redone...
Next back to wiring and setting up electrics. Gears etc..
After that I have to plumb the fuel lines and make a stand for my UAT.
i got the damaged wing issue sorted. I got an insurance settlement and agreed to fix it by myself.
I first opened up the wing root and flap ribs with 25mm circular saw to see all glue joints and get all rattling stuff out.
The main issue was bent flap, surface damage on flap and hinges bent. Also servo had slop and was changed. Nee pushrods.
I first used sauna at 110�C for heat treating the wing. The flap trailing edge was kept under compression for 2 hours in sauna and then slowly cooled. It straightened out.
Then balsa block was installed inside to pop up the surface back to form. And at last I used expanding foam to fill the flap to bond both surfaces together. It looks solid now.
The hinges were strenghtened and reglued with support.
It took few days to fix . Visually you can still see the damage unless I paint over it but structurally its sound.
The wings are now done along new 8 pin connectors. I checked the original connectors and found out that the wires havent been stripped before crimping so I did not want to take any changes. All wires are redone...
Next back to wiring and setting up electrics. Gears etc..
After that I have to plumb the fuel lines and make a stand for my UAT.
11-28-2021, 08:06 AM
#47
11-28-2021, 09:01 AM
#48
Here are the few I took along build. One shot is trailing edge after repair and another flap end also after repair. I o�intend to put film cover flap over those holes. Easy and light.
11-29-2021, 03:29 PM
#49
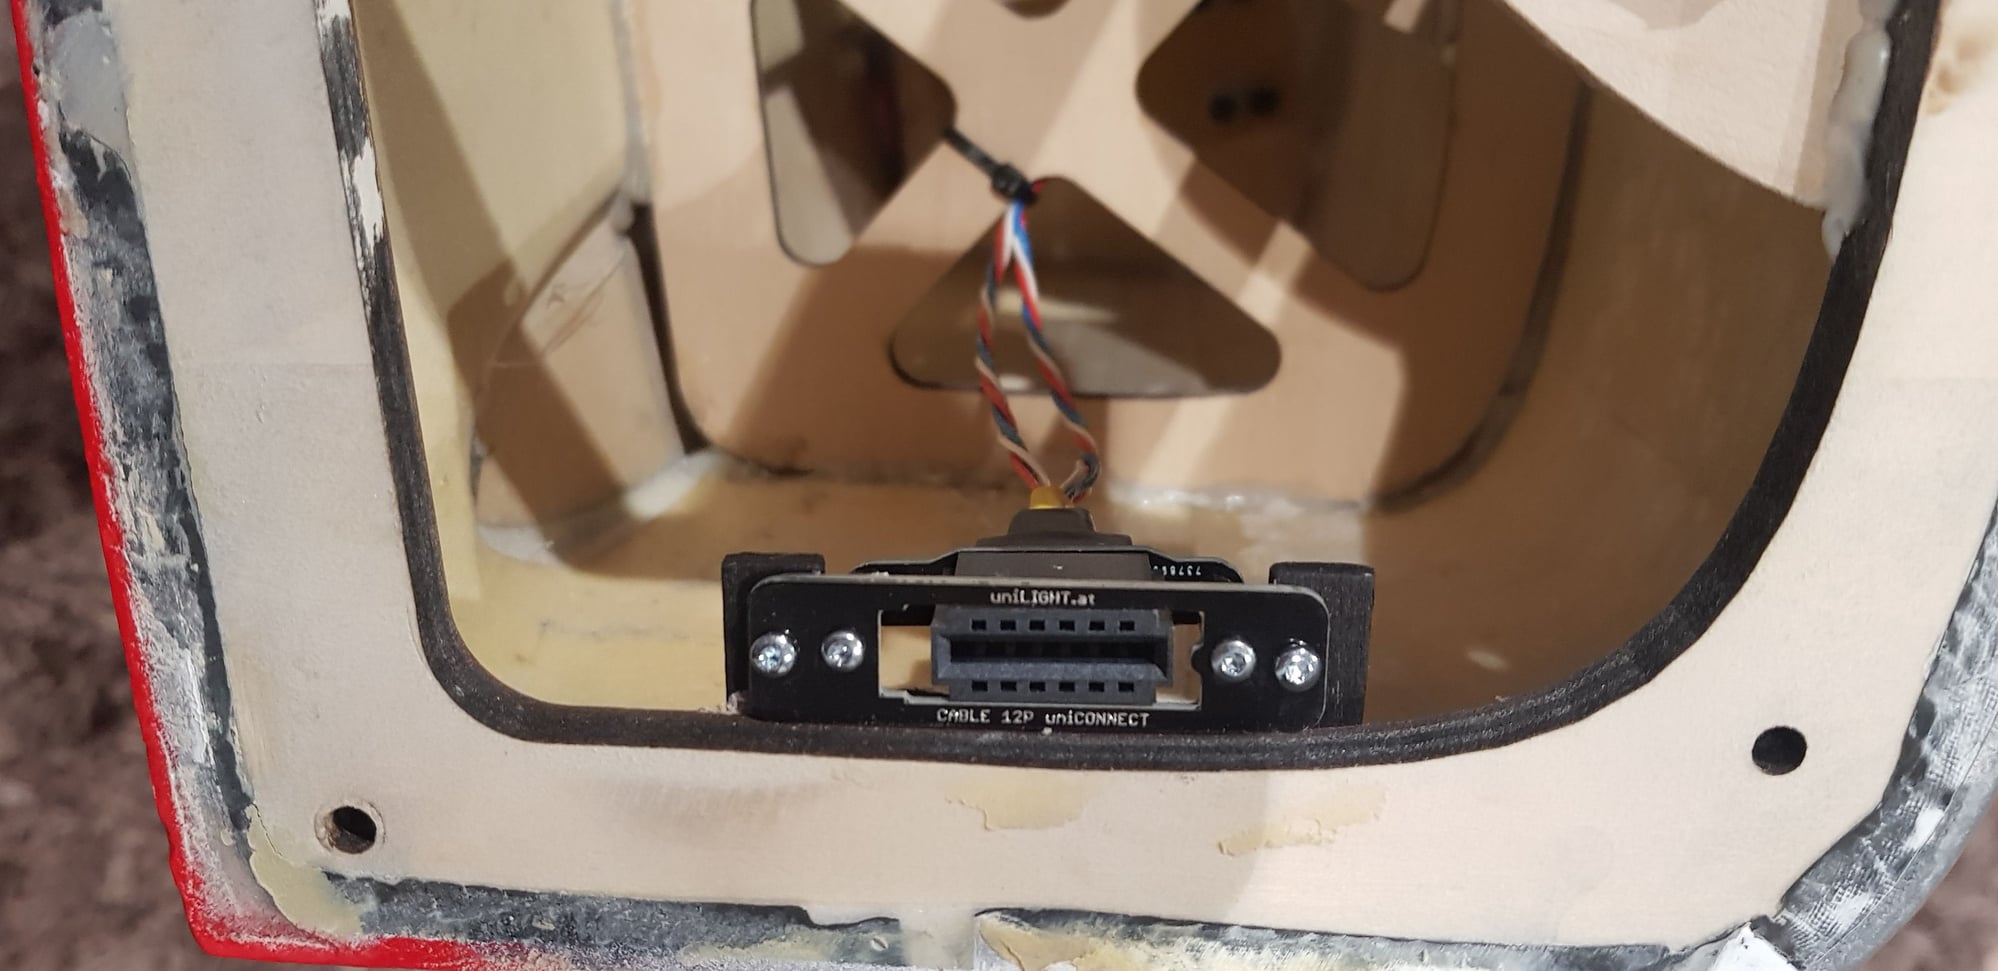
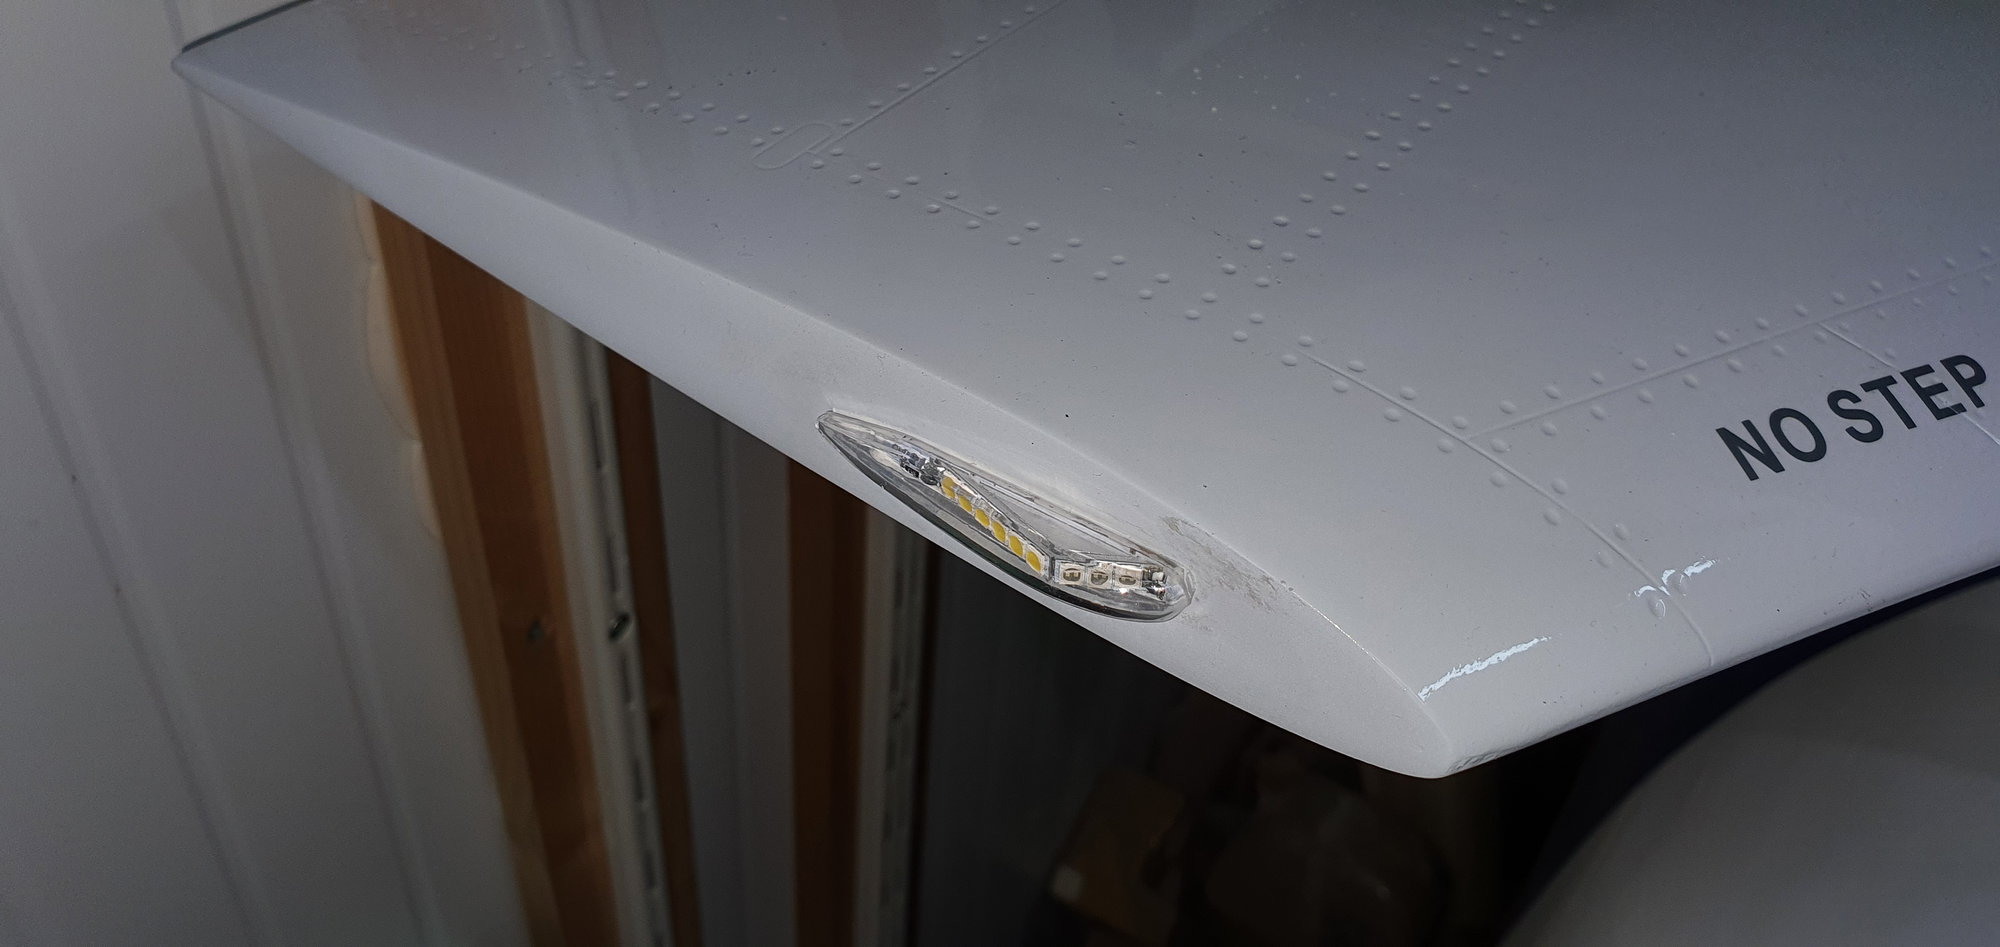
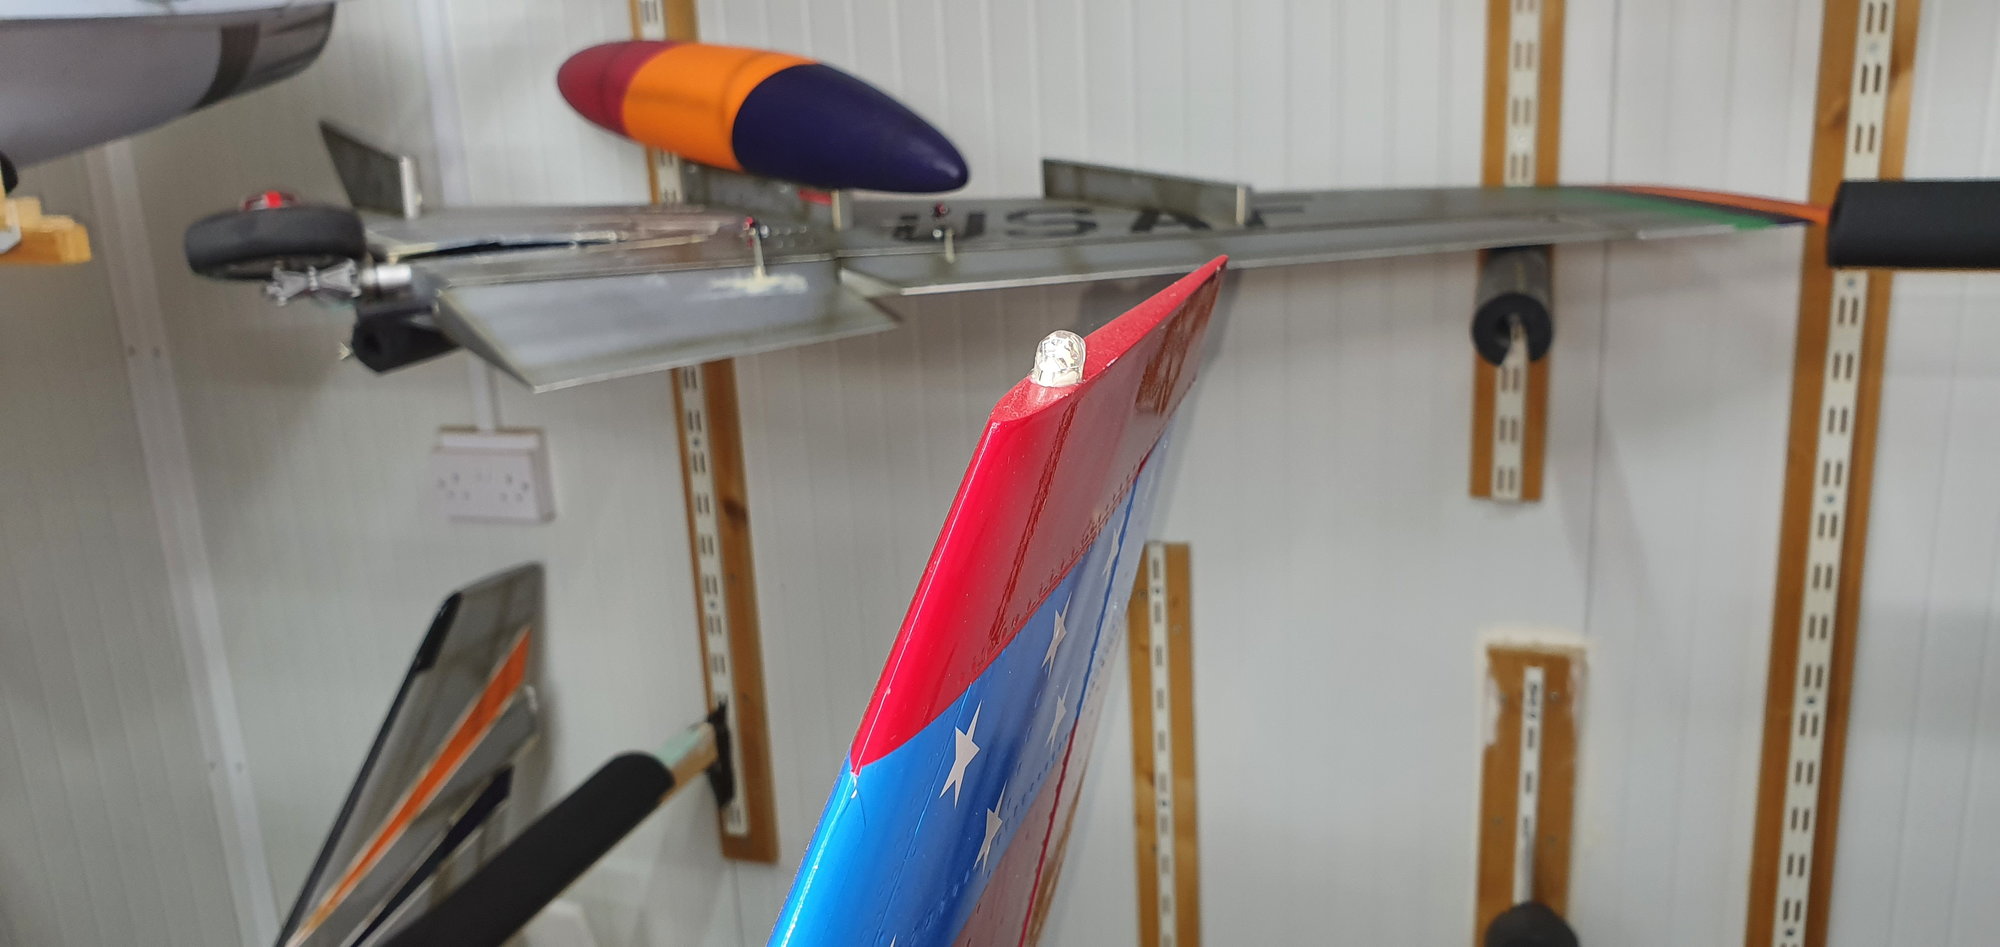
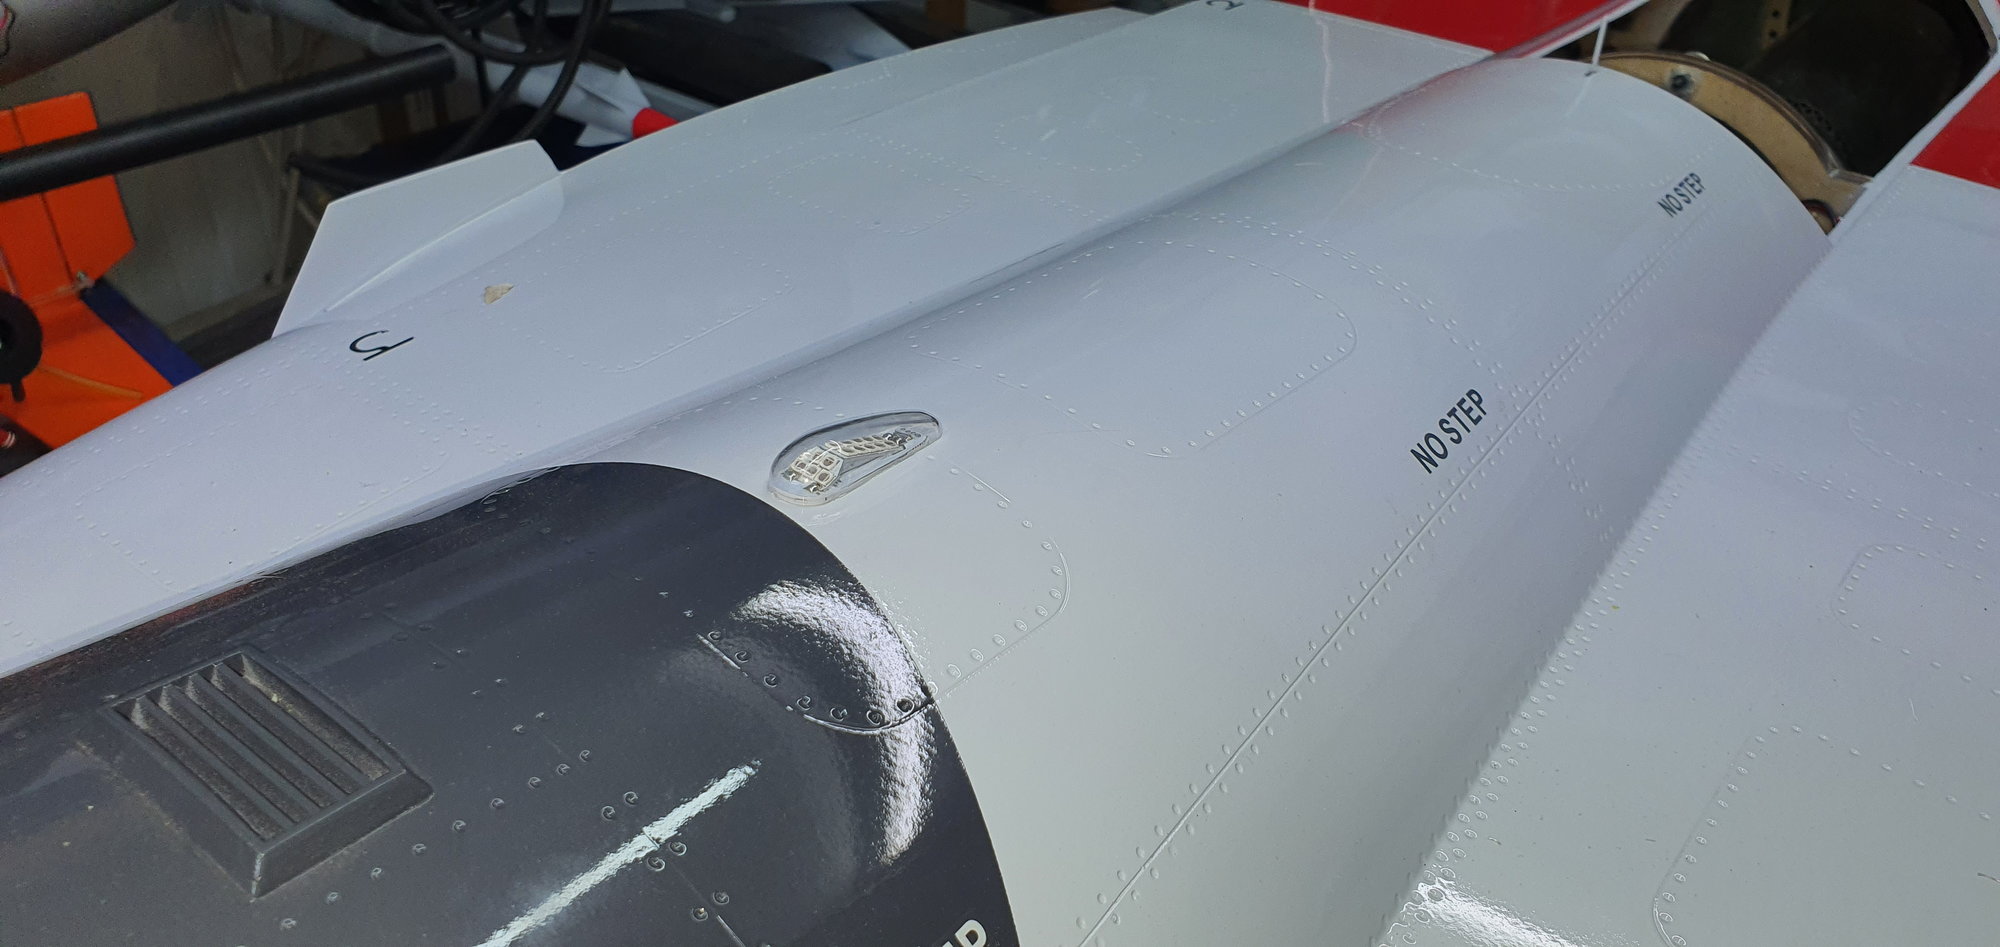
Anyone know which unilights fit this jet? I have never used them before and I am not sure which combo or individual light would work the best. What are you guys using?
thanks,
Tone
thanks,
Tone
Last edited by Agrav8ed; 11-30-2021 at 09:21 AM.
11-30-2021, 08:18 AM
#50
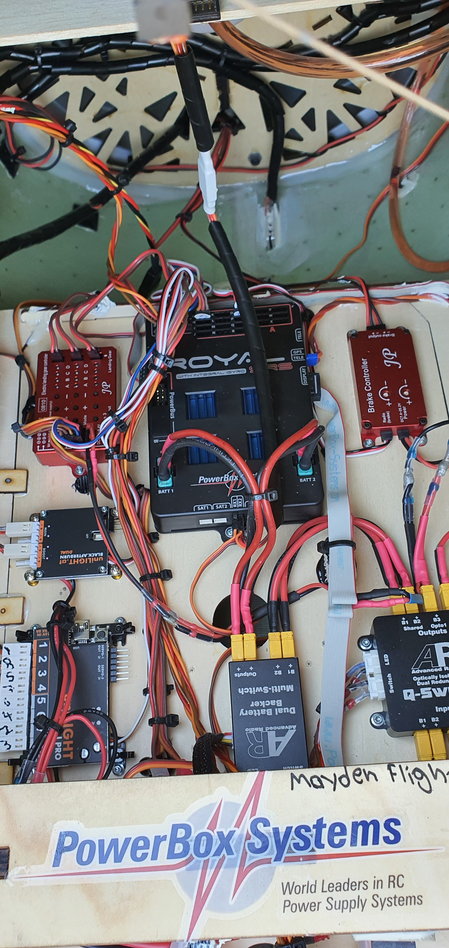
Today I got a complete build day.
1st I tackled the gear doors...
The provided JP controller is not the most intuitive one. Finally got it sorted and all gear doors work now fine. All servo horns had to be removed and angled again. They were just slapped on on the factory. Linear servo would be great for these.
Same with nose gear control horn, totally wrong angles set up.
Some wiring redone , took a bunch of extra wire out and combined lighting wires to one connector.
I may be even ready for taxi test before Christmas!

