


JW Büker Jungmeister build
 11-20-2022, 03:07 AM
#251


No mate, I'm referring to the side mount with the 4mm hole that the cabane is bolted to. There is a big step up to where it meets up with the top turtle deck. It looks like you have filled it out to match the alloy cover. On my pic it has RH OUT wrote on it.
Last edited by tmac48; 11-20-2022 at 03:11 AM.
 11-20-2022, 03:19 PM
#253
Thanks, I had not even thought about the rear mount as of yet, I was leaving my options open as to how I was going to handle the alloy in these areas as well.
11-24-2022, 02:29 AM
#254
The redo of the foam on the bottom has worked out very well. Mich would you have any close up pics of how you applied the filler for the front and rear cabane mounts? It looks as if I will need to run some thin .8mm ply butting up to the top deck ply on the sides as well.
Last edited by tmac48; 11-24-2022 at 02:34 AM.
11-24-2022, 04:23 AM
#255
The redo of the foam on the bottom has worked out very well. Mich would you have any close up pics of how you applied the filler for the front and rear cabane mounts? It looks as if I will need to run some thin .8mm ply butting up to the top deck ply on the sides as well.
I found that I had to fill the areas where the edges of the .8mm ply terminate - all the way down the fuselage. I used fairly dense balsa. If you don’t do this you’ll see unsightly terminations under the covering.
11-27-2022, 08:36 AM
#257
Terry, here's how I filled the cabane front mount areas. I used a hardwood disk (without the bolt hole drilled out yet) for the mount hole area and a soft balsa triangle around it. After glued in I drilled from the inside out using the existing hole for perfect alignment. All of this has to be sanded to desired planes, of course. Fortunately, it doesn't have to be exactly perfect because all of this is ultimately covered with sheet metal.
EDIT: I saturated the hardwood disk, which was end grain, with thin CA glue for better compression strength.
You'll also see how I filled the bottom of the .8mm top sheeting all the way to the back of the turtleneck

I sawed the hardwood disk out of a wooden rod.

Balsa filler below the .8mm sheeting all the way to
the back of the turtle deck.
EDIT: I saturated the hardwood disk, which was end grain, with thin CA glue for better compression strength.
You'll also see how I filled the bottom of the .8mm top sheeting all the way to the back of the turtleneck
I sawed the hardwood disk out of a wooden rod.
Balsa filler below the .8mm sheeting all the way to
the back of the turtle deck.
Last edited by mitchilito; 11-27-2022 at 09:33 AM.
11-27-2022, 06:00 PM
#258
Thanks for the pics and cometary, pretty much what I had envisaged. I think I may need to add some thin balsa all the way along the fuselage to get that smooth transition of the fabric.
An up date on my Pilot.

An up date on my Pilot.
11-30-2022, 11:52 AM
#260
For those of you that think I'm just sitting on my laurels, NO. I put together the tail servo extensions and got them in place prior to cover. You'll also see my radio tray in this pic. I'm using a "Aura Pro" flight stabilizer in this setup. I have one in my Phoenix Waco and like it a lot. The Aura dampens unwanted excursions (wind etc) yet is completely transparent in normal flight. The "Pro" also manages the double battery setup. They aren't cheap though. The extensions I used are all 20 AWG and are as follows (although yours will vary:
For each elevator I used a 60" extension PLUS and additional 12" one. Total of two, of course. Yes, this is a LARGE aircraft!
For the Rudder: one 60" and one 24".
Needless to say I used locks on all connectors and tested each lead for function prior to installation. They'd be a pain to remove.

Here's the three tail extensions on a carbon rod to feed them forward. This all can be done after cover but much easier now.

I'll always be able to remove and install them when covered - although I hope I won't have to. . .

Zip-tied to keep them out of the way for cover.
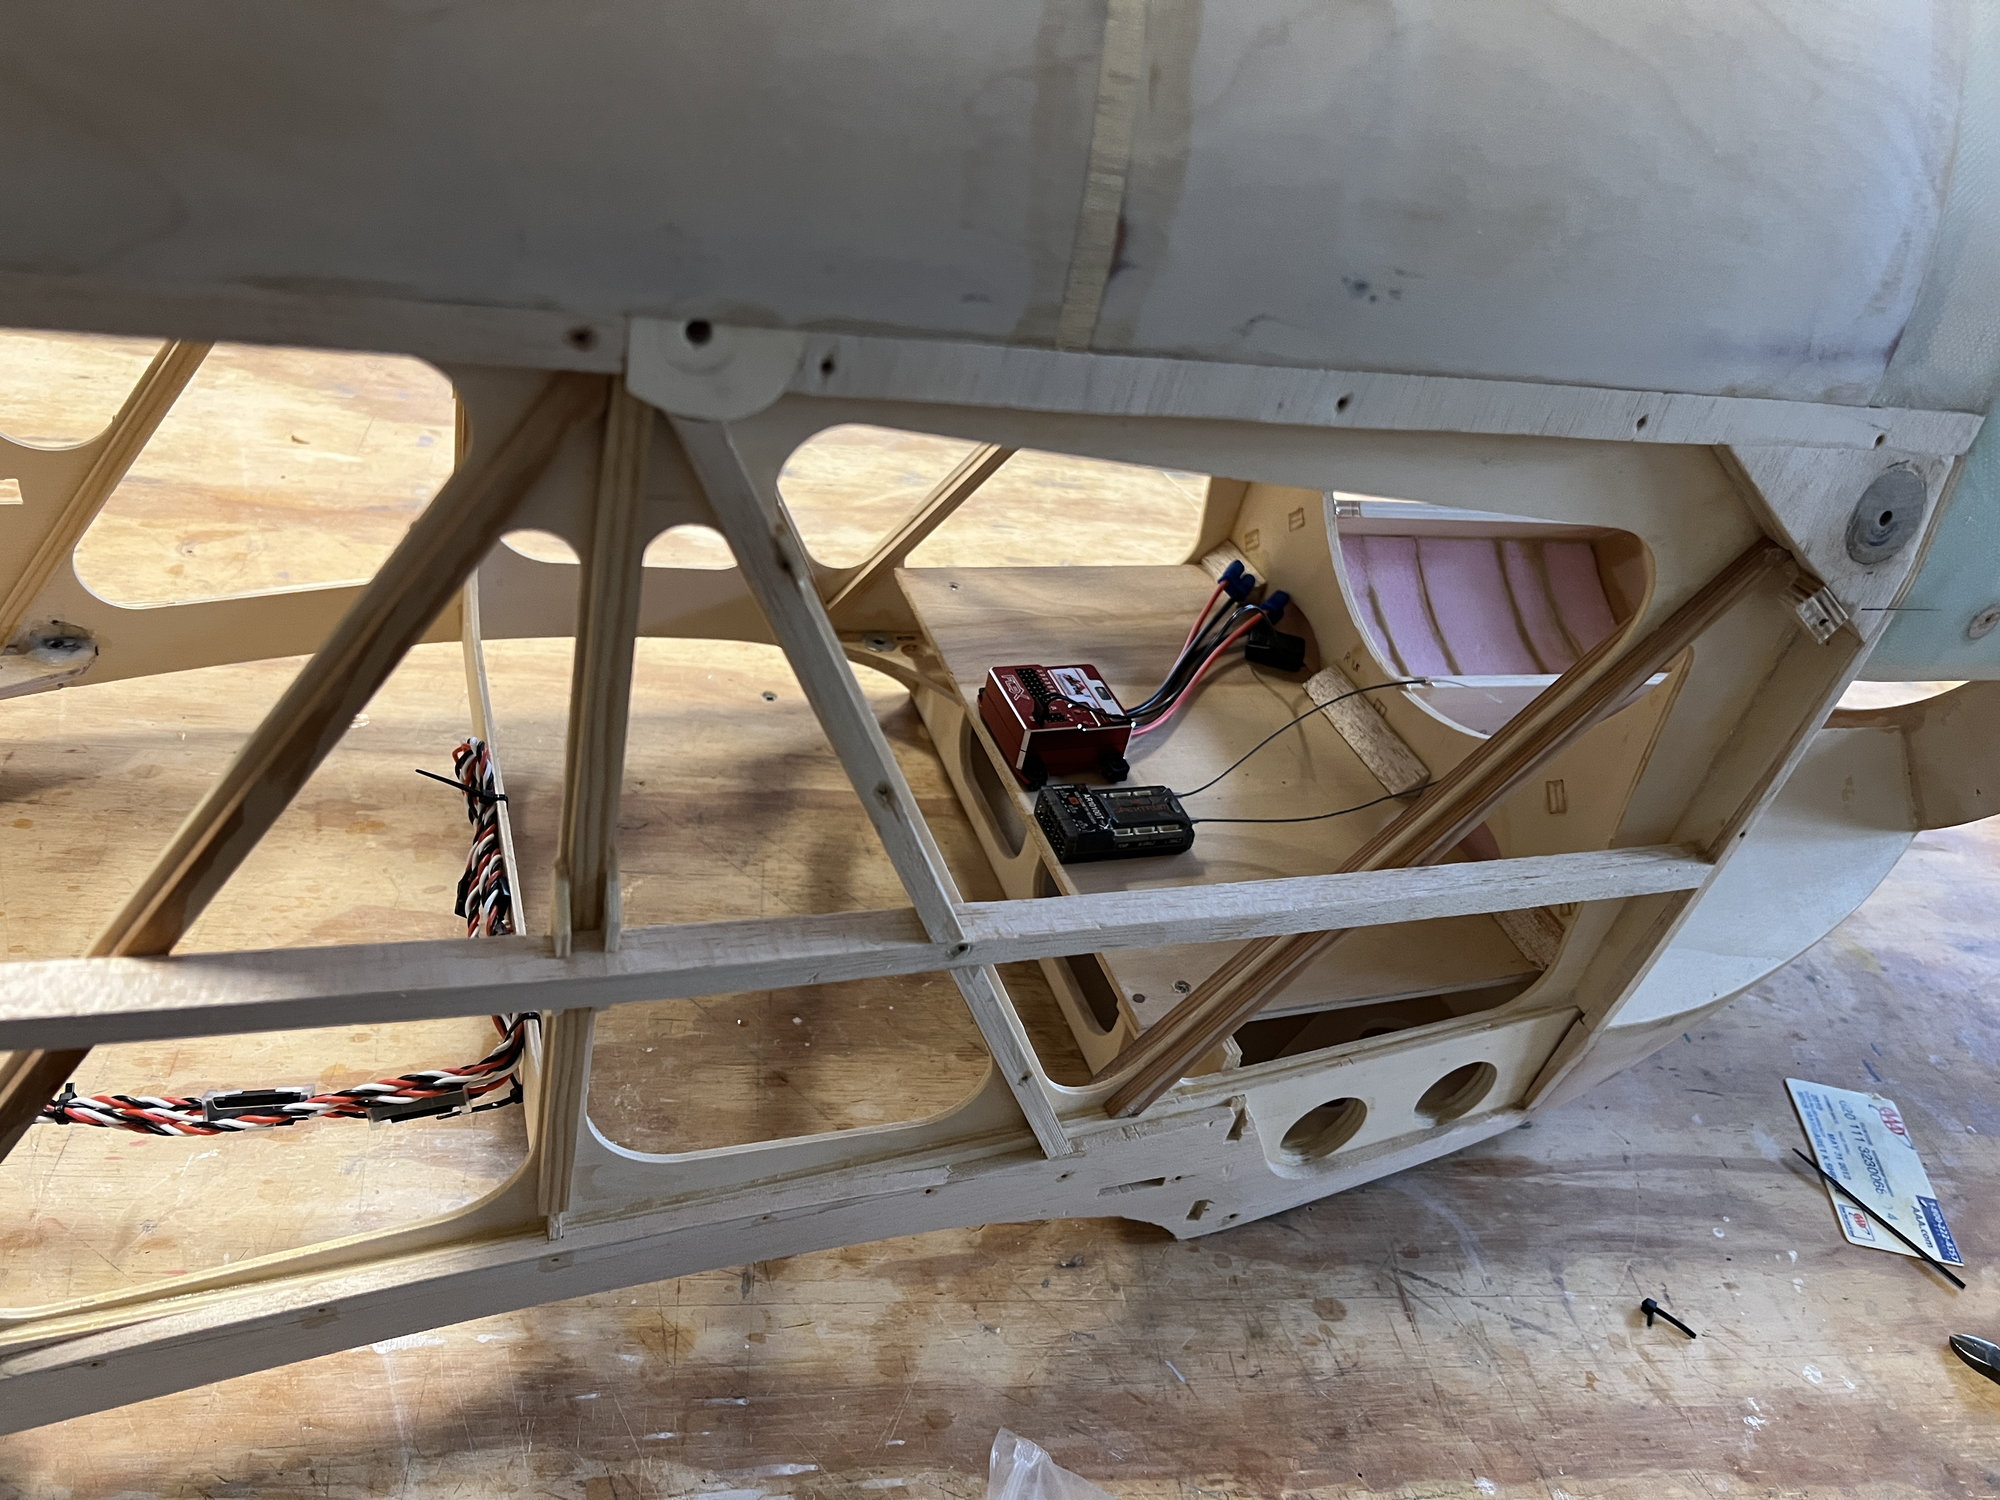
The Aura and Spectrum 10100 receiver sitting on the radio board. Two 5000mah lipos will reside on either side of them to handle the radio, ignition, fuel pump, and smoke pump. All accessible under the metal side plates.
For each elevator I used a 60" extension PLUS and additional 12" one. Total of two, of course. Yes, this is a LARGE aircraft!
For the Rudder: one 60" and one 24".
Needless to say I used locks on all connectors and tested each lead for function prior to installation. They'd be a pain to remove.
Here's the three tail extensions on a carbon rod to feed them forward. This all can be done after cover but much easier now.
I'll always be able to remove and install them when covered - although I hope I won't have to. . .
Zip-tied to keep them out of the way for cover.
The Aura and Spectrum 10100 receiver sitting on the radio board. Two 5000mah lipos will reside on either side of them to handle the radio, ignition, fuel pump, and smoke pump. All accessible under the metal side plates.
Last edited by mitchilito; 11-30-2022 at 03:14 PM.
The following users liked this post:
tmac48 (11-30-2022)
11-30-2022, 03:55 PM
#261
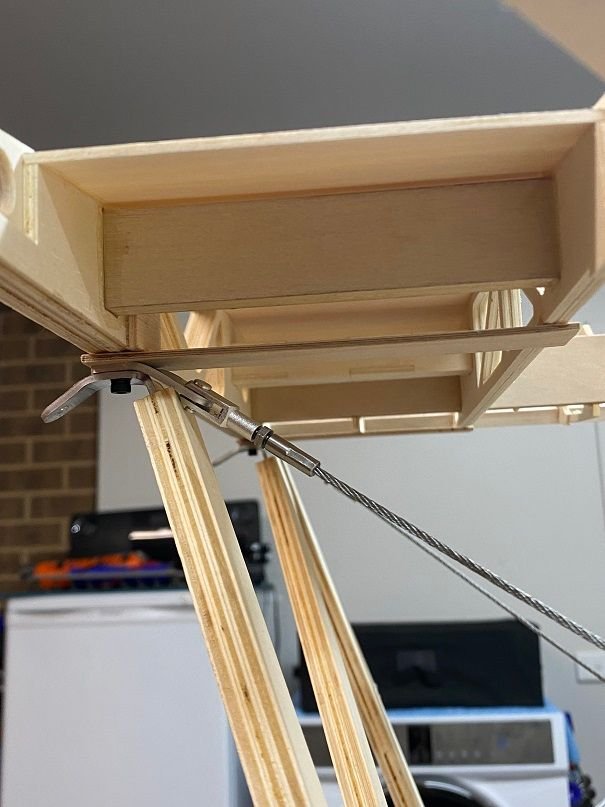
Mitch not sure how you were able to tension the cabane wires but I certainly couldn't, I ended up re threading one end along with its clevis to left hand and now I can do all the final adjustments and then lock it it up with the looking nuts.

Last edited by tmac48; 11-30-2022 at 05:30 PM.
The following users liked this post:
tmac48 (12-02-2022)

The following users liked this post:
mitchilito (12-03-2022)
12-09-2022, 02:34 AM
#266
I looked back to my first post of this build to see what the date was: November 2021. I'm over a year now! But it's finally starting to look like a flying machine:

Reminds me of my old silk and dope days. Back when I still had all my brain cells. . . . .

This is the cloth and glue I'm using. It's water based, odor free and wonderful. But wow, is it expensive! Good news is a little goes a LONG way.
Reminds me of my old silk and dope days. Back when I still had all my brain cells. . . . .
This is the cloth and glue I'm using. It's water based, odor free and wonderful. But wow, is it expensive! Good news is a little goes a LONG way.
12-10-2022, 02:02 AM
#268
With Stewart Systems there's absolutely no smell of any kind! Very very nice.
12-10-2022, 02:28 AM
#269
I totally agree. One strange thing: usually when you get to this stage of a build the beautiful view of the first-covered surfaces are accompanied by VERY strong smells of solvent/glues thinners etc.
With Stewart Systems there's absolutely no smell of any kind! Very very nice.
With Stewart Systems there's absolutely no smell of any kind! Very very nice.
12-10-2022, 05:15 PM
#271
Did I answer your question?
EDIT: at least I think the removable wire fitting system I built into the stabilizers was factory intended. Upon recollection, now I may have just designed it in myself. I'm not really sure. . . l
 12-10-2022, 10:46 PM
#272
Mitch, I don't think that JW gave us the option of fitting them after cover, but I was thinking along the same lines as you , now I'm convinced that is the way to go.
The following users liked this post:
tmac48 (12-11-2022)

