


JW Büker Jungmeister build
 . But I saw how you were doing it and I think yours will look the same.

 12-13-2022, 02:49 AM
#277


I don't think you realize what I eventually did. I just could not convince myself that it was going to work so I did a modification, will take a pic tomorrow and post it so you can have a laugh on me!! It still stands I dont think that I could have acheived what you have.
12-13-2022, 01:19 PM
#278
Mitch this is what I ended up doing, going by your results I have just wasted my time but I'm still not convinced that I would have achieved such a satisfactory result as you ! I have run a small strip of 2mm balsa between each rib.
The following users liked this post:
tmac48 (12-13-2022)
12-14-2022, 05:21 AM
#280
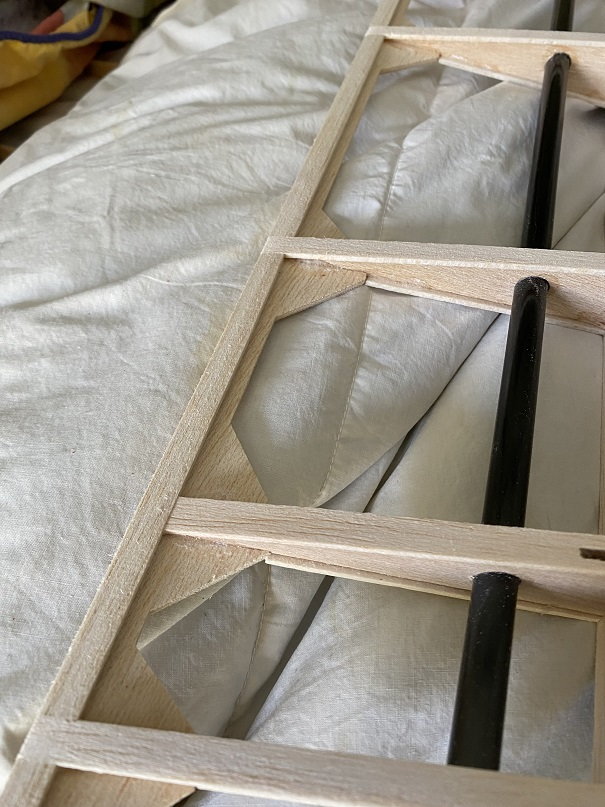
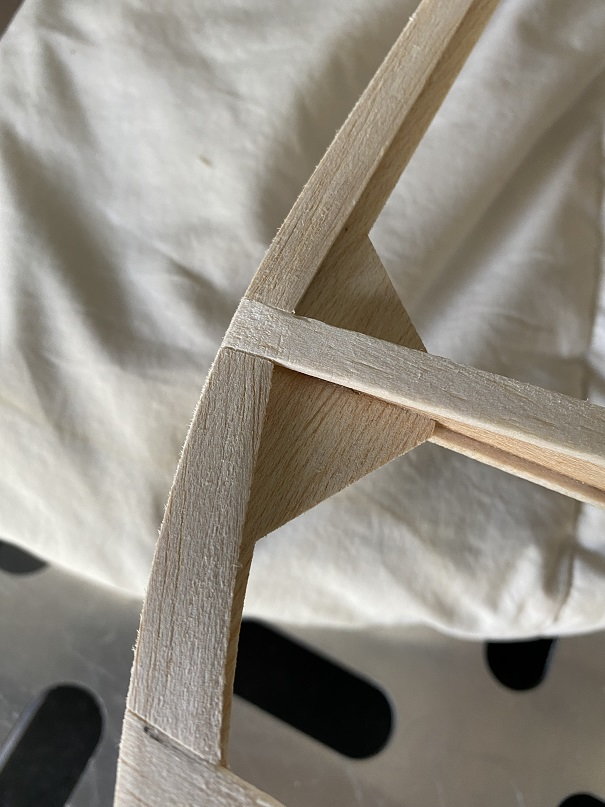
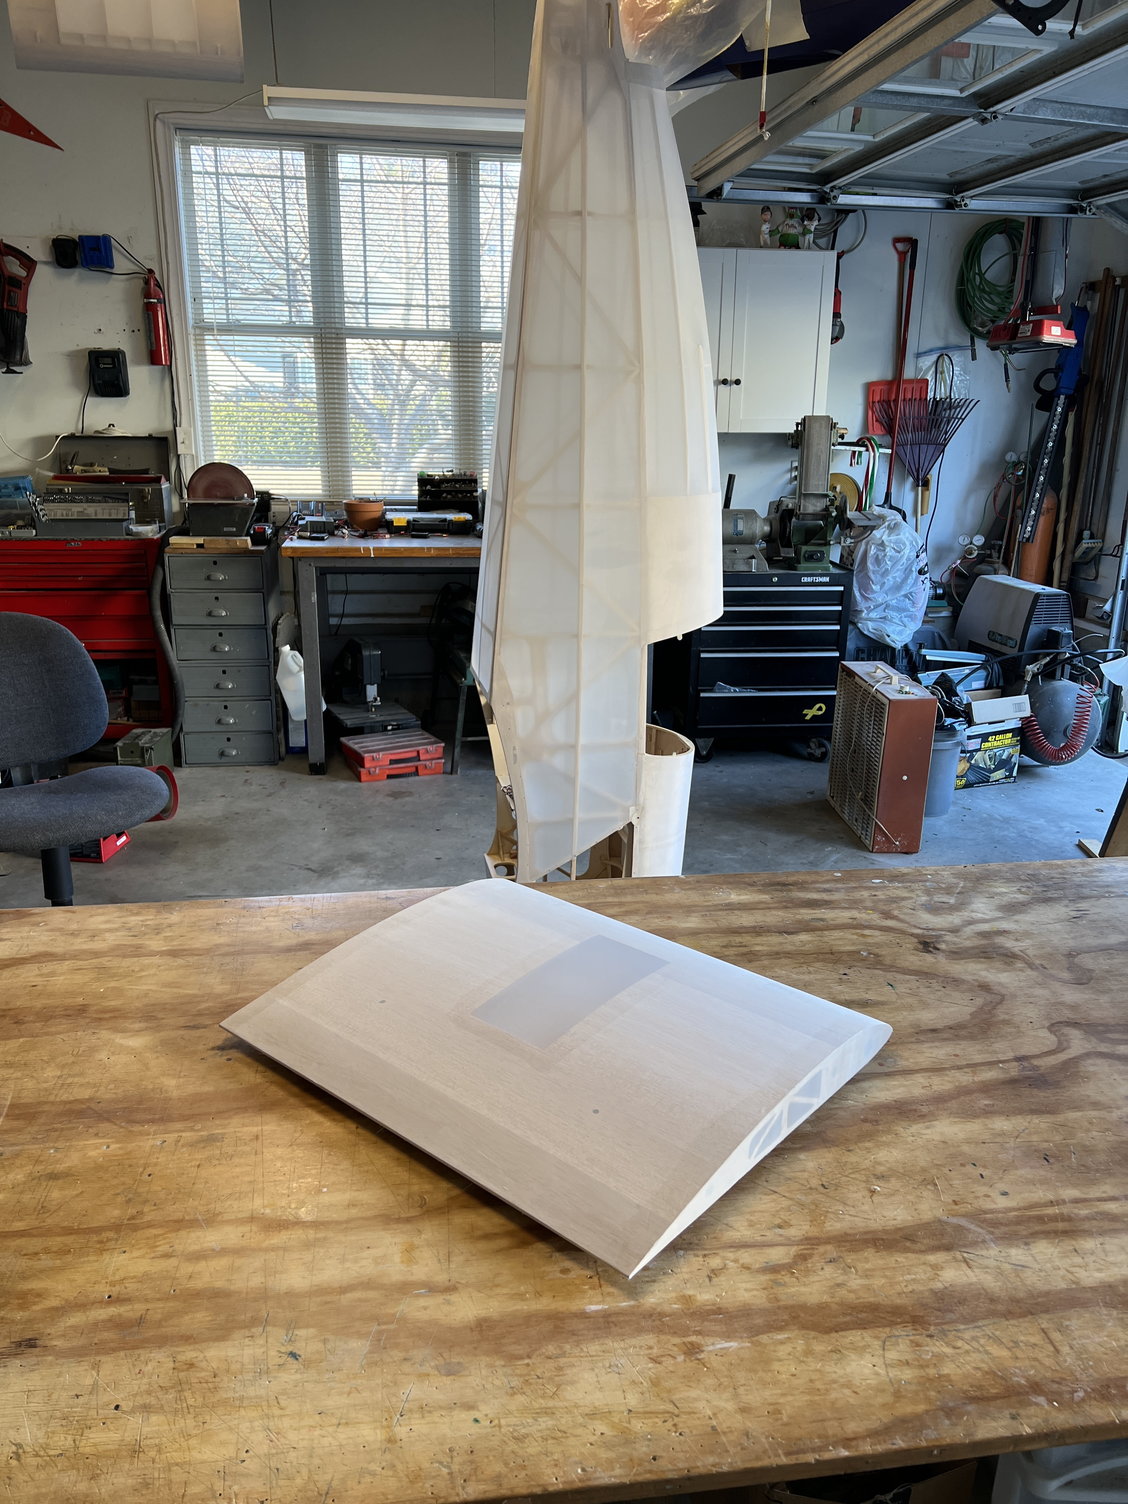
As you all know, I'm using Balsa USA cloth and Stewart Systems "Eco Bond" for this cover. This is the first time I've tried this stuff and I'm going to go on record and say I LOVE IT. In the following pics you will see that I covered the last little bits and pieces. Some of them I NEVER would've believed I could actually cover with cloth effectively. Well I was wrong. Every single one of the most challenging pieces covered fantastically. Here's how:
I brushed on the Ecobond like always. Then you have to wait for 20 or 30 minutes for it to dry before cover. After about 15 minutes of waiting and staring at the parts I got the idea that it might be a good idea to lay the cloth on the more challenging pieces and get it smoothed out PRIOR to full cure of the glue. Not wet but just a little tacky was the key. This allowed me to smooth all the crazy features with some hold but still move the cloth around to adjust to perfection. Then later after full cure of the Eco Bond I ironed it down (at a reduced heat: I didn't not want any shrinkage since it already fit perfectly). Well that worked great. Look at the wing fairings and imagine how difficult (if not impossible) it would be lay down wrinkle free cloth. But I did. Again: I love this stuff.
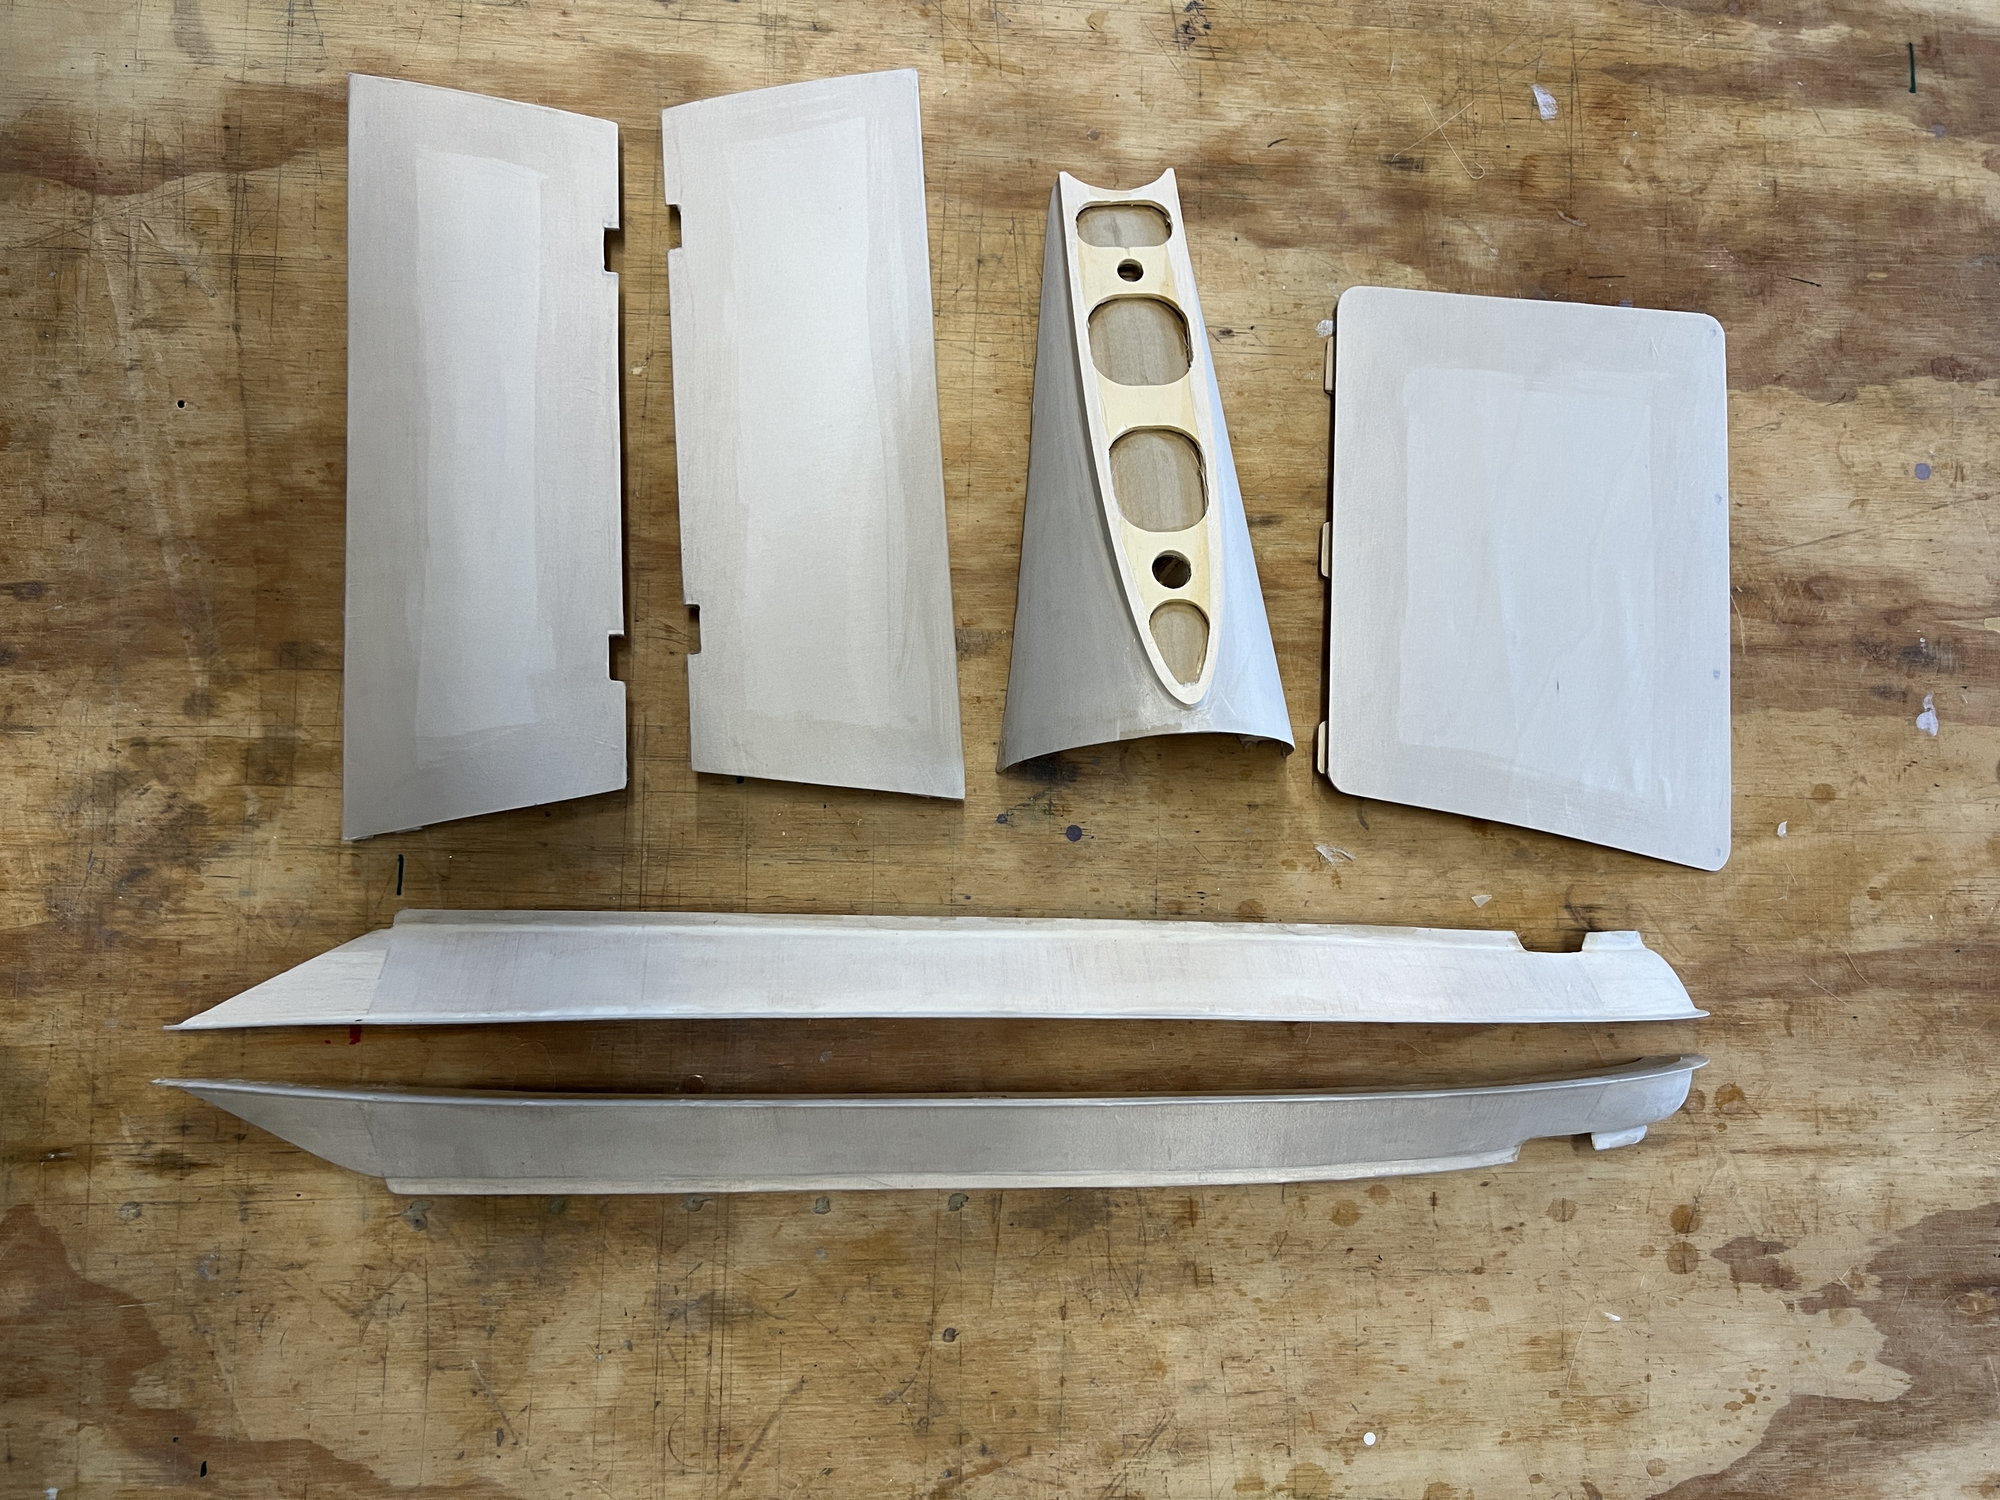
The wing fairings and the tail fairing present some incredible challenges for cover. Yet they came out great. Note: I had not shrunk out the wrinkles you may see. They all came out drum tight.
I brushed on the Ecobond like always. Then you have to wait for 20 or 30 minutes for it to dry before cover. After about 15 minutes of waiting and staring at the parts I got the idea that it might be a good idea to lay the cloth on the more challenging pieces and get it smoothed out PRIOR to full cure of the glue. Not wet but just a little tacky was the key. This allowed me to smooth all the crazy features with some hold but still move the cloth around to adjust to perfection. Then later after full cure of the Eco Bond I ironed it down (at a reduced heat: I didn't not want any shrinkage since it already fit perfectly). Well that worked great. Look at the wing fairings and imagine how difficult (if not impossible) it would be lay down wrinkle free cloth. But I did. Again: I love this stuff.
The wing fairings and the tail fairing present some incredible challenges for cover. Yet they came out great. Note: I had not shrunk out the wrinkles you may see. They all came out drum tight.
Last edited by mitchilito; 12-14-2022 at 02:51 PM.
The following users liked this post:
tmac48 (12-14-2022)
12-16-2022, 04:33 AM
#281
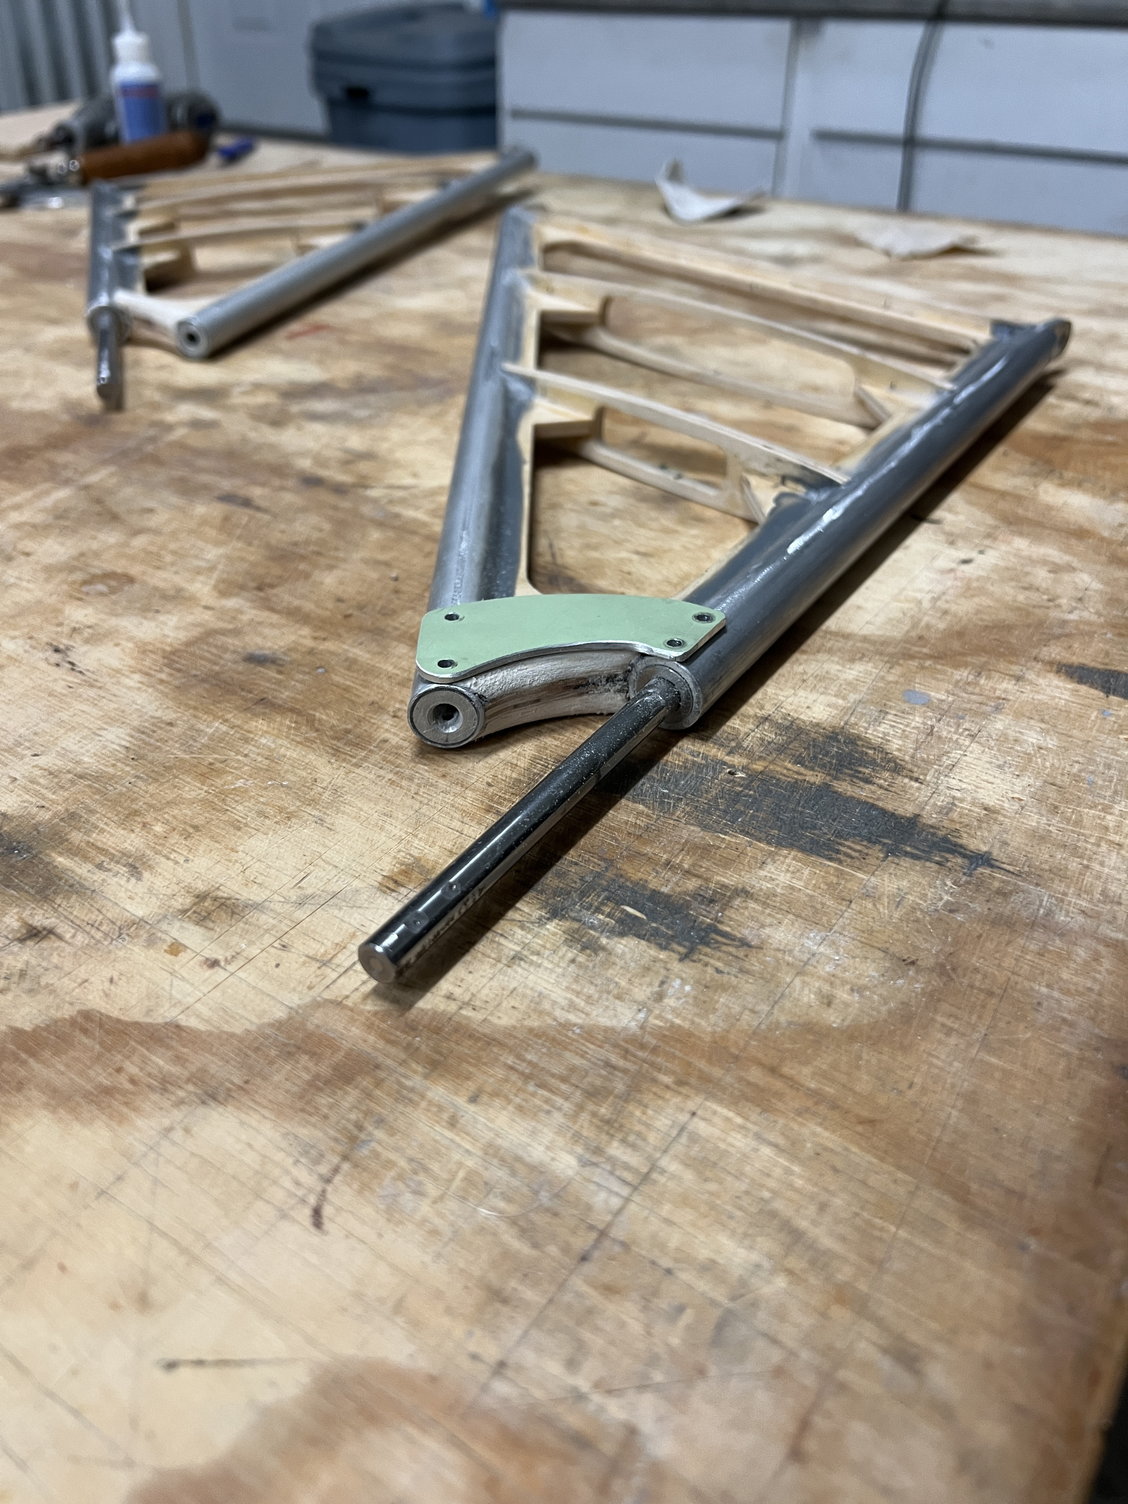
Been working on the landing gear legs to get them ready for cover. As designed they have a weird/useless wooden tab that protrudes from the bottom of the struts. I removed it. I also needed to close up the structure in this area (bottom of the struts) so that grass/dirt etc. doesn't find its way inside. The pictures explain it better:
EDIT: Upon further thought I know that JW carefully designed every aspect of this aircraft so I went back a looked at my landing gear photos. It might be possible that the extended piece of wood on the bottom is some kind of "bump stop" for the gear travel. However, I can't see any problem with the sprung gear shaft bumping against the internal stop so I removed the wooden one. Anyway, remove at your peril. . . .

Removed extra tab below tubes

Balsa filler to close the bottom

EDIT: Upon further thought I know that JW carefully designed every aspect of this aircraft so I went back a looked at my landing gear photos. It might be possible that the extended piece of wood on the bottom is some kind of "bump stop" for the gear travel. However, I can't see any problem with the sprung gear shaft bumping against the internal stop so I removed the wooden one. Anyway, remove at your peril. . . .
Removed extra tab below tubes
Balsa filler to close the bottom
Last edited by mitchilito; 12-16-2022 at 05:51 AM.

The following users liked this post:
Steve (01-15-2023)
The following users liked this post:
mitchilito (12-18-2022)
12-19-2022, 12:30 PM
#284
Mitch,I wonder if you can clarify something for me. I'm a bit concerned about the hand hold on the lower wings, it looks as if I need to add another layer of filler in order to meet the lay of the covering otherwise it appears that there would be a noticeable droop downwards in the covering. The strange thing is that I was supplied with 7 of the cutouts and using 3 per side left one over, was I meant to have more of them?


Last edited by tmac48; 12-19-2022 at 04:34 PM.
12-20-2022, 05:47 AM
#285
Terry, I don't recall needing any more of these filler pieces but YES you need to make sure they rise to the fall line - even if it requires another piece.
***************NEWS FLASH!!!!!!***************
Okay, so I went out to the shop and counted the layers on the bottom wing: one below the plywood former and two above the plywood former PLUS an extra little filler piece on top, just like you're going to need. That extra one you have will make a handy template for the ones you need to cut out: mine looked to be around 2mm thick.
You lucked out cuz I'm actually covering those very hand holds in a few minutes and once covered I'd never be able to see that detail.
EDIT!! As I said I’m actually covering this area right this minute and I happened to discover something I missed. I only paid attention to the TOP of the hand hold fall line. Well my bottom fall line needs approximately 3+mm of fill too. So instead of covering I’m back to cutting balsa!
Last edited by mitchilito; 12-20-2022 at 07:11 AM.
12-20-2022, 11:36 AM
#287
Thanks for your explanation Mitch. Yes agree I'm lucky to have one to use as a template. Do you think that you would be able to post a pic of yours before you cover or have you already covered?


The following users liked this post:
Steve (01-15-2023)
The following users liked this post:
mitchilito (12-20-2022)
12-22-2022, 08:36 AM
#291
Anybody covering one of these giants is going to find out it takes a LOT of cover material. For the record it has taken me 2 "double width" packages and one single width package of Planetex to finish this beast - although I'm waiting for the small package to come in the mail so I can finish the very last thing: my bottom center section.
This pic is the bottom wings. I'm happy with how the hand holds came out.


This pic is the bottom wings. I'm happy with how the hand holds came out.
The following users liked this post:
Steve (01-15-2023)
12-22-2022, 01:20 PM
#292
I would think about mid 23 would be a good time for you to take your trip to Australia. Should have everything ready for you by then!! BYO covering material of course!!!
12-22-2022, 04:57 PM
#293
Ha ha ha ha!!! That’s a good one Terry. Sadly, when I finish covering this monster I may never want to cover again!!
Yes, I’m glad it’s covered but now I have to fill and paint - and winter has arrived with a vengeance. Not a good time for painting unfortunately.
Yes, I’m glad it’s covered but now I have to fill and paint - and winter has arrived with a vengeance. Not a good time for painting unfortunately.
12-22-2022, 09:34 PM
#294
Mitch a good friend of mine owns SOUTHERN ROD AND CUSTOM here in Australia, that is where i paint mine!! You can check him out on FB. Would be the best restoration business world wide.
 01-08-2023, 02:09 AM
#298
Haven't had a lot of time for the Bucker, what with Christmas etc. but I did finally finish the covering process. I'd been waiting for the final package of Planetex to arrive and it finally did. As I've said a million times, I love the stuff.
Bottom center section. On to fill/paint. ..
Bottom center section. On to fill/paint. ..
01-13-2023, 02:18 AM
#299
The first step in finish is filling the weave with Ecobond. It's thinned 33% with water and brushed on with a foam brush. Bright green!
As always with this stuff the almost total lack of fumes/smell is pretty wonderful.
As always with this stuff the almost total lack of fumes/smell is pretty wonderful.
Last edited by mitchilito; 01-13-2023 at 02:20 AM.