BUSA 1/6th scale Sopwith Pup build.
 07-27-2012, 04:33 PM
#26
Senior Member
Join Date: Sep 2003
Location: Bend,
OR
Posts: 1,052
Likes: 0
Received 0 Likes
on
0 Posts
Man, am I jealous. My PUP will be on the shelf for a bit. I started a giant scale P47 and have not made much progress. I'm also in the middle of converting my GP PT17 Stearman to gas so that is taking some time.......oh and trying to fit in some fishing outings with my wife. This winter I might start the PUP......but I've already committed to going ahead on the P47...............too many kits...........too little time......... 
 07-27-2012, 05:10 PM
#27
Senior Member
Thread Starter
Join Date: Sep 2008
Location: Houston, TX
Posts: 2,101
Likes: 0
Received 0 Likes
on
0 Posts
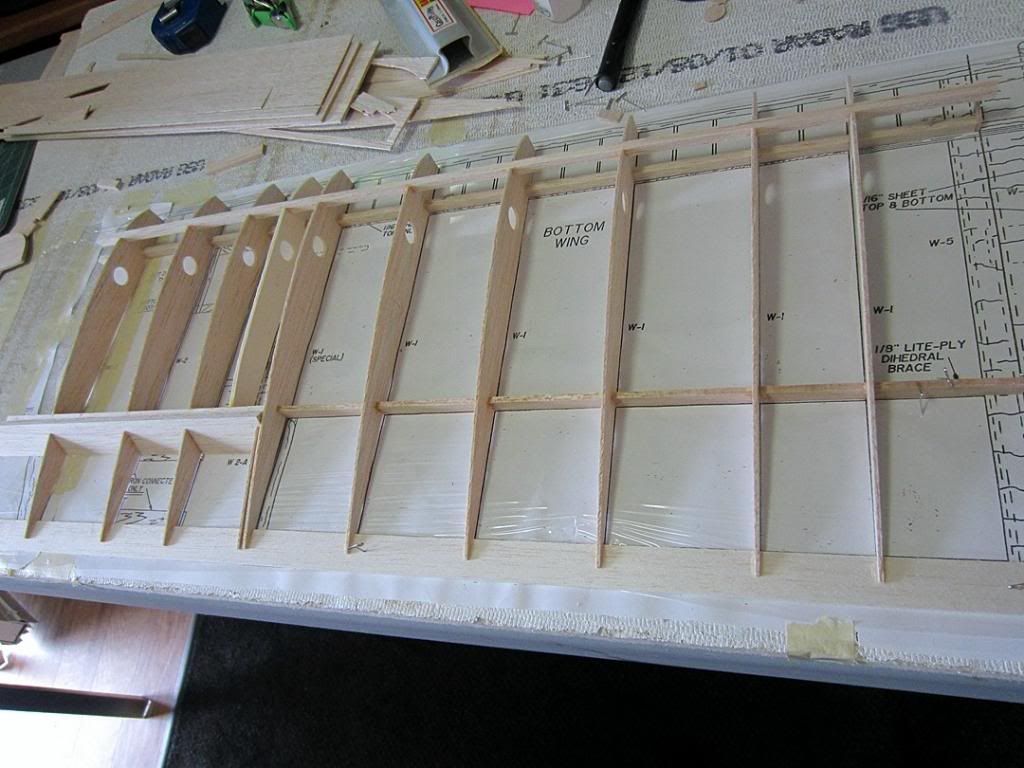
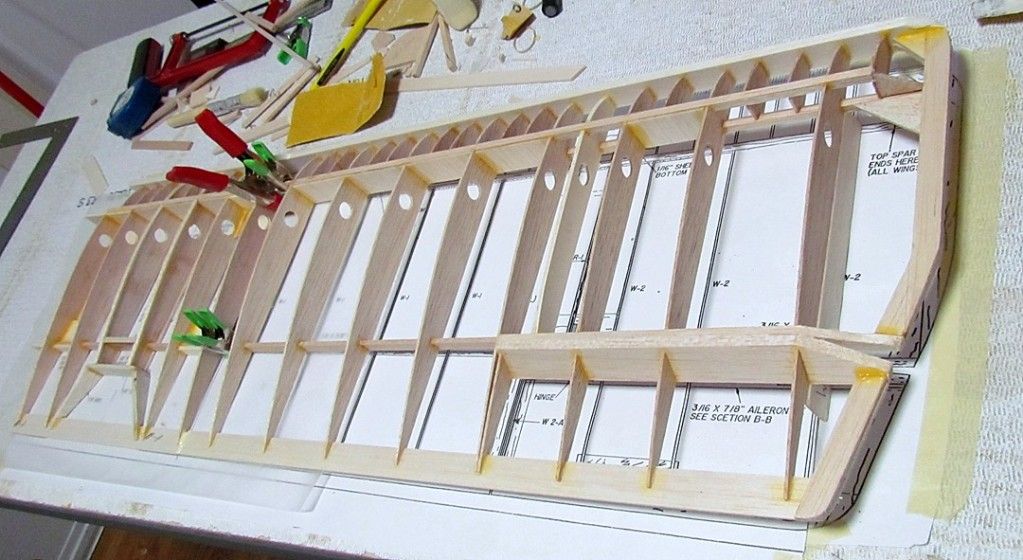
Had a little more confusion after attaching the fake ribs fore of the main spar, the manual say's to attach the "Beveled" 1/4x34" leading edge, and there aint any. [&:] Hope I got this right.
07-27-2012, 06:03 PM
#28
Senior Member
Thread Starter
Join Date: Sep 2008
Location: Houston, TX
Posts: 2,101
Likes: 0
Received 0 Likes
on
0 Posts
ORIGINAL: oldtyme
Man, am I jealous. My PUP will be on the shelf for a bit. I started a giant scale P47 and have not made much progress. I'm also in the middle of converting my GP PT17 Stearman to gas so that is taking some time.......oh and trying to fit in some fishing outings with my wife. This winter I might start the PUP......but I've already committed to going ahead on the P47...............too many kits...........too little time.........
Man, am I jealous. My PUP will be on the shelf for a bit. I started a giant scale P47 and have not made much progress. I'm also in the middle of converting my GP PT17 Stearman to gas so that is taking some time.......oh and trying to fit in some fishing outings with my wife. This winter I might start the PUP......but I've already committed to going ahead on the P47...............too many kits...........too little time.........
After noticing that the main spars are balsa and not the usual hardwoods I am used to, and thinking about it for awhile, I'm trying something I never thought of before. I want to keep this build as light as possible, but I would like to make it sturdier by distributing the loading forces up and down from the joints. I'm tacking everything with thin CA but have been planning on using Titebond as much as I can while using less CA. What I did was slightly thin out some Titebond with some water, added it in places and before/ while it's running, I used a slightly wet paint brush to clean up the goop/runs and distribute it along the joints and spread it along the joining members hopefully strengthening those areas.
 07-27-2012, 07:39 PM
#29
Senior Member
Join Date: Sep 2003
Location: Bend,
OR
Posts: 1,052
Likes: 0
Received 0 Likes
on
0 Posts
ORIGINAL: GaryHarris
I would LOvE to build a P47D. It's on my bucket list. [8D]
After noticing that the main spars are balsa and not the usual hardwoods I am used to, and thinking about it for awhile, I'm trying something I never thought of before. I want to keep this build as light as possible, but I would like to make it sturdier by distributing the loading forces up and down from the joints. I'm tacking everything with thin CA but have been planning on using Titebond as much as I can while using less CA. What I did was slightly thin out some Titebond with some water, added it in places and before/ while it's running, I used a slightly wet paint brush to clean up the goop/runs and distribute it along the joints and spread it along the joining members hopefully strengthening those areas.
ORIGINAL: oldtyme
Man, am I jealous. My PUP will be on the shelf for a bit. I started a giant scale P47 and have not made much progress. I'm also in the middle of converting my GP PT17 Stearman to gas so that is taking some time.......oh and trying to fit in some fishing outings with my wife. This winter I might start the PUP......but I've already committed to going ahead on the P47...............too many kits...........too little time.........
Man, am I jealous. My PUP will be on the shelf for a bit. I started a giant scale P47 and have not made much progress. I'm also in the middle of converting my GP PT17 Stearman to gas so that is taking some time.......oh and trying to fit in some fishing outings with my wife. This winter I might start the PUP......but I've already committed to going ahead on the P47...............too many kits...........too little time.........
After noticing that the main spars are balsa and not the usual hardwoods I am used to, and thinking about it for awhile, I'm trying something I never thought of before. I want to keep this build as light as possible, but I would like to make it sturdier by distributing the loading forces up and down from the joints. I'm tacking everything with thin CA but have been planning on using Titebond as much as I can while using less CA. What I did was slightly thin out some Titebond with some water, added it in places and before/ while it's running, I used a slightly wet paint brush to clean up the goop/runs and distribute it along the joints and spread it along the joining members hopefully strengthening those areas.
07-28-2012, 11:03 AM
#30
Senior Member
Thread Starter
Join Date: Sep 2008
Location: Houston, TX
Posts: 2,101
Likes: 0
Received 0 Likes
on
0 Posts
That's a good idea!
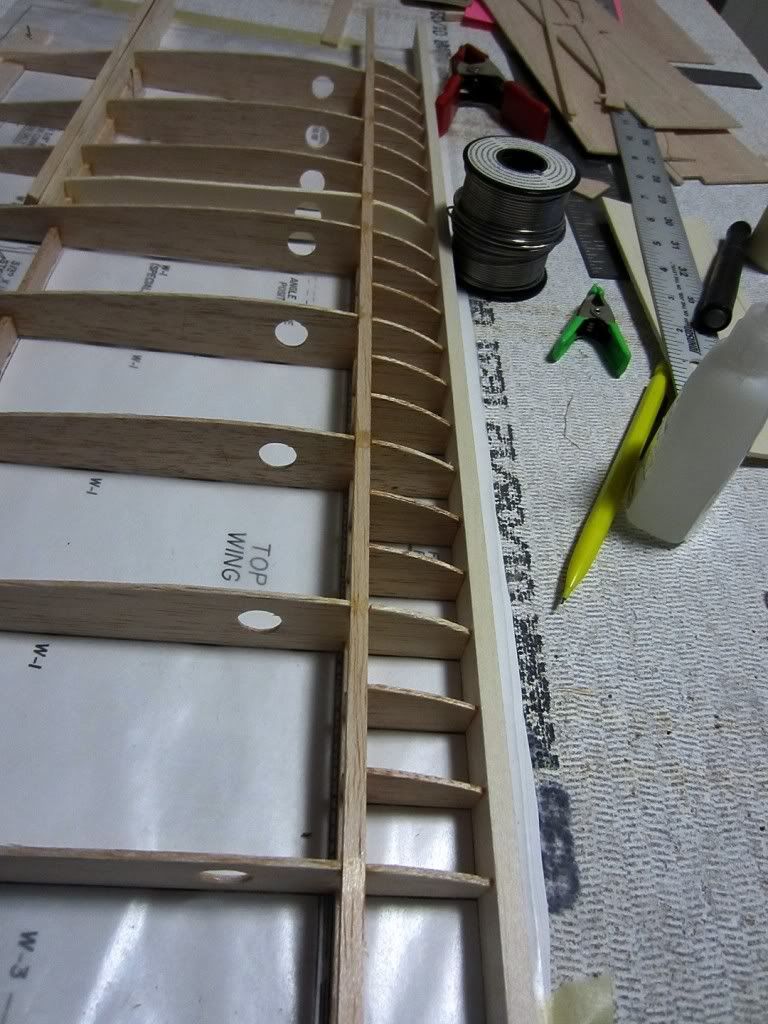
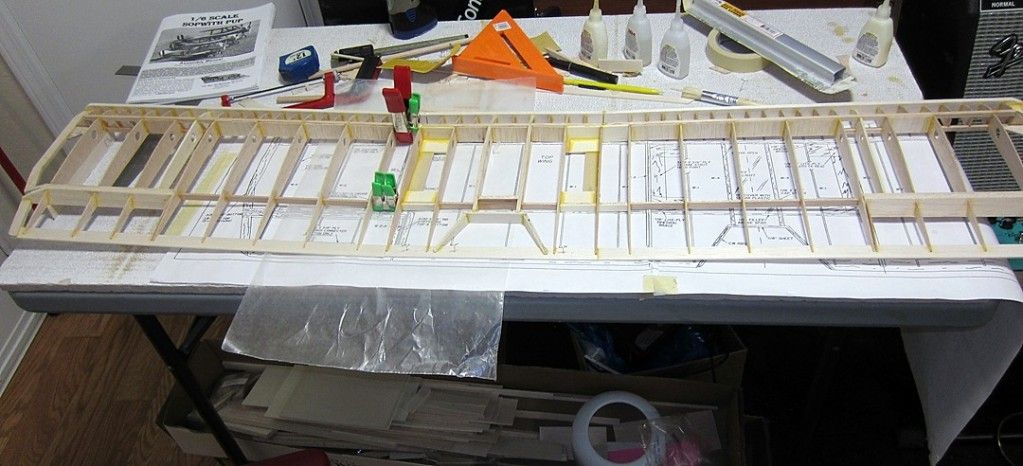
I pulled the top left wing half off the board and almost have the right wing panel framed up, nothing to show really. Just more of the same. I hope to have the top wing built this weekend.
I pulled the top left wing half off the board and almost have the right wing panel framed up, nothing to show really. Just more of the same. I hope to have the top wing built this weekend.
07-31-2012, 03:16 PM
#31
Senior Member
Thread Starter
Join Date: Sep 2008
Location: Houston, TX
Posts: 2,101
Likes: 0
Received 0 Likes
on
0 Posts
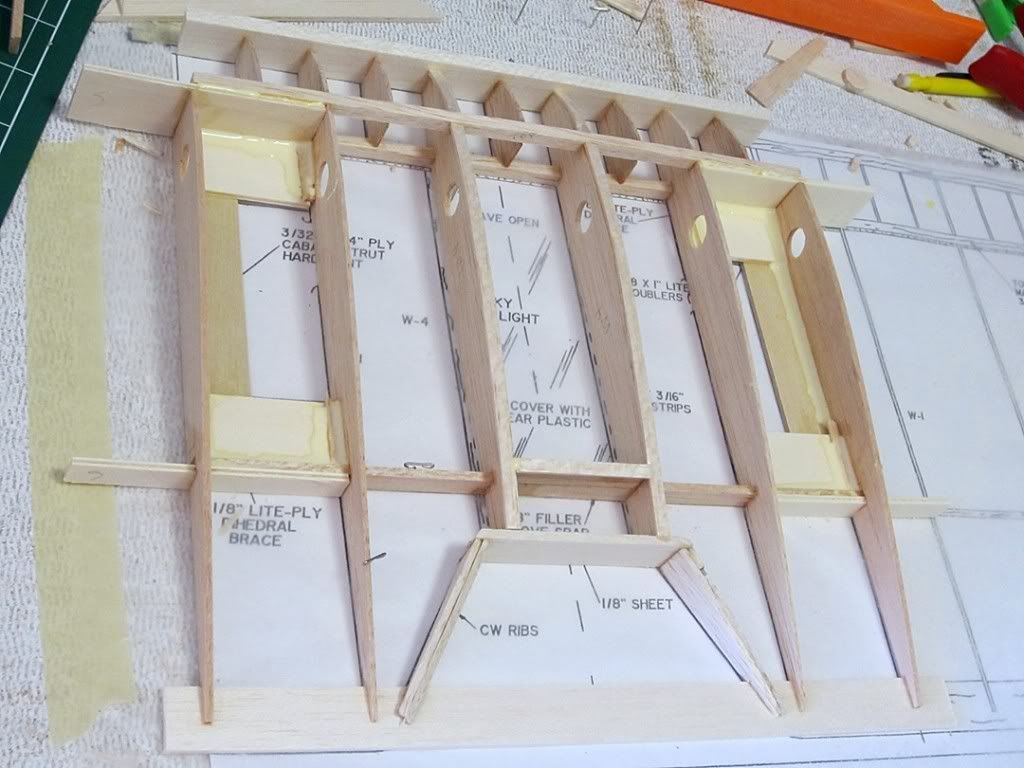
Along with the top port side wing panel framed up, the starboard side is done except for trimming and shaping the wing tips. I decided to wait on this step and move forward to building the top wing center section in order to get in as much "Gluing" in as possible and then go back to shaping/sanding while the Titebond is drying. In the mean time I'm also building a Four Star 60 that I plan on finishing up before the Pup. Summer is building season here and my goal is to have the 4 star ready by October when it cools down enough to fly here. Since I haven't been flying for the past two years, I have an Alpha 40 with the Saito 56 I plan on using on the Pup in there now, but I'm going to fly the trainer for awhile to get back in flying shape, then move to the 4* for awhile before I even try flying this Pup. This build is much too much work to hurry through just to crash being stupid.
I'm looking for suggestions. Although I am thinking of somewhat of a "Scale" looking plane, I want to keep it as "Flyer Friendly" as possible. My club has a paved strip that is somewhat narrow, so I will be using a tail wheel instead of a tail skid. Any suggestions on how to pull this off? A pull/pull system can be done, but for a 1/6th scale plane with a tail wheel? I'm thinking of keeping as simple as possible while expediting the build in order to reach my goal of having it done in the next 4months. Any suggestions on near scale looking control horns etc?
As far as covering, I will definitely be using antique Solartex, but I am unsure of what scheme to use. I notice some guys use olive drab on the top sides of their wings, but I kind of like the idea of being able to see through the framing with the semi transparent covering. I was also thinking of using stickers for the markings, but wasn't planning on clear coating the covering. I can't paint work a crap, but if I use stickers, I would probably have to clear coat the covering right? Or I could hire one of the local rc car guys to do my painting for me. I'm wide open for suggestions.
Thanks guys.
07-31-2012, 03:26 PM
#32
Senior Member
Join Date: Sep 2003
Location: Bend,
OR
Posts: 1,052
Likes: 0
Received 0 Likes
on
0 Posts
Gary,
We also have a paved strip and anyone that flys a WWI bird does it off the pavement and on our dirt shoulders. Seems these short coupled WWI birds don't like to fly off pavement. I cannot say first person but I've been told that several times. This will be my 2nd bi-plane, the 1st being a GP Stearman that I am in the middle of. I will keep the skid on my PUP
We also have a paved strip and anyone that flys a WWI bird does it off the pavement and on our dirt shoulders. Seems these short coupled WWI birds don't like to fly off pavement. I cannot say first person but I've been told that several times. This will be my 2nd bi-plane, the 1st being a GP Stearman that I am in the middle of. I will keep the skid on my PUP
07-31-2012, 03:36 PM
#33
Senior Member
Thread Starter
Join Date: Sep 2008
Location: Houston, TX
Posts: 2,101
Likes: 0
Received 0 Likes
on
0 Posts
I'm gonna use a tail wheel Andy. I want as much control as possible with my first warbird. I have no problem on the ground with tail draggers like 4 *'s, but with the wind here and all that, I gotta have a tail wheel at least until I become a much better pilot.
07-31-2012, 03:50 PM
#34
Senior Member
Join Date: Sep 2003
Location: Bend,
OR
Posts: 1,052
Likes: 0
Received 0 Likes
on
0 Posts
ORIGINAL: GaryHarris
I'm gonna use a tail wheel Andy. I want as much control as possible with my first warbird. I have no problem on the ground with tail draggers like 4 *'s, but with the wind here and all that, I gotta have a tail wheel at least until I become a much better pilot.
I'm gonna use a tail wheel Andy. I want as much control as possible with my first warbird. I have no problem on the ground with tail draggers like 4 *'s, but with the wind here and all that, I gotta have a tail wheel at least until I become a much better pilot.
 08-09-2012, 10:38 AM
#35
Senior Member
Thread Starter
Join Date: Sep 2008
Location: Houston, TX
Posts: 2,101
Likes: 0
Received 0 Likes
on
0 Posts
I got side tracked a bit playing with other toys, but I'm back on the board. I finished the top wings center and am now doing some rough sanding and gluing up the starboard wing half to the center section. Not much to report but some items to note. This is not a beginners kit.  There things like gussets and stuff that I haven't found yet that are shown in the instruction manual photos, but may not be found in the instructions or on the drawings. This is not a kit to be built in a hurry and at least for me, it's a good idea to step away from the board and come back later. I'm seeing things I missed before and I have read the manual forwards and backwards before starting. Even boo-boo'ed here and there. [X(]
There things like gussets and stuff that I haven't found yet that are shown in the instruction manual photos, but may not be found in the instructions or on the drawings. This is not a kit to be built in a hurry and at least for me, it's a good idea to step away from the board and come back later. I'm seeing things I missed before and I have read the manual forwards and backwards before starting. Even boo-boo'ed here and there. [X(]
08-09-2012, 01:54 PM
#36
Senior Member
Join Date: Sep 2003
Location: Bend,
OR
Posts: 1,052
Likes: 0
Received 0 Likes
on
0 Posts
Gary,
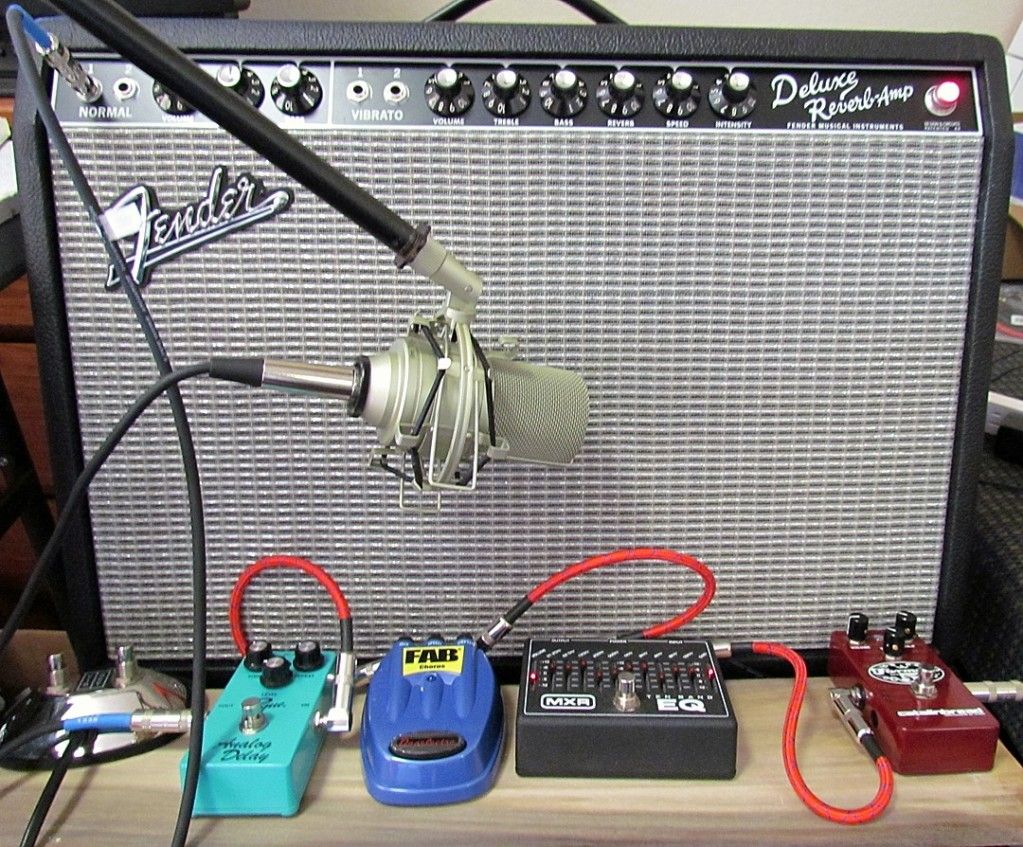
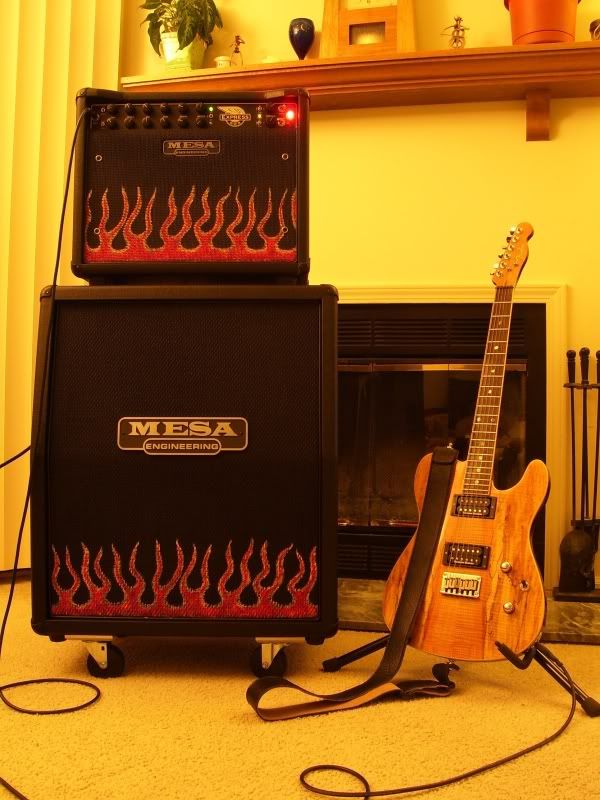
I used to have a 1963 Bassman and a 1967 Bandmaster with a 1963 Reverb and a 1962 Strat. Now all I have is a Frontman 212 and a Squire Affinity Tele and a pedal board...............oh yeah...........back to the building.
I used to have a 1963 Bassman and a 1967 Bandmaster with a 1963 Reverb and a 1962 Strat. Now all I have is a Frontman 212 and a Squire Affinity Tele and a pedal board...............oh yeah...........back to the building.
08-10-2012, 05:12 AM
#38

My Feedback: (2)
Join Date: Jun 2003
Location: Fairport, NY,
Posts: 775
Likes: 0
Received 0 Likes
on
0 Posts
Great looking job so far. I am sure you will enjoy the outcome. I've built BUSA's 1/4 versions of the Pup and DR1. (Both builds are on RCU.) I have a couple of suggestions..
Take it easy on the Titebond. A modest amount is all that is needed for a concrete bond. Just enough to make the smallest fillet at the joint is all that is necessary. The rest is pretty much just dead weight and it can add up. (I build with CA now but have built far more models with TB in the past.)
Don't shy away from a tail skid. When I first built my Pup I thought that it would act as practically an anchor and prevent the tail from turning. So I built it with a free wheeling tail wheel. Completely unnecessary. The tail skid works just fine. I have since put in a scale looking skid. It provides just the right amount of drag to keep the tail where you want it. If the grass is a bit taller than typical, just a bit of down elevator and a blip of the motor will lighten the tail up just fine and let you swing the tail around. On pavement, the skid will slide around more than a tail wheel but it isn't a problem unless you have a strong crosswind. It's good rudder practice. Once you're a few feet on our takeoff roll, it won't matter anyway. That tail will be up very quickly and the skid (or wheel) won't matter.
As for pull-pull vs. conventional, I'd recommend a conventional pushrod setup. It is easier to install, especially in a smaller plane, and very reliable. But you don't have to sacrifice scale looks. Like I did on my Pup and DR1, I added "faux" pull-pull. For one side of the rudder, the underside of the elevator, and the underside of the ailerons, I used the pushrod linkages. Where the linkages were visible outside of the plane, I used carbon fiber rods with the clevises epoxied onto the ends. Sticks or Golden-Rod was used inside of the plane.
For the other side of the control surfaces, I also used carbon fiber rods but they just ended in the fuselage (or wings). So when the pushrods moved the surfaces, the other rods just moved in and out giving the appearance of pull-pull. The rods that do the actual control are thicker than cable but the other rods can be as thin as you like.
Hope this helps. Keep up with the good work.
08-11-2012, 08:12 AM
#39
Senior Member
Thread Starter
Join Date: Sep 2008
Location: Houston, TX
Posts: 2,101
Likes: 0
Received 0 Likes
on
0 Posts
Thanks Chevelle. Good advice.
The reason I'm going so heavy with the Titebond is because this wing has a lot of flex and I want to distribute the bending and torsional loads as far away as I can away from the joints.
The reason I'm going so heavy with the Titebond is because this wing has a lot of flex and I want to distribute the bending and torsional loads as far away as I can away from the joints.
08-11-2012, 08:33 AM
#40
My Feedback: (2)
Join Date: Jun 2003
Location: Fairport, NY,
Posts: 775
Likes: 0
Received 0 Likes
on
0 Posts
Your thoughts on the Tightbond won't hurt anything other than add some additional weight but I'm not sure you will accomplish your goal. A good glue joint is stronger than the wood. When I have, shall we say, a mishap, lots of sticks get broken and not at the joints.  About the torsional issue, again, probably not an issue. When assembled with the cabanes and outer struts, it will be rock solid.
I did a project of the 1910 Curtiss Hudson Flier. (There are threads here on RCU.) I did the CAD work from old photographs and textual descriptions of the plane. I did the design in full scale and worked with the Glenn Curtiss Museum in Hammondsport to build and fly the full scale replica. I then built a 1/4 version. As I was building the model, I was very concerned about the flexing of the wing(s). This was particularly a concern because the wings were not one piece. They were panels attached together with brackets. So there was no spar, leading or trailing edge that went from one end of the wing to the other. They were also very thin (1/4") and under cambered.
I was delighted and very impressed at how rigid the end result came out. It was absolutely rock solid. The 8 foot wingspan plane could be lifted from each wing tip and the wings remained straight as a board. Now there was a lot of wire bracing but it was amazingly strong and stiff.
My point is that even though you wont have to do a lot of rigging with the 1/6 scale version of the Pup, it will be very solid and not twist. I'm sure that it will fly like a dream.
But again, the Tight Bond won't hurt anything so carry on if that gives you piece of mind.
Best of luck.
About the torsional issue, again, probably not an issue. When assembled with the cabanes and outer struts, it will be rock solid.I did a project of the 1910 Curtiss Hudson Flier. (There are threads here on RCU.) I did the CAD work from old photographs and textual descriptions of the plane. I did the design in full scale and worked with the Glenn Curtiss Museum in Hammondsport to build and fly the full scale replica. I then built a 1/4 version. As I was building the model, I was very concerned about the flexing of the wing(s). This was particularly a concern because the wings were not one piece. They were panels attached together with brackets. So there was no spar, leading or trailing edge that went from one end of the wing to the other. They were also very thin (1/4") and under cambered.
I was delighted and very impressed at how rigid the end result came out. It was absolutely rock solid. The 8 foot wingspan plane could be lifted from each wing tip and the wings remained straight as a board. Now there was a lot of wire bracing but it was amazingly strong and stiff.
My point is that even though you wont have to do a lot of rigging with the 1/6 scale version of the Pup, it will be very solid and not twist. I'm sure that it will fly like a dream.
But again, the Tight Bond won't hurt anything so carry on if that gives you piece of mind.
Best of luck.
08-11-2012, 09:12 AM
#41
Senior Member
Thread Starter
Join Date: Sep 2008
Location: Houston, TX
Posts: 2,101
Likes: 0
Received 0 Likes
on
0 Posts
Ha! I never thought about the cabanes adding strength. This is my first bipe and I didn't think about that. I was wondering why the main spars are balsa and why the wing is so "Flexy"!
Thanks man.
Thanks man.
08-12-2012, 07:48 AM
#42
Senior Member
Thread Starter
Join Date: Sep 2008
Location: Houston, TX
Posts: 2,101
Likes: 0
Received 0 Likes
on
0 Posts
Just joined the left top wing half onto the center section using Titebod. After that drys I have a few odds and ends yet to do before final sanding and as much as I hate sanding, Ill start the lower wing in order to keep my interest and while that glue is drying, Ill shape and sand the top wing close to it's final shape. I'm not going to try and totally finish sanding the wings until I'm ready to check the wings incidence.
 12-12-2012, 07:25 AM
#45
My Feedback: (17)
Join Date: Apr 2010
Location: New Market, MD
Posts: 190
Likes: 0
Received 0 Likes
on
0 Posts
OK, I'm now following this build. I do one winter build each year and the Balsa 1/6 Sopwith Pup was this year's selection. Looking forward to picking up some pointers as this will be my first Balsa kit. Last winter I built the Sig 1/5 Cub. It came out "heavy" so I took special note of the comments above about the use of wood glues (I used Gorilla Wood Glue). Guess I need to lighten up a bit. Also I added a different tail wheel assembly than the one provided by Sig and that added to the tail heavy issue (which was solved by switching from a Saito 72 to a Saito 82, amazing how spending more money always helps).Anyway, good luck with the build. I'll be watching closely and will be about a month behind you.<br type="_moz" />
12-12-2012, 09:49 AM
#46
Senior Member
Thread Starter
Join Date: Sep 2008
Location: Houston, TX
Posts: 2,101
Likes: 0
Received 0 Likes
on
0 Posts
Ill most likely get this back on the board tonight. I had pulled it off to try and finish up my 4*60 but I'm tired of sanding and ready to start building again.
12-12-2012, 12:59 PM
#47
My Feedback: (17)
Join Date: Apr 2010
Location: New Market, MD
Posts: 190
Likes: 0
Received 0 Likes
on
0 Posts
You're supposed to sand these kits? No wonder mine always come out on the heavy side. No really, if I could just do the building and have someone else do the sanding my life would be perfect. The sanding, sanding, sanding is the part I hate most. Work, work, work and stand back, look . . . and nothing has changed! MORE SANDING ! ! !
12-13-2012, 02:28 PM
#48
Senior Member
Thread Starter
Join Date: Sep 2008
Location: Houston, TX
Posts: 2,101
Likes: 0
Received 0 Likes
on
0 Posts
ORIGINAL: Homer712
You're supposed to sand these kits? No wonder mine always come out on the heavy side. No really, if I could just do the building and have someone else do the sanding my life would be perfect. The sanding, sanding, sanding is the part I hate most. Work, work, work and stand back, look . . . and nothing has changed! MORE SANDING ! ! !
You're supposed to sand these kits? No wonder mine always come out on the heavy side. No really, if I could just do the building and have someone else do the sanding my life would be perfect. The sanding, sanding, sanding is the part I hate most. Work, work, work and stand back, look . . . and nothing has changed! MORE SANDING ! ! !
12-13-2012, 03:54 PM
#49
Senior Member
Thread Starter
Join Date: Sep 2008
Location: Houston, TX
Posts: 2,101
Likes: 0
Received 0 Likes
on
0 Posts
Getting the board set up for building the bottom wing and have a piece of advice for the newer builders and I can't believe I didn't do this. Once your settled in and identified all those W1 and so on ribs, mark them ALL! And don't wait several months, or in this case a year before moving on. [>:]
I could of saved an hour or two of build time doing not only that, but bundling and marking all the spars etc.
Another suggestion. When you buy wax paper, but it by the case! I'm stuck with plastic.
[:'(]

I could of saved an hour or two of build time doing not only that, but bundling and marking all the spars etc.
Another suggestion. When you buy wax paper, but it by the case! I'm stuck with plastic.
[:'(]