


Build/Discussion Thread: Elite Aerosport Shockwave
 01-01-2019, 03:30 PM
#1

Thread Starter
My Feedback: (11)

Join Date: Apr 2002
Location: Bowie,
MD
Posts: 148
Likes: 0
Received 0 Likes
on
0 Posts
Hello everyone!
I have been in the hobby for 20+ years but have only built pylon racers, IMAC/freestyle airplanes, and general sport planes, but never a jet. Well...now is the time, and I figured I'd try to document the journey and solicit help along the way from the experts here in this forum.
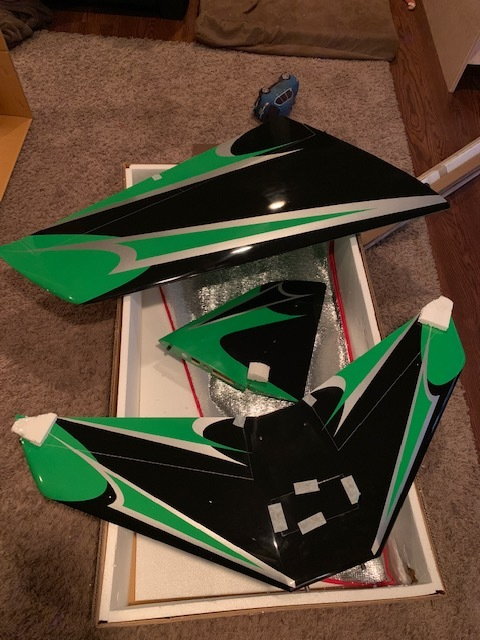
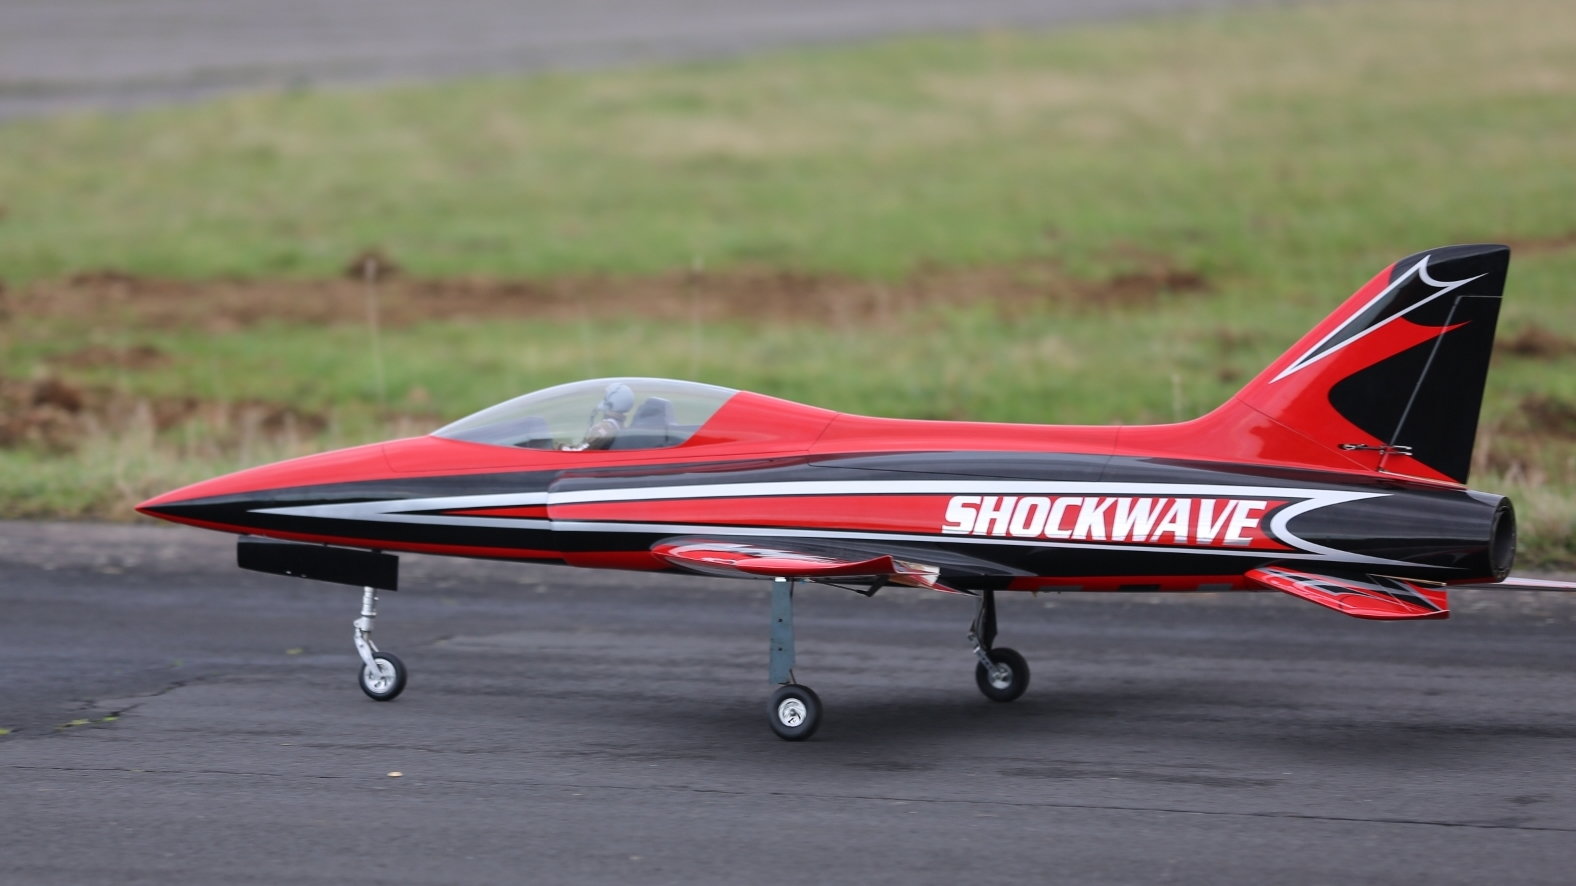
So without further ado, here is the jet:
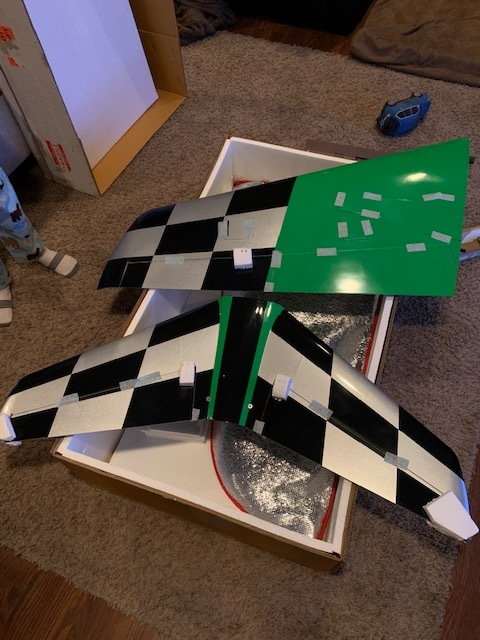
Wing bottom
Wing Top
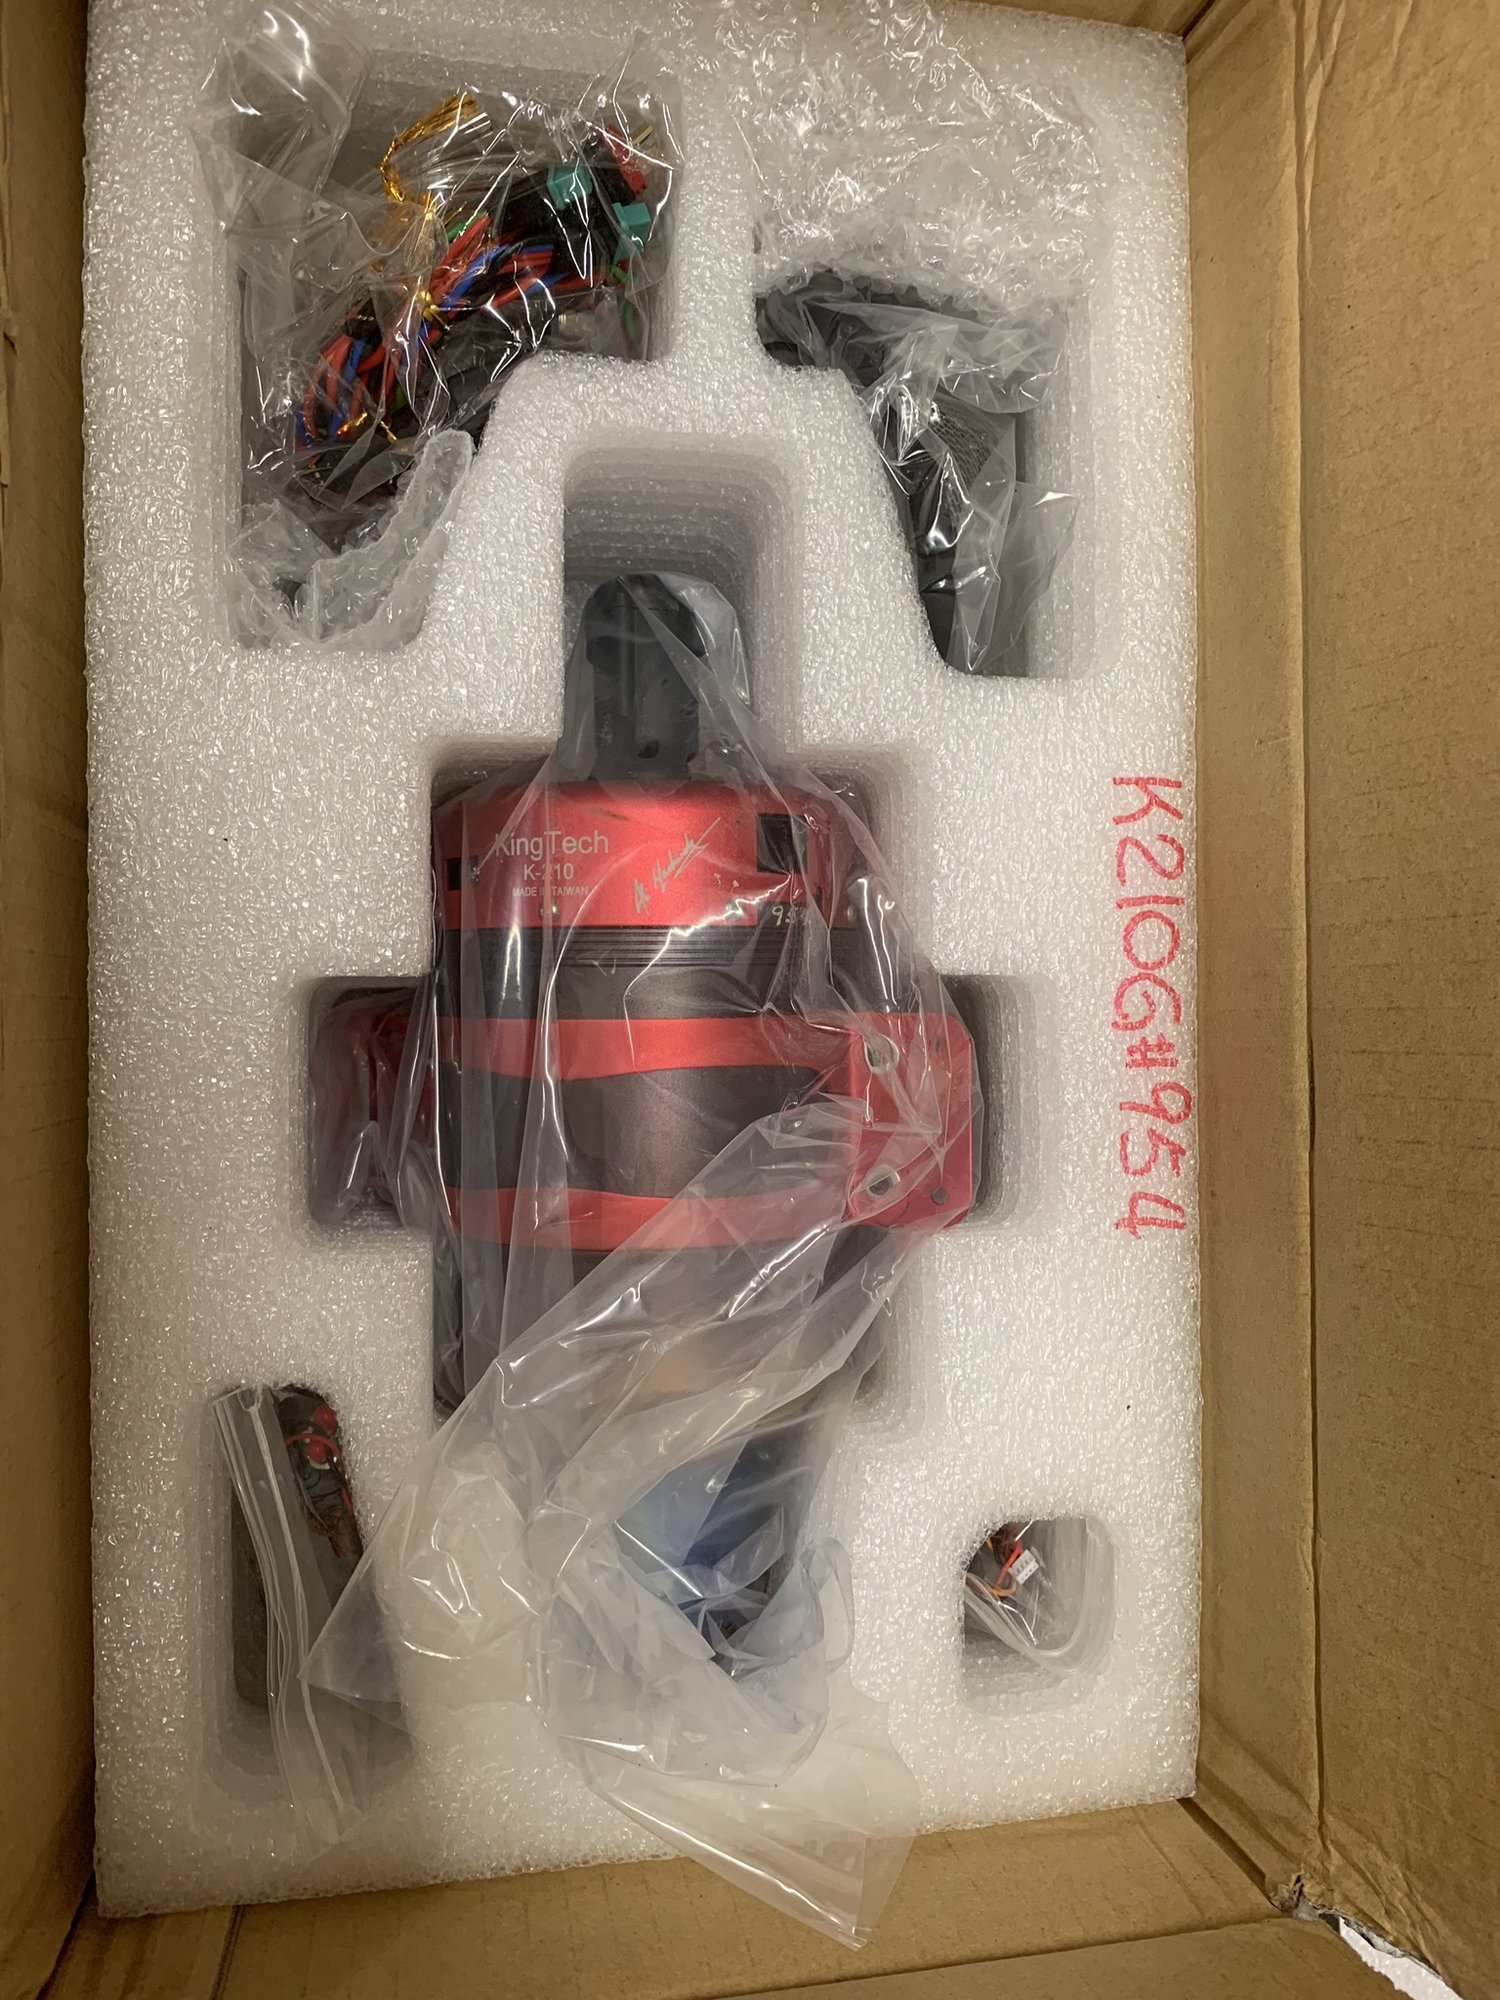
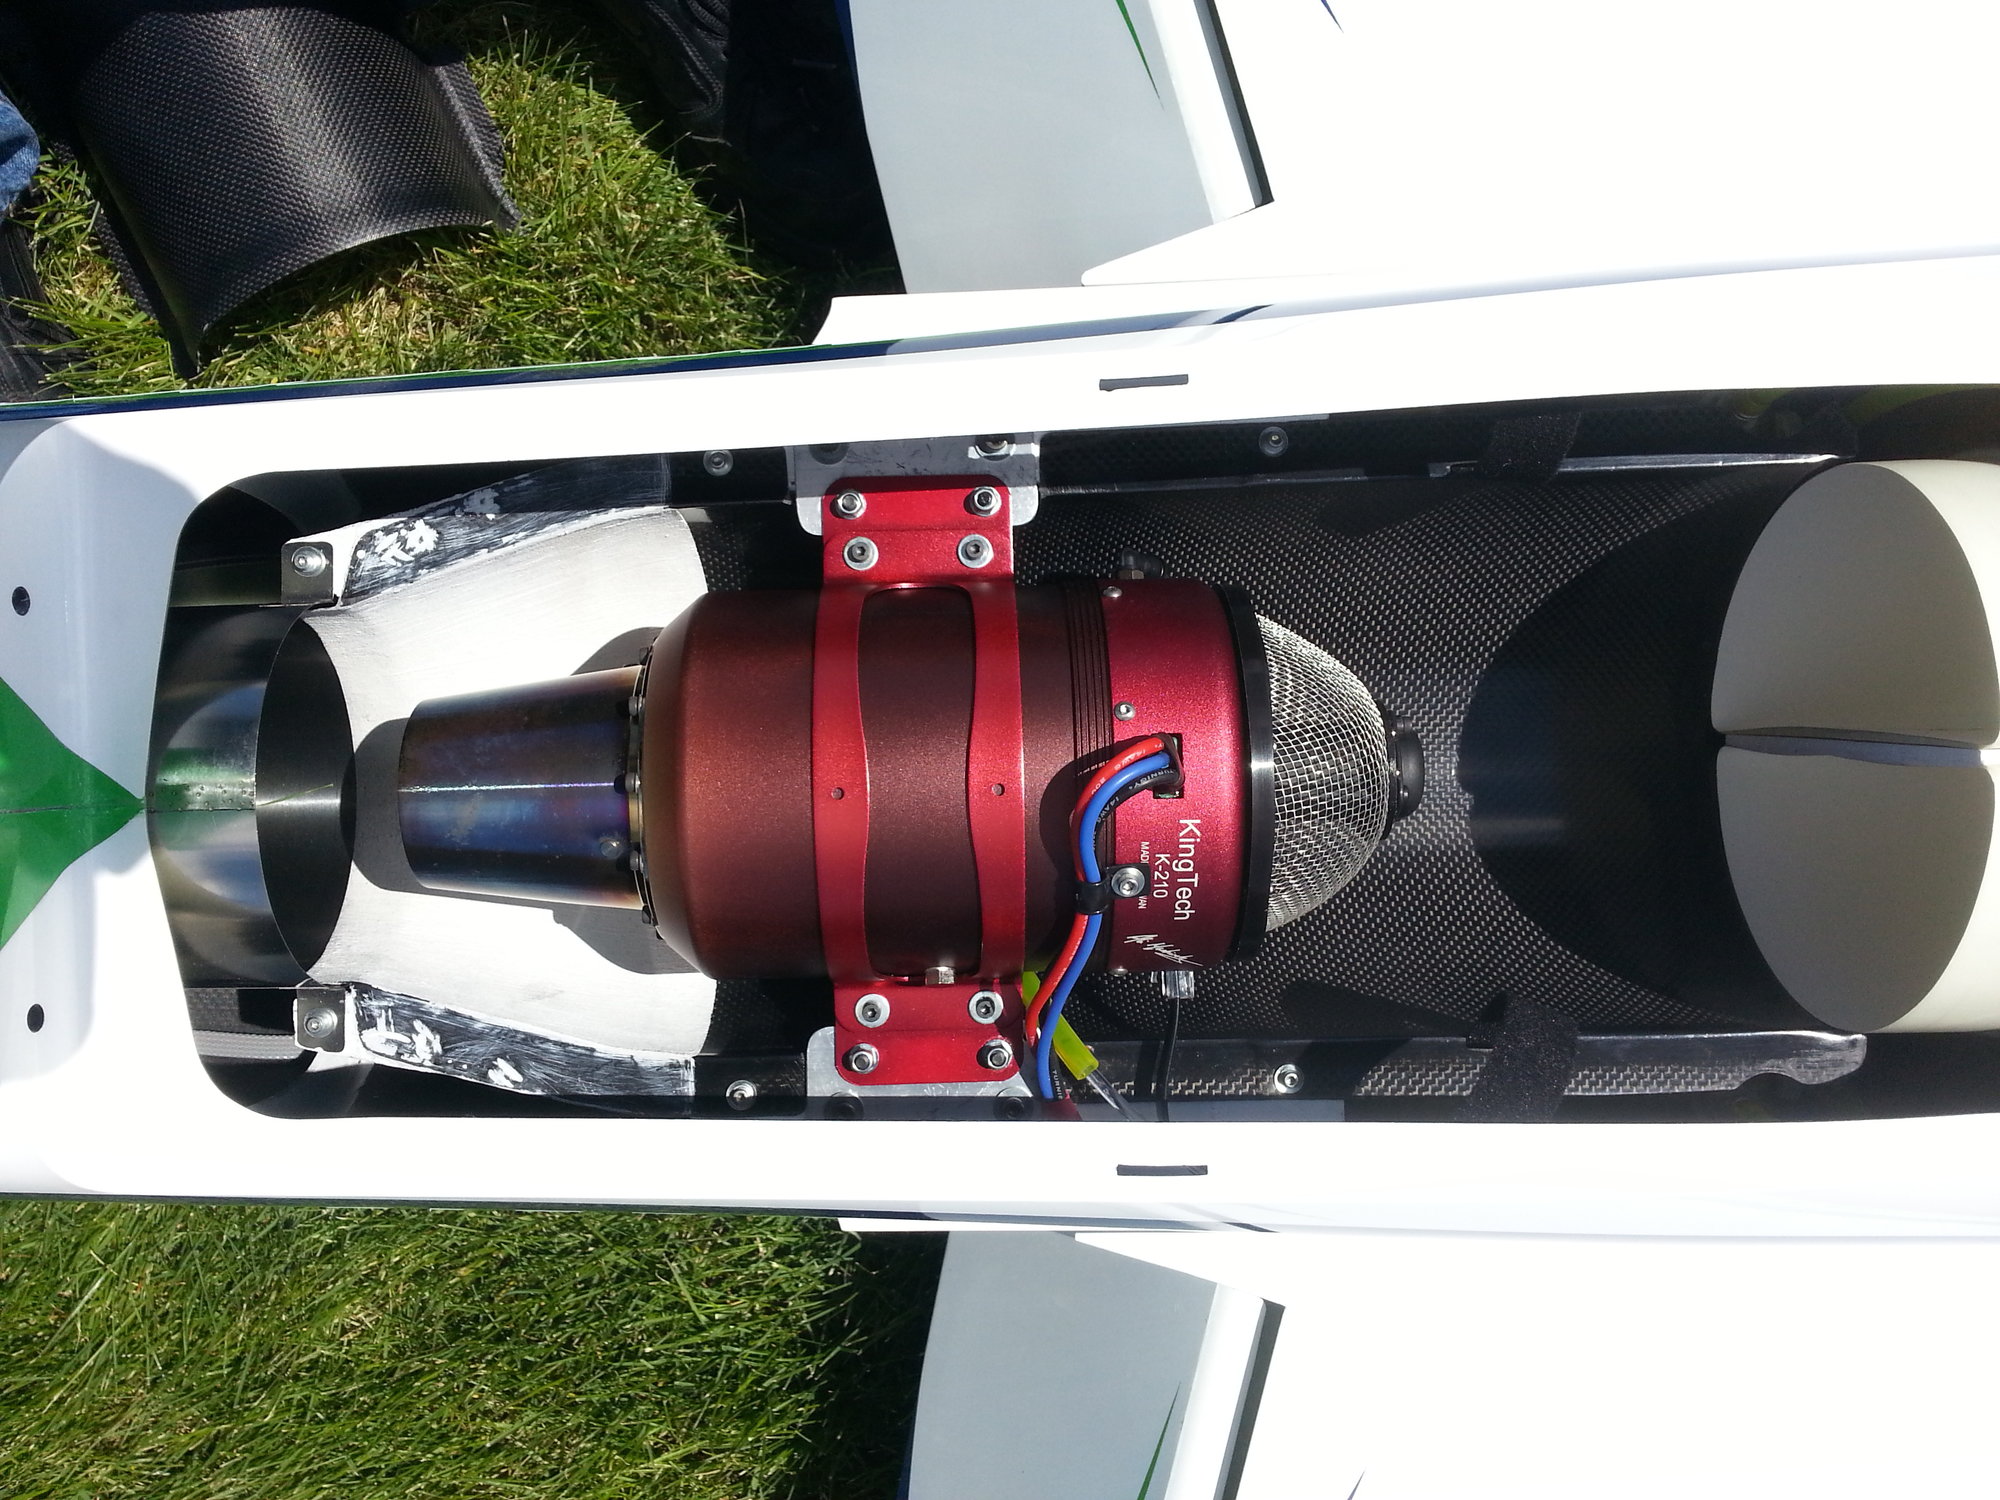
KingTech K210G2
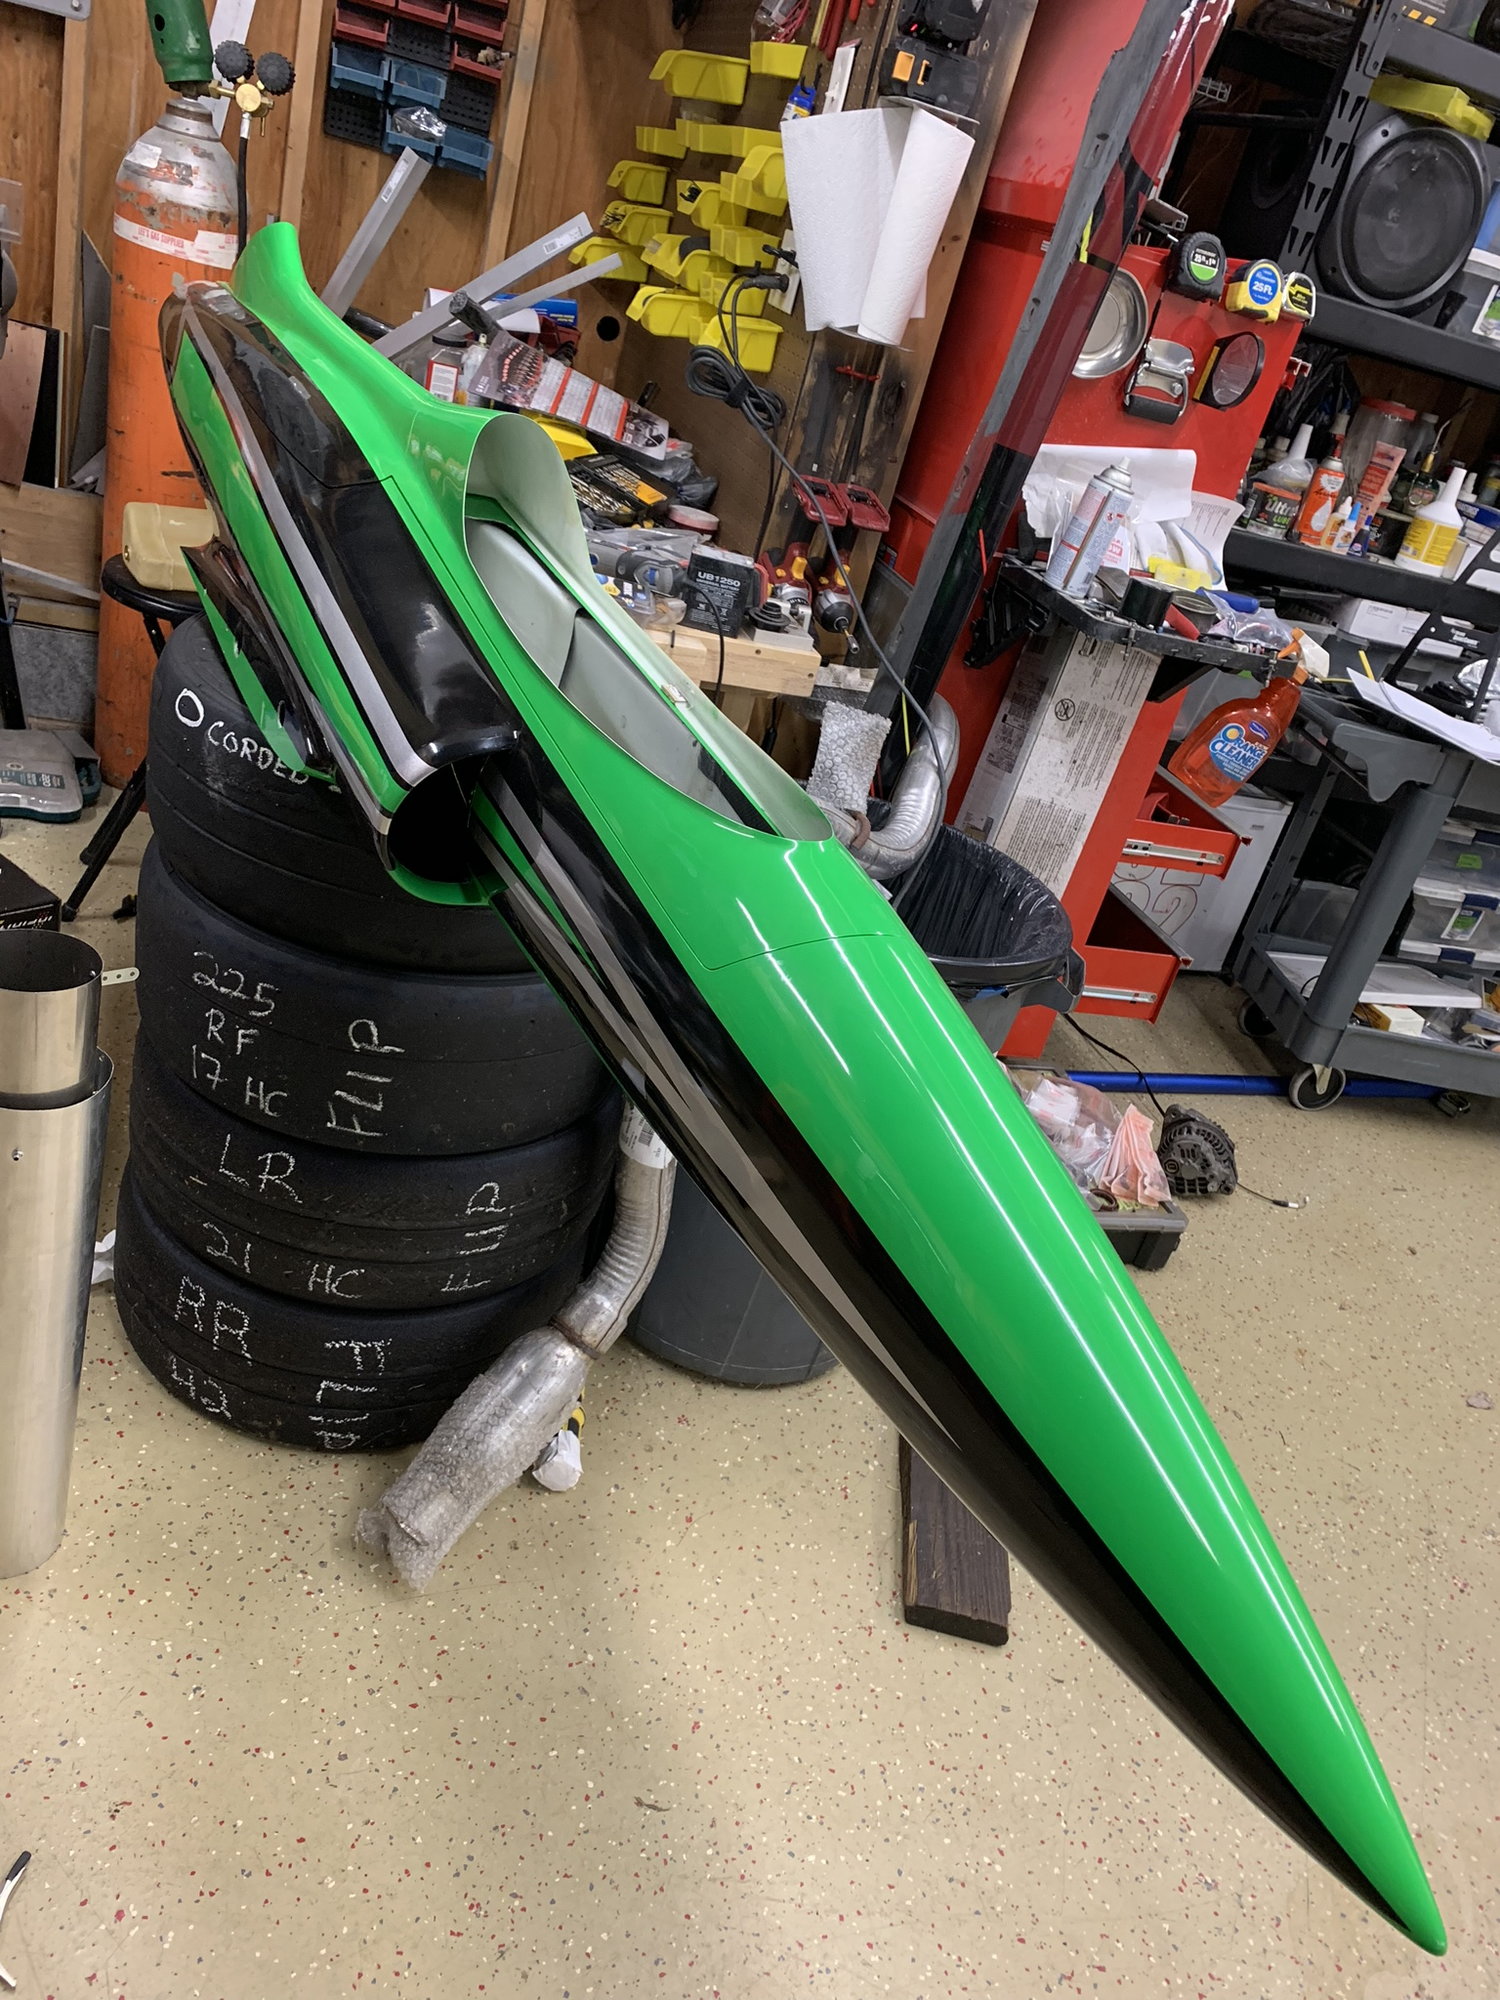
Fuselage
Turbine bay
I have been in the hobby for 20+ years but have only built pylon racers, IMAC/freestyle airplanes, and general sport planes, but never a jet. Well...now is the time, and I figured I'd try to document the journey and solicit help along the way from the experts here in this forum.
So without further ado, here is the jet:
Wing bottom
Wing Top
KingTech K210G2
Fuselage
Turbine bay
 01-01-2019, 04:26 PM
#2
Thread Starter
My Feedback: (11)
Join Date: Apr 2002
Location: Bowie,
MD
Posts: 148
Likes: 0
Received 0 Likes
on
0 Posts
Alright, working to get the turbine bypass in, and already my lack of jet knowledge is hurting me...
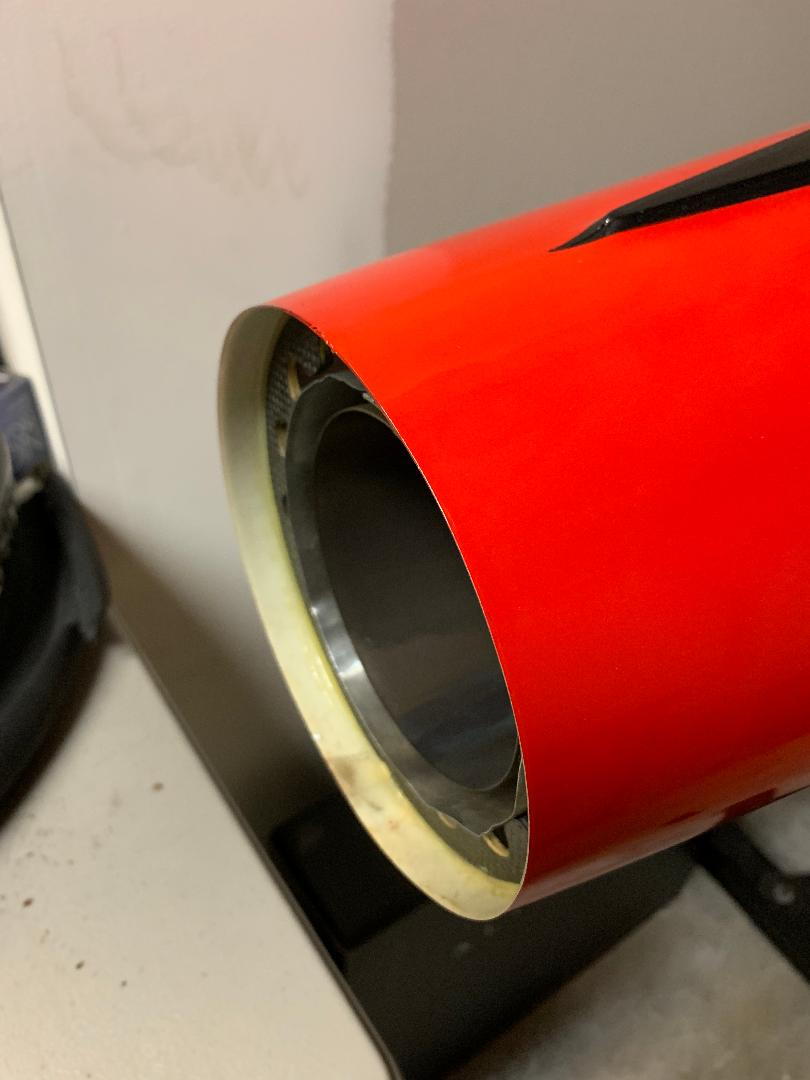
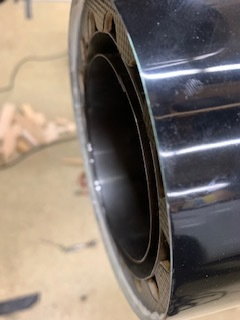
How does the bypass mount relative to the exhaust pipe? They seem to be the same diameter. Is the exhaust pipe supposed to fit inside the carbon bypass?
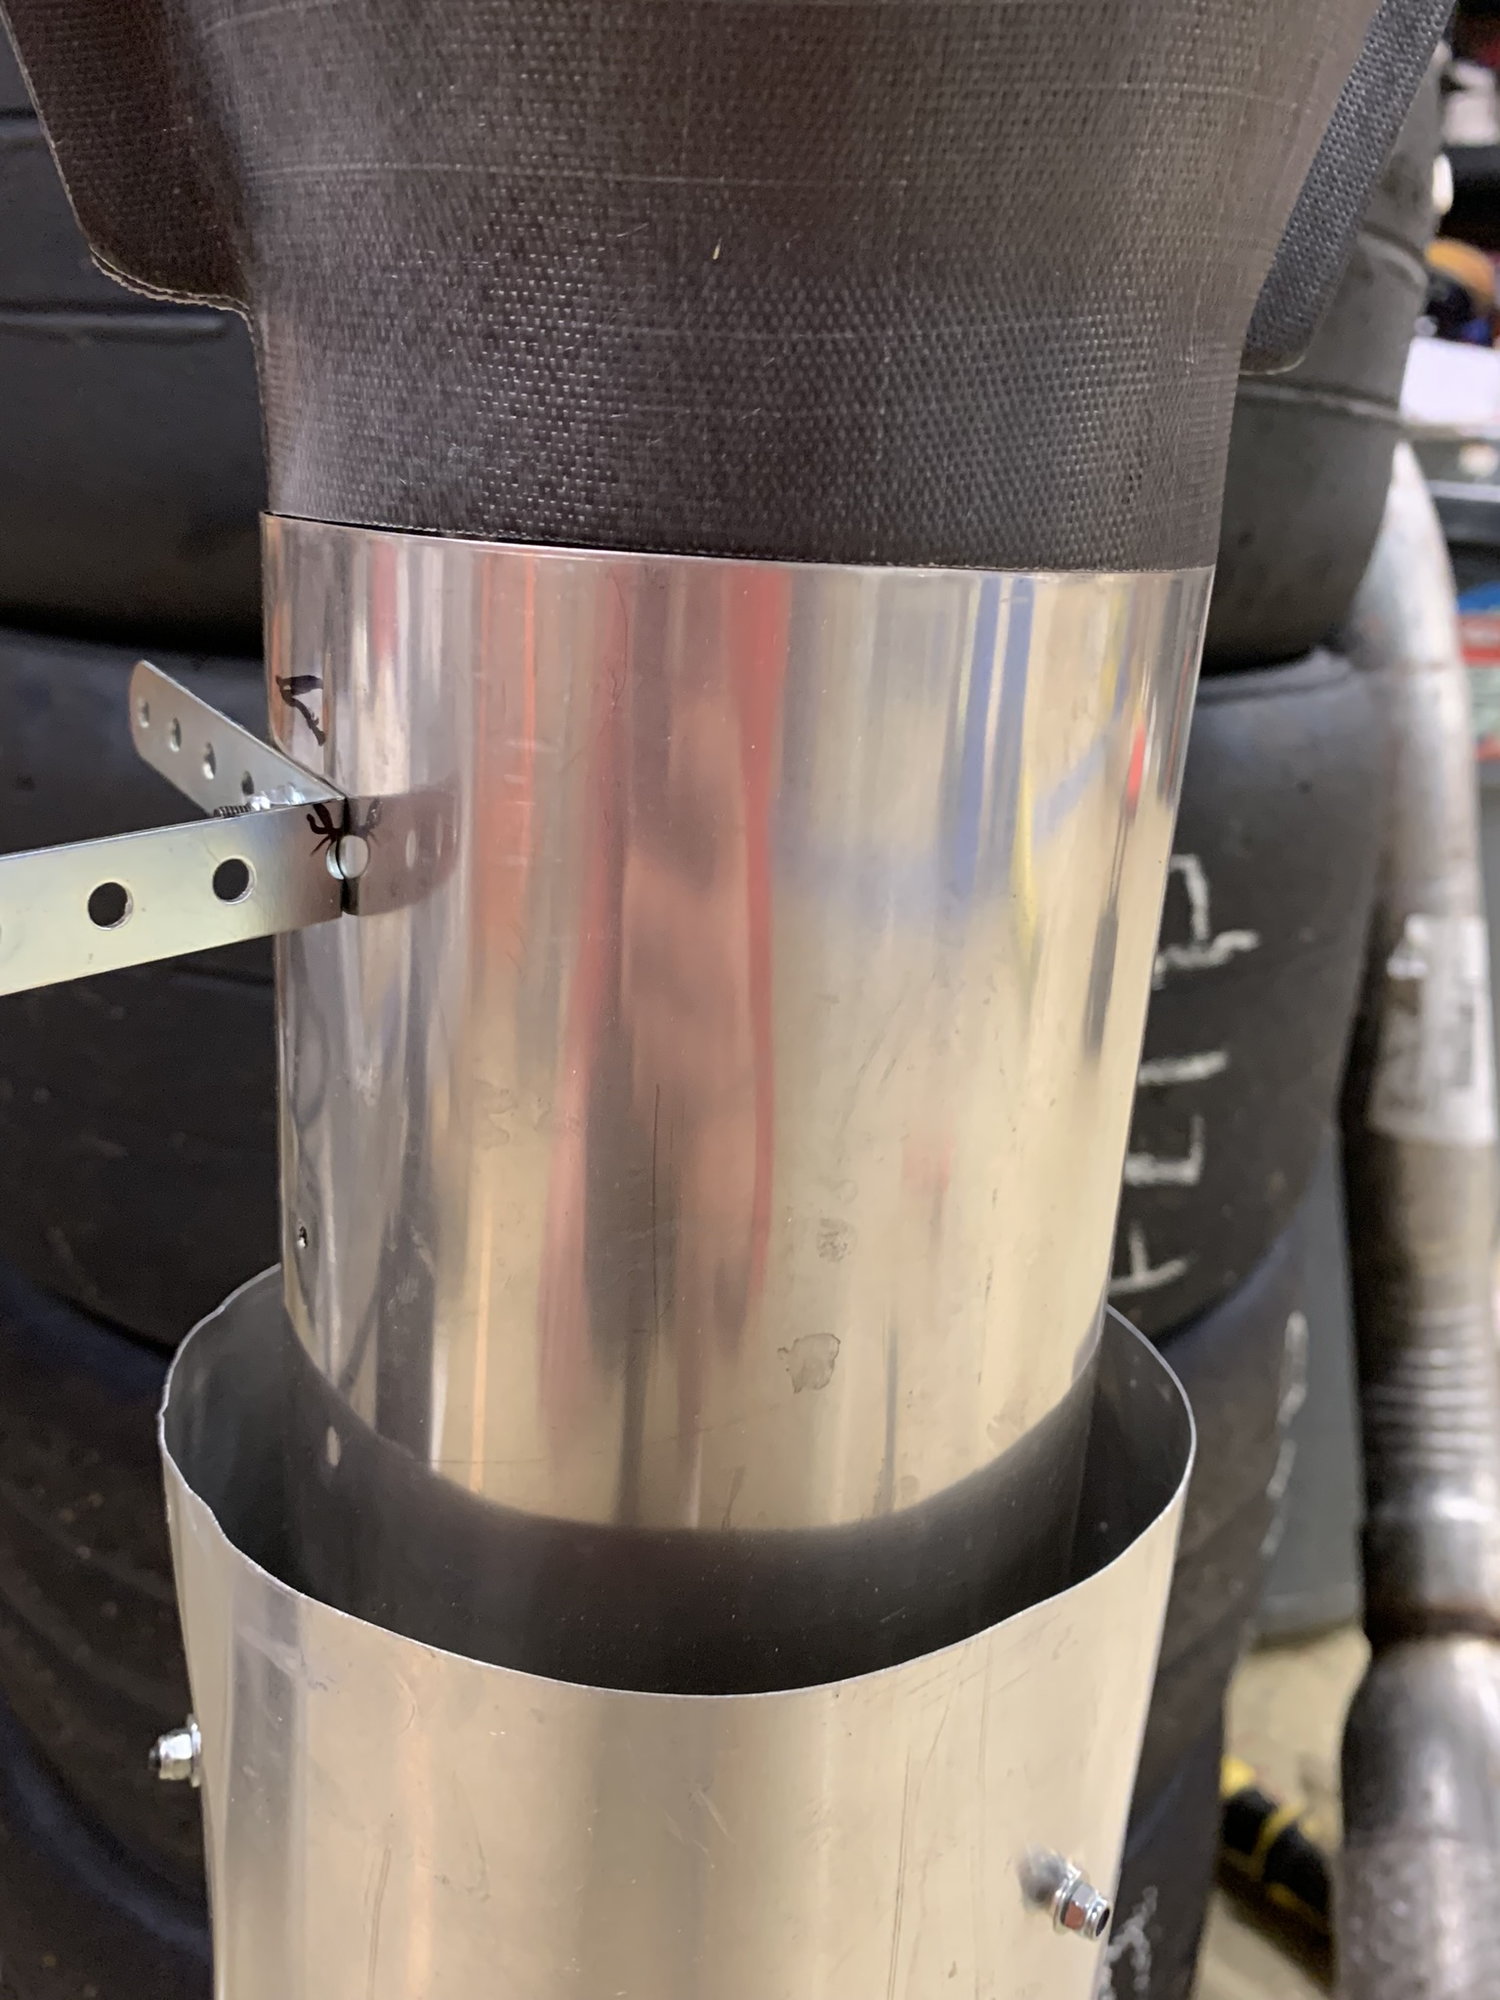
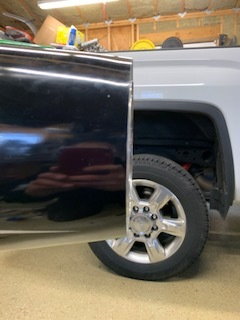
Here is how I see Scott mounts it, looks like the carbon bypass slips inside the exhaust pipe:
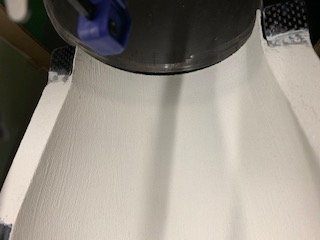
But here is one of many pictures from ZivBit with the exhaust pipe inside the carbon bypass: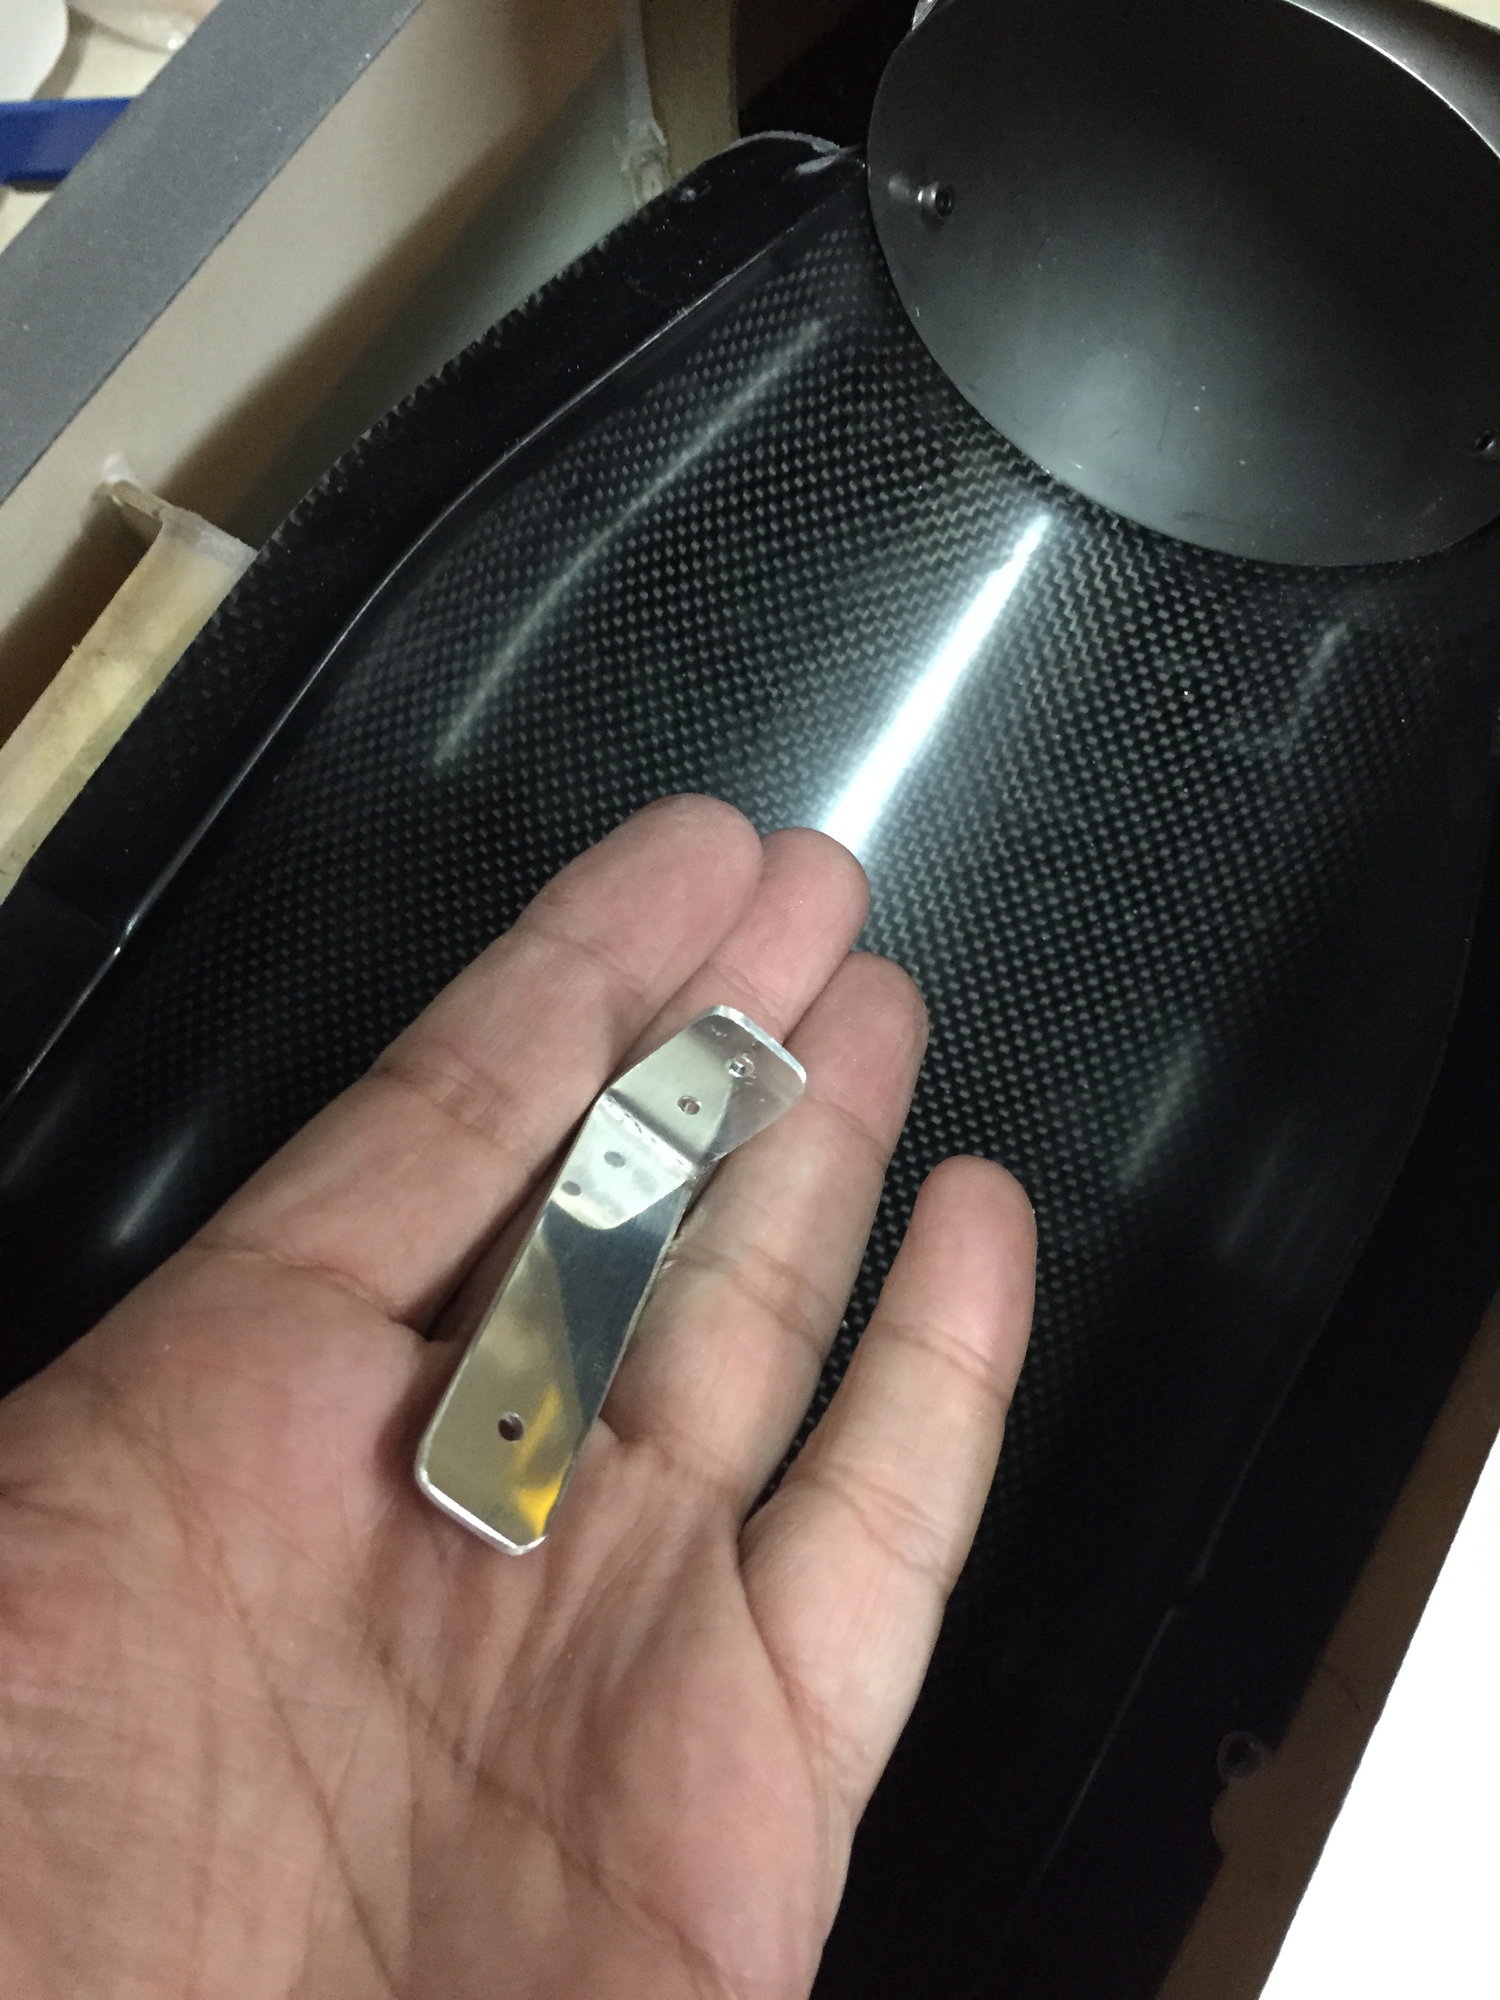
Thoughts???
How does the bypass mount relative to the exhaust pipe? They seem to be the same diameter. Is the exhaust pipe supposed to fit inside the carbon bypass?
Here is how I see Scott mounts it, looks like the carbon bypass slips inside the exhaust pipe:
But here is one of many pictures from ZivBit with the exhaust pipe inside the carbon bypass:
Thoughts???
Last edited by gi8u2racing; 01-01-2019 at 04:29 PM.
01-02-2019, 06:21 AM
#3
First off, I suggest you link up eyeball to eyeball with some jet guys. Then spend some time flying with them as a spotter. Find the builder in the group and get some face-to-face help. Being in MD, I suspect there is not much flying going on right now. Maybe get the realflight out and practice landing the L-39 too. Eventually, you have to get your waiver. So your linking with the Jet Guys will help you there and in the meantime they can help you with the build.
But, … my very first thought is a shockwave is a very expensive jet to learn on. When you tear the gear out and scrape the bottom on your practice landings it is going to be expensive. If you burn it down or something you built fails, you're talkin' a lot of $s. During their maidens, I have seen a brand new Viper and Hawker burn to the ground on the ground.
Also, a Shockwave is rather large, and it is a sport jet (i.e. NOT a trainer jet nor a pylon racer). There is a lot of energy involved. Energy management is a critical skill that will be necessary to learn. Learning to fly jets with a sport jet is like learning to first fly with a warbird. A few folks can do it. But, you will be spending a lot of time on a buddy box trying to learn landings and approaches, etc.. Its size and cost certainly will increase the pucker factor while learning. Also, don't forget safety. Flying a jet with people around is a lot different than 10 or 11 laps around the pylons with everyone back 500' or wearing helmets, etc.
Best first move is to link up with some experienced jet guys before you have to start cutting parts back out. If you don't get things right, the entire plane can go up in smoke. Just this past year alone, I have seen two go up in smoke on the startup pads, just because of electrical problems. I also saw this year a myriad of other jets that did not fly because of fuel system issues. Consider getting some experienced help. Even with a good building manual, there are always things that they assume you know to do or not do (i.e. like mating your bypass to the tail pipe or setting distance from the exhaust cone to the tail pipe, etc..
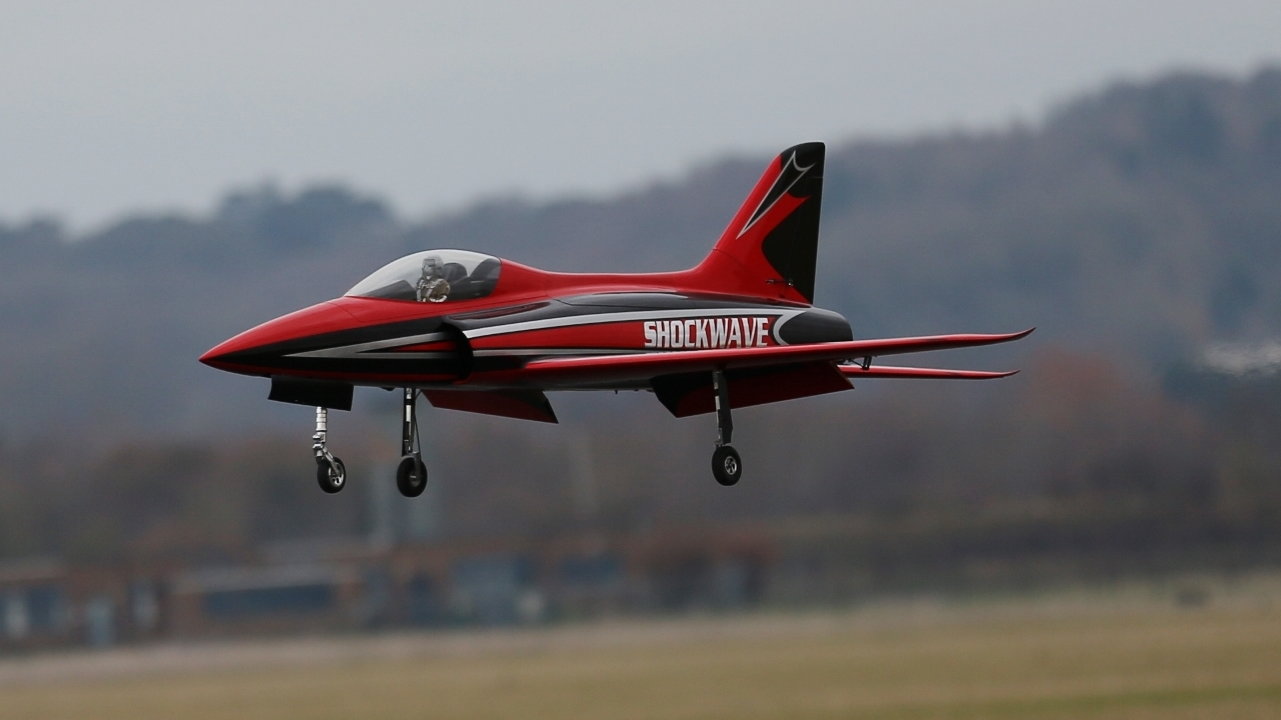
Just first thoughts! Being a car and pylon racer, you know the benefits of a good crew. Time to find that jet crew and start tapping their knowledge face-to-face. Maybe someone close by will see your post and step up to give you a hand. You can get some good info here on-line. But eventually you will start to get conflicting or outright phony information. Having good face-to-face experiences will help you sort that out. Good luck. Shockwaves are gorgeous planes to watch fly.
But, … my very first thought is a shockwave is a very expensive jet to learn on. When you tear the gear out and scrape the bottom on your practice landings it is going to be expensive. If you burn it down or something you built fails, you're talkin' a lot of $s. During their maidens, I have seen a brand new Viper and Hawker burn to the ground on the ground.
Also, a Shockwave is rather large, and it is a sport jet (i.e. NOT a trainer jet nor a pylon racer). There is a lot of energy involved. Energy management is a critical skill that will be necessary to learn. Learning to fly jets with a sport jet is like learning to first fly with a warbird. A few folks can do it. But, you will be spending a lot of time on a buddy box trying to learn landings and approaches, etc.. Its size and cost certainly will increase the pucker factor while learning. Also, don't forget safety. Flying a jet with people around is a lot different than 10 or 11 laps around the pylons with everyone back 500' or wearing helmets, etc.
Best first move is to link up with some experienced jet guys before you have to start cutting parts back out. If you don't get things right, the entire plane can go up in smoke. Just this past year alone, I have seen two go up in smoke on the startup pads, just because of electrical problems. I also saw this year a myriad of other jets that did not fly because of fuel system issues. Consider getting some experienced help. Even with a good building manual, there are always things that they assume you know to do or not do (i.e. like mating your bypass to the tail pipe or setting distance from the exhaust cone to the tail pipe, etc..
Just first thoughts! Being a car and pylon racer, you know the benefits of a good crew. Time to find that jet crew and start tapping their knowledge face-to-face. Maybe someone close by will see your post and step up to give you a hand. You can get some good info here on-line. But eventually you will start to get conflicting or outright phony information. Having good face-to-face experiences will help you sort that out. Good luck. Shockwaves are gorgeous planes to watch fly.
01-02-2019, 06:33 AM
#4
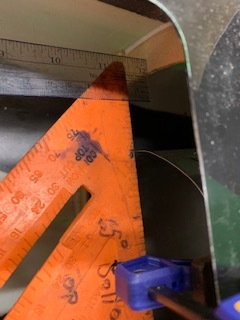
Turbine just looks a bit too far from the pipe. Typically, there is about 3/4" to 1" between the end of the pipe and the exhaust cone. Not sure what that distance for a 210 is. There is a Jetcat table floating around that suggest these distances for different sized turbines. The bracket you are holding is to fasten the turbine end of the exhaust pipe to the fuse. The pipe and the turbine also have to be axially lined up. Sometimes a little shimming and bracket placement may be necessary to make that happen.
 01-02-2019, 07:08 AM
#6
Thread Starter
My Feedback: (11)
Join Date: Apr 2002
Location: Bowie,
MD
Posts: 148
Likes: 0
Received 0 Likes
on
0 Posts
Turbine just looks a bit too far from the pipe. Typically, there is about 3/4" to 1" between the end of the pipe and the exhaust cone. Not sure what that distance for a 210 is. There is a Jetcat table floating around that suggest these distances for different sized turbines. The bracket you are holding is to fasten the turbine end of the exhaust pipe to the fuse. The pipe and the turbine also have to be axially lined up. Sometimes a little shimming and bracket placement may be necessary to make that happen.
I didn't mention that I had the first 8 flights on another ShockWave that isn't mine, and was delighted with how easy it flew. The landings took a bit of getting used to, especially since the other Shockwave was 8-10lb overweight (long story) and most of my previous experience didn't involve big flaps for landing. So I defienitely appreciate the cautions on getting too far ahead of myself, but at this point my focus is on getting this one assembled correctly. My father and I are quite active in a big field out here (PGRC), but we don't exactly have the most hardcore jet guys in our area, hence why I am posting on here to reach out a bit. Hope that doesn't offend anyone, if it does, I can probably use your help!
As for the carbon bypass to exhaust pipe installation, I was not asking about the spacing from the aft end of the turbine to the TAMS pipe, that is 20-30mm according to the KingTech manual. What I'm asking is how I mount the TAMS pipe (what I was calling the exhaust pipe) to the carbon bypass since they seem to be the same diameter. And that picture of the bracket being held isn't me, it just has the bypass/TAMS pipe in the background.
Last edited by gi8u2racing; 01-02-2019 at 07:16 AM.
01-02-2019, 08:14 AM
#7

Lol - there's always someone who kicks in and says you need to fly something rubbish to get in to jets. The Shockwave is a *****cat. Easy to fly and highly capable.
The pipe goes over the carbon bell mouth. I had to sand the carbon on mine a little to fit, the bottom bolts to the pipe and the top slides in and bolts down to the rest of the bypass (I've built one with a Tam pipe and 1 with a std pipe and it's the same with both). This way there is no danger of any blow by where the pipe is mounted. It is a tight fit but it's supposed to be
The pipe goes over the carbon bell mouth. I had to sand the carbon on mine a little to fit, the bottom bolts to the pipe and the top slides in and bolts down to the rest of the bypass (I've built one with a Tam pipe and 1 with a std pipe and it's the same with both). This way there is no danger of any blow by where the pipe is mounted. It is a tight fit but it's supposed to be
The following users liked this post:
jkeze (11-23-2022)
01-07-2019, 03:24 PM
#8
Thread Starter
My Feedback: (11)
Join Date: Apr 2002
Location: Bowie,
MD
Posts: 148
Likes: 0
Received 0 Likes
on
0 Posts
Got some pieces cut to glue in: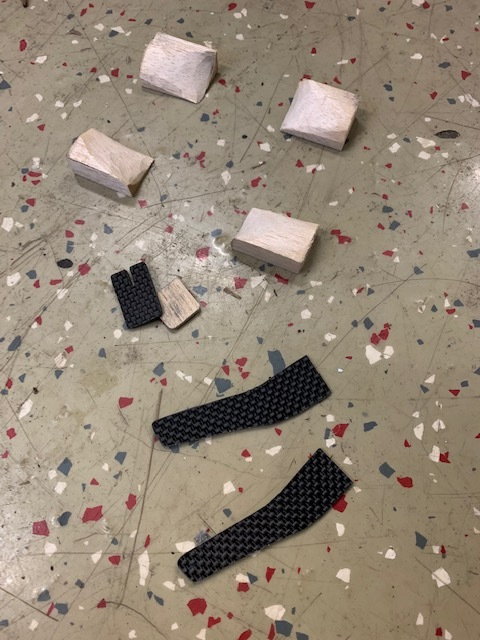
- The rear mounts for the TAMS pipe cut out of 1/16" carbon
- Turbine rails reinforcement pieces made from balsa
- Piece to hold inlet halves together at the lower carbon bypass
- Shim to raise this piece ^^^ since there are bends in the inlet halves
01-09-2019, 06:20 AM
#9
Thread Starter
My Feedback: (11)
Join Date: Apr 2002
Location: Bowie,
MD
Posts: 148
Likes: 0
Received 0 Likes
on
0 Posts
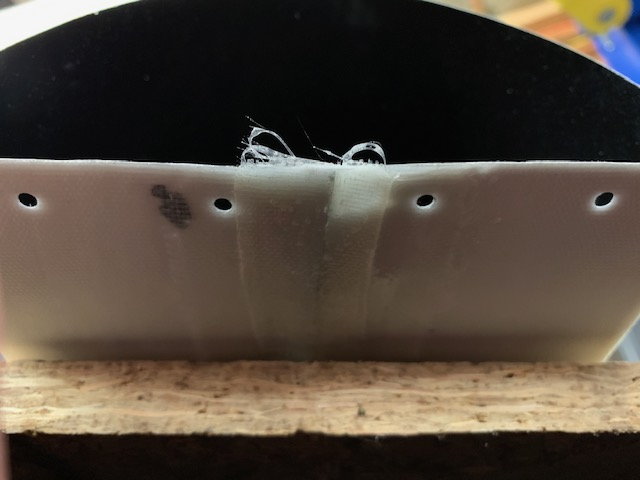
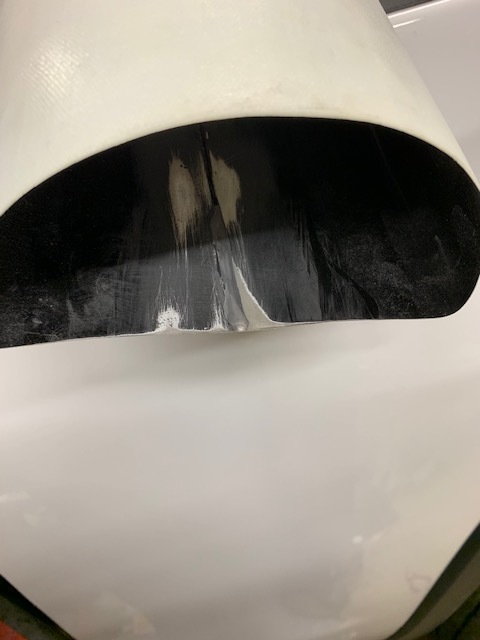
I started to sand down the bulge on the outer part of the ducts, where the two halves meet, and it quickly split at the seam 
So I finished up, mixed some West Systems with micro-balloons in it, and filled the void at the seam:
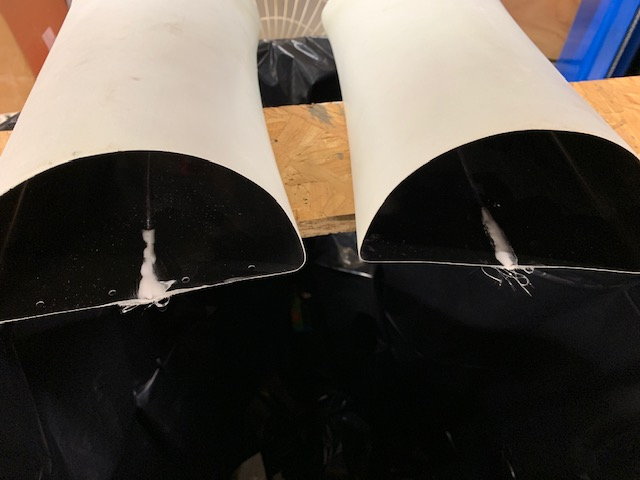
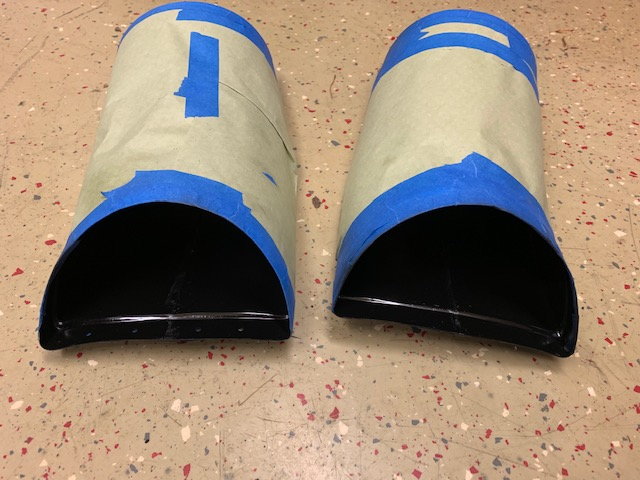
I fiberglassed the underside as well:
Once dry, sanded them down:
Then masked and painted them with Rustoleum Professional (i.e. rattle can) in Gloss Black:
So I finished up, mixed some West Systems with micro-balloons in it, and filled the void at the seam:
I fiberglassed the underside as well:
Once dry, sanded them down:
Then masked and painted them with Rustoleum Professional (i.e. rattle can) in Gloss Black:
01-10-2019, 10:13 AM
#10
Join Date: Oct 2008
Location: , UNITED KINGDOM
Posts: 17
Likes: 0
Received 0 Likes
on
0 Posts
I fly mine like a big girl, one project is to do something with where those intakes join in order to see the forward tanks.....?
If I could see the forward tanks I would only fill them to 1/4 full.
This thing carries tons of fuel. I can have a complete flight and land with the main tank nearly full!
You've flown it and it's a fab model, it just weighs a ton. Not so good on a calm/tailwind day.
If I could see the forward tanks I would only fill them to 1/4 full.
This thing carries tons of fuel. I can have a complete flight and land with the main tank nearly full!
You've flown it and it's a fab model, it just weighs a ton. Not so good on a calm/tailwind day.
01-16-2019, 02:19 PM
#11
Thread Starter
My Feedback: (11)
Join Date: Apr 2002
Location: Bowie,
MD
Posts: 148
Likes: 0
Received 0 Likes
on
0 Posts
I fly mine like a big girl, one project is to do something with where those intakes join in order to see the forward tanks.....?
If I could see the forward tanks I would only fill them to 1/4 full.
This thing carries tons of fuel. I can have a complete flight and land with the main tank nearly full!
You've flown it and it's a fab model, it just weighs a ton. Not so good on a calm/tailwind day.
If I could see the forward tanks I would only fill them to 1/4 full.
This thing carries tons of fuel. I can have a complete flight and land with the main tank nearly full!
You've flown it and it's a fab model, it just weighs a ton. Not so good on a calm/tailwind day.
Has anyone figured out a way to know the fuel state of the saddle tanks visually? Maybe a small mirror from the front hatch?
 02-09-2019, 11:29 AM
#13
Thread Starter
My Feedback: (11)
Join Date: Apr 2002
Location: Bowie,
MD
Posts: 148
Likes: 0
Received 0 Likes
on
0 Posts
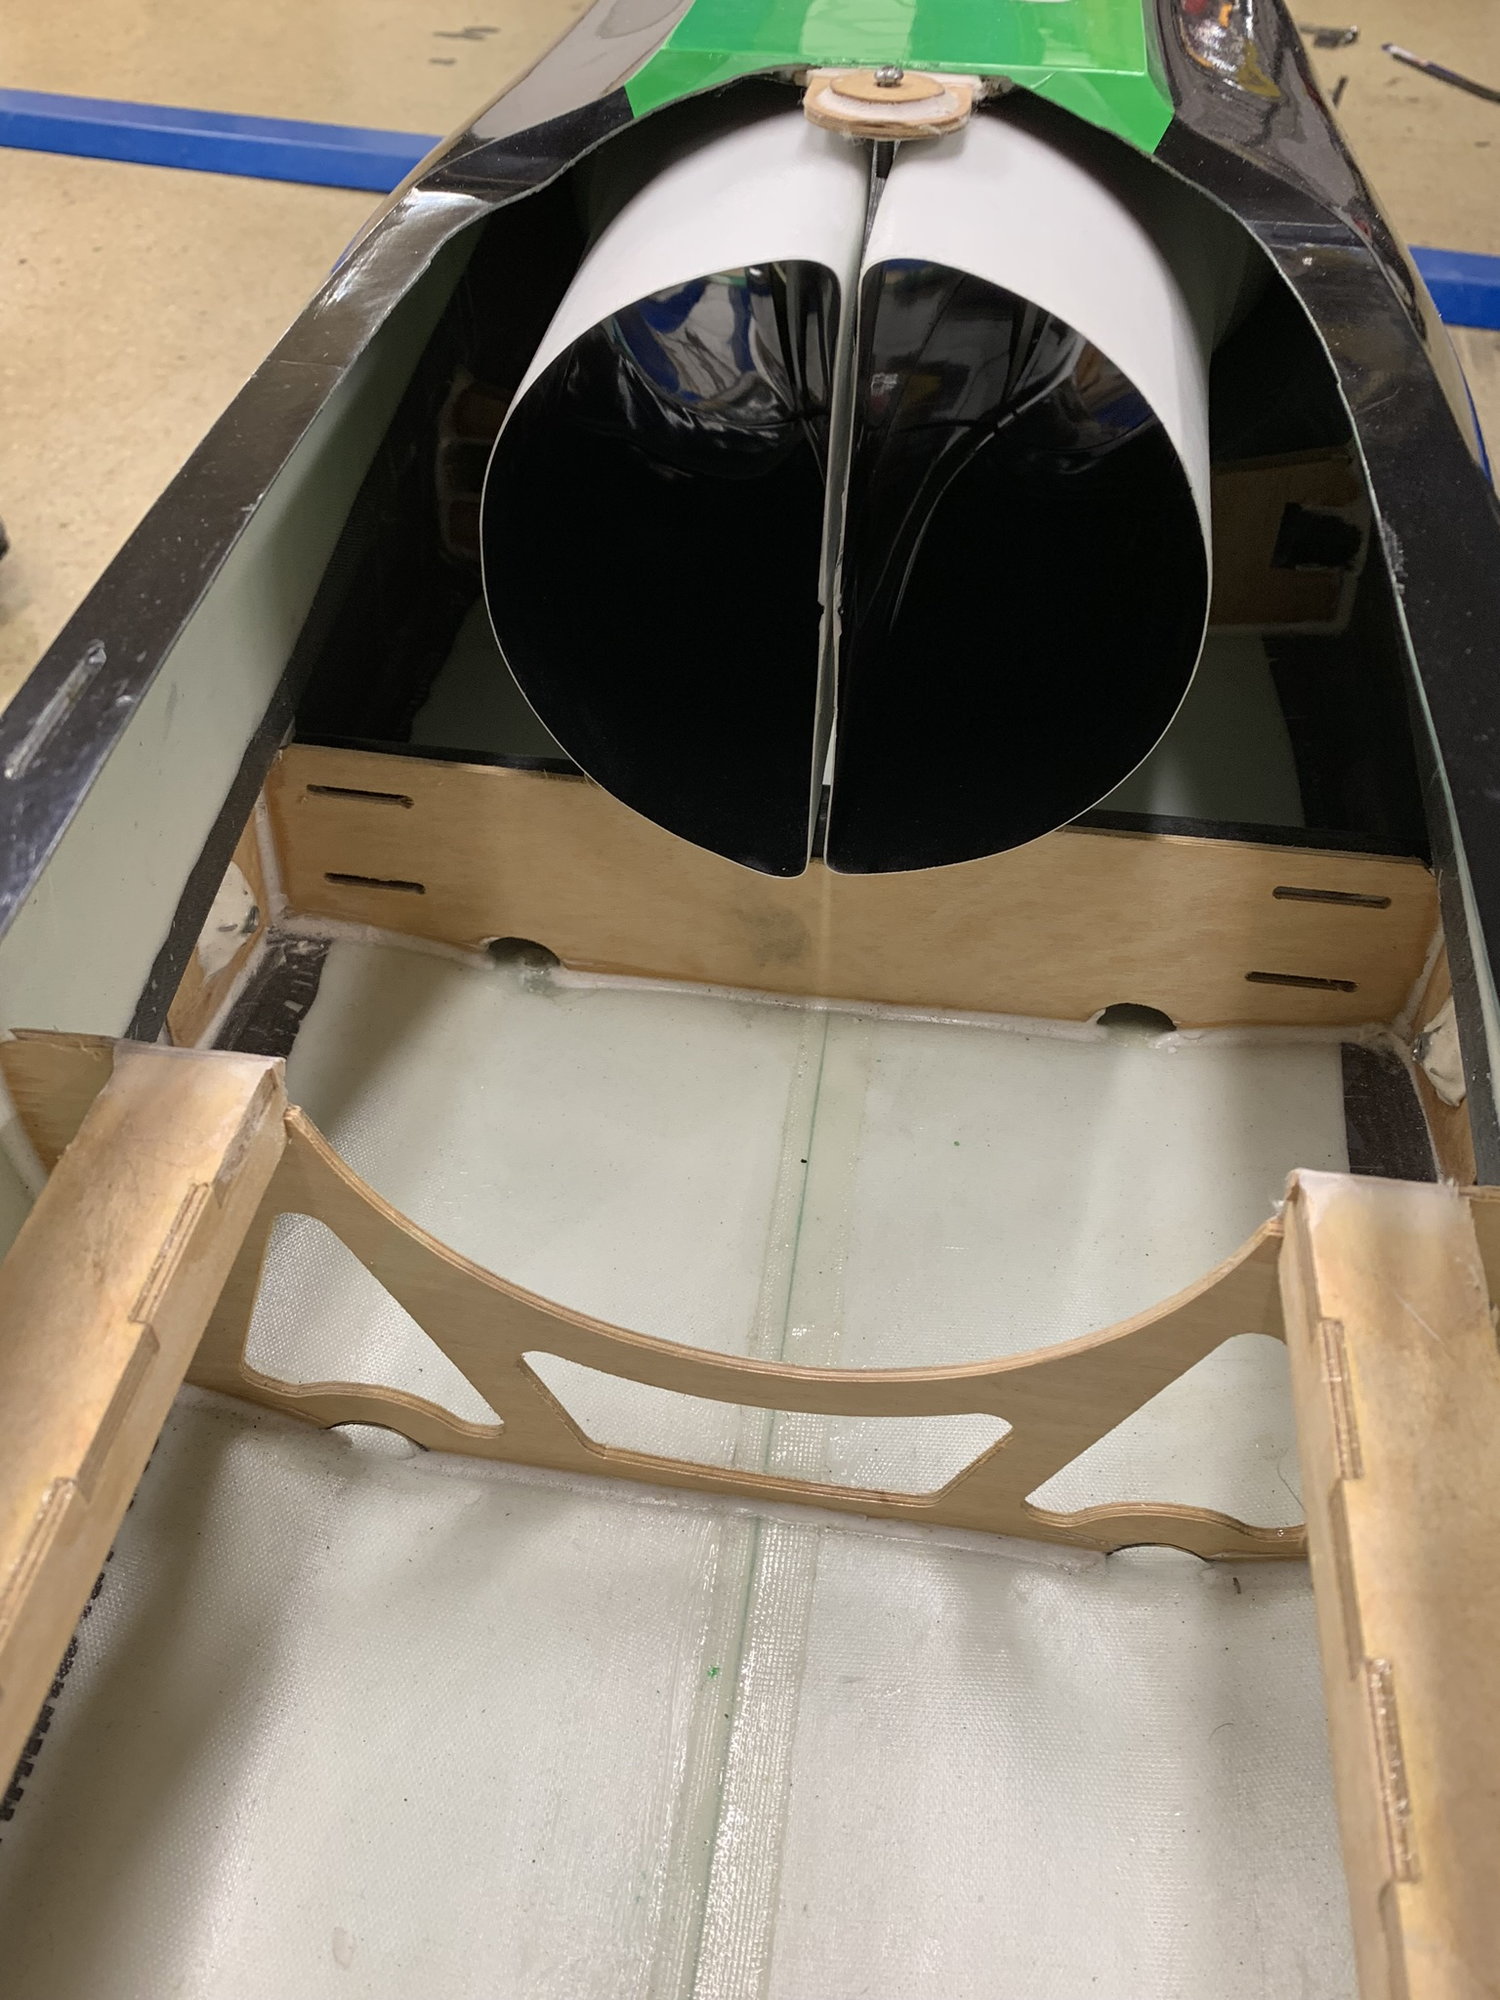
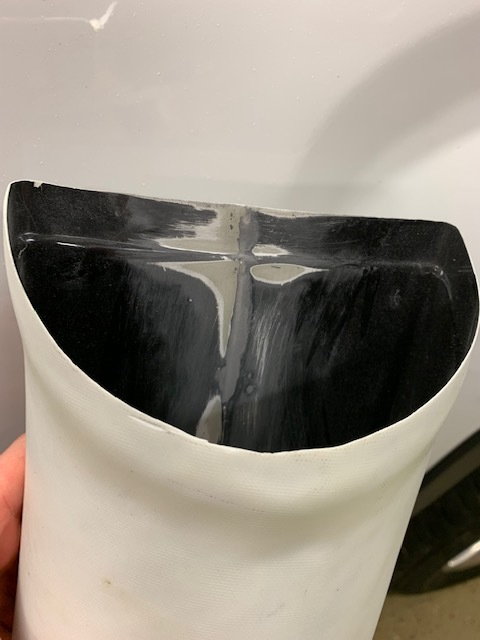
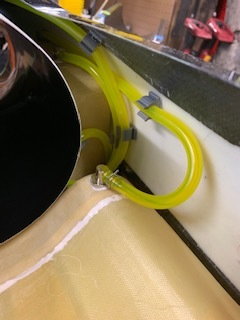
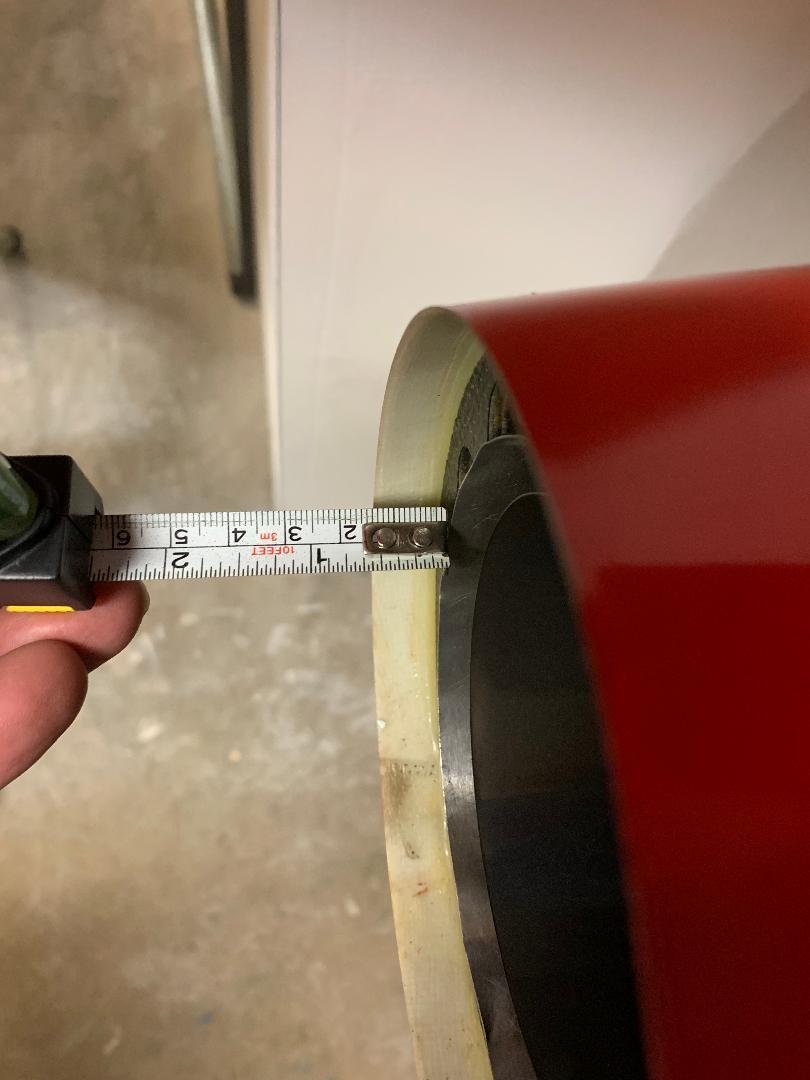
Running into an issue here where the pipe does not reach the carbon bypass, wondering if anyone else has any thoughts:
First thought, must be something else is out of place, so here's where the other items are: the exhaust pipe just past the fuselage (~1/16" or 1mm), the inlets in place (feeling in there to line up the overlap), and ~1/4 overlap between the carbon bypass and the inlets.
Notice gap at the top of the picture:
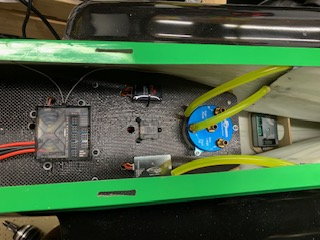
Showing the rest of the turbine bay for reference:
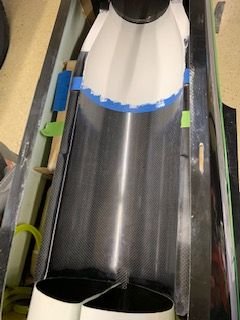
As a reference for how far in front of the bulkhead it reaches (~5/8"), doesn't that seem short?...
First thought, must be something else is out of place, so here's where the other items are: the exhaust pipe just past the fuselage (~1/16" or 1mm), the inlets in place (feeling in there to line up the overlap), and ~1/4 overlap between the carbon bypass and the inlets.
Notice gap at the top of the picture:
Showing the rest of the turbine bay for reference:
As a reference for how far in front of the bulkhead it reaches (~5/8"), doesn't that seem short?...

 02-11-2019, 07:43 PM
#15
Thread Starter
My Feedback: (11)
Join Date: Apr 2002
Location: Bowie,
MD
Posts: 148
Likes: 0
Received 0 Likes
on
0 Posts
My inner and outer pipe line up at the rear of the stock pipe, should the inner pipe be a bit forward to create the suction effect? If so, how much? This may fix my issue!!!
 02-12-2019, 02:51 PM
#18
Join Date: Oct 2008
Location: , UNITED KINGDOM
Posts: 17
Likes: 0
Received 0 Likes
on
0 Posts
To me your rear jetpipe former looks a way bit aft and the inner thrust tube also? The former is done unless you cut it out and move it by 1/4" or so? Hardly worth it.
The jetpipe inner is bolted to the outer and held in place at the rear by a spring coil? I guess you could re-drill and move the inner or cut off 1/4" at the rear?
Mine looks a bit different at the outlet but fly's perfectly anyway.
Essentially, engine starts, fly, egt is good, winner!
The jetpipe inner is bolted to the outer and held in place at the rear by a spring coil? I guess you could re-drill and move the inner or cut off 1/4" at the rear?
Mine looks a bit different at the outlet but fly's perfectly anyway.
Essentially, engine starts, fly, egt is good, winner!
 11-22-2022, 12:01 AM
#20
Hello everyone, I just did ma maiden flight a few days ago. I noticed there is a pitch down when I apply full throttle!!
I did check my my turbine and the pipe they looks centered and straight!! Even my elevators looks normal! Did any one had the same issue? and any idea to fix that?
Im planning to do a mix between my throttle and the elevator to fix this issue, but this is going to be my last solution, I would appreciate any ideas and suggestions.


